Find Longest Word in a String
In this example, you will create a JavaScript function that will accept a string that contains multiple words and find the longest among those words and display the length of the string.
The program takes following steps to find the longest string.
- Accept the string in a function –
findLengthLongest(). - Use JavaScript regex to extract each word from the string.
- Store the words in an array.
- Find length of each word in the array and copy in a variable called
max. - At the end, max has the length of longest word.
- Display the result.
JavaScript Code: Find Longest Word in a String
function findLengthLongest() {

    var str = document.getElementById("in").value;
    var max = 0;
    var regex = /\w+/gi;
    var word = [];
    word = str.match(regex);
  for (let i = 0;i < word.length;i++){

      if(word[i].length > max)
      {

        max = word[i].length;

      }
  }
   var result = max.toString(10);

   document.getElementById("out").innerHTML = result;
}

function MyClear(){

   document.getElementById("in").value = "";

}
Note that we are accepting values from textbox control and displaying result in a H1 element. To find the length, we use the .length function and loop through each word of the array. Each time a greater length word if found, update the variable max.
Program Code: Find Longest Word
<!DOCTYPE html>
<html>
<head>
<title>Find Longest Word</title>
<meta charset="utf-8">
<style>
main{
width:40%;
padding:2%;
margin:10% auto;
background:DodgerBlue;
text-align:center;
}
#in{
padding:10px;
width:150px;
background:whitesmoke;
margin:auto;
}
button{
padding:10px;
margin:10px;
}
</style>
</head>
<body>
<main>
<h1 id="out">Output here</h1>
<input type="text" id="in" /><br/>
<button onclick="findLengthLongest()">Find Longest Word</button>
<button onclick="MyClear()">Clear</button>
</main>
<script>
function findLengthLongest() {
var str = document.getElementById("in").value;
var max = 0;
var regex = /\w+/gi;
var word = [];
word = str.match(regex);
for (let i = 0;i < word.length;i++){
if(word[i].length > max)
{
max = word[i].length;
}
}
var result = max.toString(10);
document.getElementById("out").innerHTML = result;
}
function MyClear(){
document.getElementById("in").value = "";
}
</script>
</body>
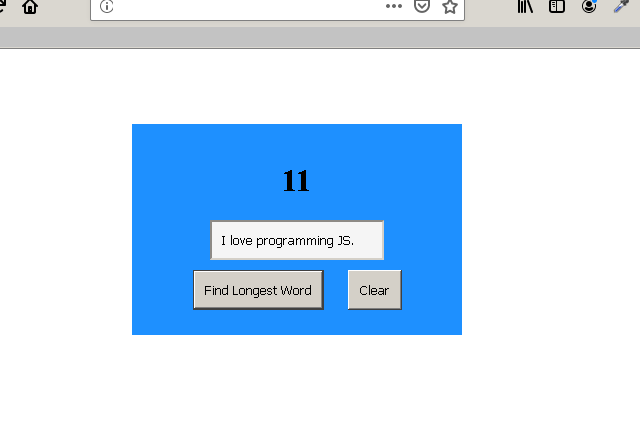
</html>Output To Browser: Find Longest Word
Reverse a String
In this example, we will create a program using JavaScript and HTML to reverse a given string and display the output.
The JavaScript code will accept a string from a HTML textbox control and reverse the string and output the result to a H1 element to display.
The step to reverse the string is given below.
- Program accepts the input string.
- Split the string into an array of characters using
.splitfunction. - Reverse the array using .
reversefunction - Join the array of characters into a string using
.joinfunction. - Output the result to H1 tag.
JavaScript Code: Reverse a String
function reverseMyString() {
  let str = document.getElementById("in").value;
  let temp = str.split("");
  let iter = temp.reverse();
  str = iter.join('');
  document.getElementById("out").innerHTML = str;
}

function MyClear(){
  document.getElementById("in").value = "";
}
The function clear() is to clear the textbox control. Each time the JavaScript want to access HTML data, it uses the id attribute.
HTML and JavaScript Code: Reverse a String
<!DOCTYPE html>
<html>
<head>
   <title>Reverse A String</title>
   <meta charset="utf-8">
   <style>
   main{
    width:40%;
	padding:2%;
	margin:10% auto;
	background:rgba(50,115,220,0.3);
	text-align:center;
   }
     #in{

	  padding:10px;
	  width:150px;
	  background:whitesmoke;
	  margin:auto;
	 }

	 button{
	 padding:10px;
	 margin:10px;

	 }
   </style>
</head>
<body>
<main>
<h1 id="out">Output here</h1>
<input type="text" id="in" /><br/>
<button onclick="reverseMyString()">Reverse</button>
<button onclick="MyClear()">Clear</button>
</main>
<script>
    function reverseMyString() {
      let str = document.getElementById("in").value;
      let temp = str.split("");
      let iter = temp.reverse();
      str = iter.join('');
      document.getElementById("out").innerHTML = str;
}
    function MyClear(){
      document.getElementById("in").value = "";
}
</script>
</body>
</html>
In the program above, we have following HTML elements – a textbox, two buttons, and H1 element to output the result. The output to the program is given in the next section.
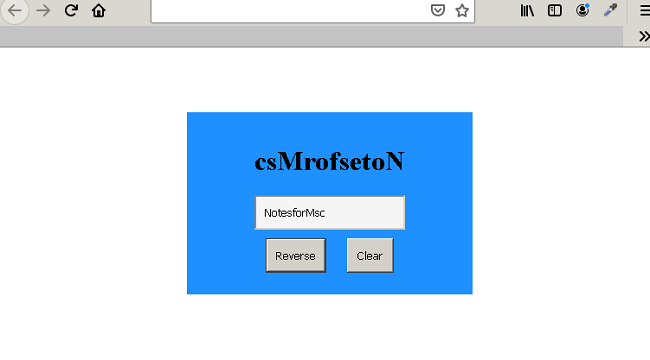
Output To Browser: Reverse a String
Find Factorial Of A Number
The factorial is a popular mathematical concept or algorithms and very useful in computer science. In this example, we are going to accept a number as argument to JavaScript function and find the factorial of the number.
To accept the argument, we will use HTML text box control and output it in a H1 element. Learn more about HTML from our HTML tutorial.
Factorial of a Number
The factorial of a number is product of all natural numbers up to the number. Note that the factorial of 0! and 1! is 1. Suppose we are given a number 5 , then the factorial would be
5! = 1 x 2 x 3 x 4 x 5 = 120! is the factorial notation in mathematics. So, factorial of 24 is 24! , factorial of 10 is 10!.
JavaScript Code: Find Factorial of a Number
function MyClear(){
    document.getElementById("in").value = "";
}

function Myfactorial() {

    let num = document.getElementById("in").value;
    let fact = 1;
    for(let i = 0;i <= num;i++)
     {
       if (i > 1)
       {
          fact = fact * i;
       }
       else
       {
          fact = 1;
       }
  }
    document.getElementById("out").innerHTML = fact;
}
The program use the algorithm: fact(n) = fact(n-1) * fact(n-2) repeatedly. Any of its term is product of previous two terms.
The full code for the program is given below. We have also added some style to the program for better display.
HTML and JavaScript Code: Find Factorial
<!DOCTYPE html>
<html>
<head>
<title>Factorial Of a Number</title>
<meta charset="utf-8">
<style>
main{
width:20%;
margin:auto;
}
#in{
padding:10px;
width:150px;
background:whitesmoke;
}
button{
padding:10px;
margin:10px;
}
</style>
</head>
<body>
<main>
<h1 id="out">Output here</h1>
<input type="text" id="in" /><br/>
<button onclick="Myfactorial()">Factorial</button>
<button onclick="MyClear()">Clear</button>
</main>
<script>
function MyClear(){
document.getElementById("in").value = "";
}
function Myfactorial() {
let num = document.getElementById("in").value;
let fact = 1;
for(let i = 0;i <= num;i++)
{
if (i > 1)
{
fact = fact * i;
}
else{
fact = 1;
}
}
document.getElementById("out").innerHTML = fact;
}
</script>
</body>
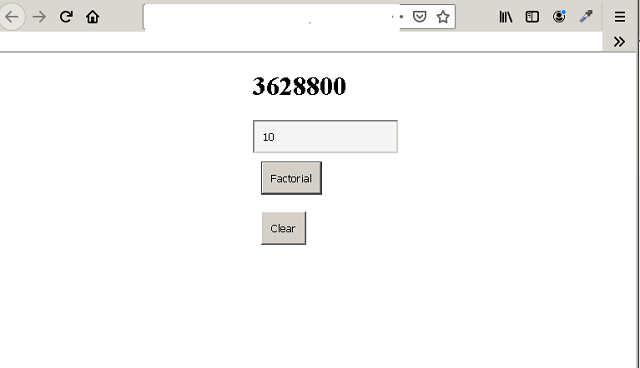
</html>Output to Browser: Find Factorial
Celsius To Fahrenheit In JavaScript (step by step example)
Our goal in post is to test a simple algorithm to convert temperature in Celsius to Fahrenheit and display on a HTML page. The language used to write this program is JavaScript. JavaScript is a browser based scripting language and works fine with HTML and CSS.
The steps are listed below:
- Receive input from a HTML text box.
- When user click the button to convert Celsius to Fahrenheit, execute JavaScript function –
convertToF(). - The function uses the formula:
F = (Celsius * 9/5) + 32to convert Celsius to Fahrenheit. - The function then output the result to an H1 tag for display.
STEP 1: Receive input from a HTML text box
For this step, you need to create a HTML text box control and a button to trigger the JavaScript function. A user enters the Celsius value in the text box.
<input type="text" id="inp" value="enter celsius"/>STEP 2:
The second step is to create an HTML button , that has onclick event that will trigger the function – convertToF().
<button onclick="convertToFahrenheit()">Convert</button>This button convert the celsius value to fahrenheit value using the JavaScript function.JavaScript Code.
STEP 3: The JavaScript Function
In this step, you create the JavaScript function in you HTML document between the <script> </script> tags. Put this script in <head> , <body>. or <footer> ,it does not matter. But the best practice is to put the code between <head> </head> tags.
. Here is the code for function convertToF().
function convertToF() {
let celsius = document.getElementById("inp").value;
  let fahrenheit = (celsius * 9/5) + 32;
  document.getElementById("demo").innerHTML = fahrenheit + "°F";
}
The function uses following formula to convert Celsius to Fahrenheit:
Fahrenheit = (Celsius \times \frac{9}{5}) + 32Here is the code version:
let fahrenheit = (celsius * 9/5) + 32;STEP 4: Printing Output
The function uses the id attribute of HTML element to access the input and print the output in the above program. The rest of the code is to compute the Fahrenheit value.
The entire HTML code and JavaScript code for the program is given below. We also put some CSS code so that the input elements appear nice. You can Learn HTML Basic – step by step.
Having difficulty understanding this example, learn and master JavaScript first.
HTML and JavaScript Code: Celsius to Fahrenheit
<!DOCTYPE html>
<html>
<head>
<title>Celcius To Fahrenheit</title>
<meta charset="utf-8">
</head>
<body>
<h1 id="demo">Output here</h1>
<input type="text" id="inp" value="enter celsius"/>
<button onclick="convertToFahrenheit()">Convert</button>
<script>
function convertToFahrenheit() {
let celsius = document.getElementById("inp").value;
let fahrenheit = (celsius * 9/5) + 32;
document.getElementById("demo").innerHTML = fahrenheit + "°F";
}
</script>
</body>
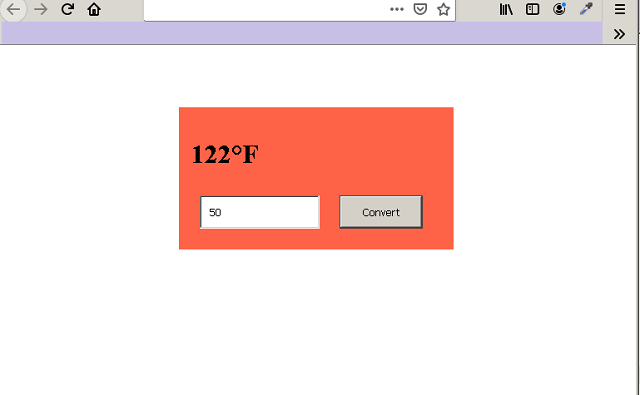
</html>Output To Browser:
Designing the HTML page and the form is totally upto you. I have used a bit of CSS to give color to the form.
You can Learn CSS Styling and Layout and build beautiful HTML pages.
Converting String to Number
In VB 6, you need to accept numbers from Textbox controls and then manipulate the values and return the output to another Textbox for display. There is no problem if the entire operation happens on strings.
However, the input values from a Textbox control is not always a string, it can be a number. The default type of Textbox control is string. Therefore, the string values must be converted into numbers.
While outputting a number to Textbox, the number must be converted into a string again.
Val() and Str() Function
The Val() and Str() are two functions that can change a string to number and number to string respectively.
Consider the following example,
Dim A as Number
A = 100
'now we assign the number to a textbox for display

Text1.Text = A
' the above will result in type error
To solve the above problem use the Str() function.
Dim A As Number
A = 100
Text1.Text = Str(A)

'Now there will not be any problem and Text1 will display number 100
Consider another example
Dim A As Number, B As Number, C As Number
'convert the value of textbox to a number using Val()
A = Val(Text1.Text)
B = Val(Text2.Text)
C = A + B
The Val() function convert the string value of Textbox into number and then you can use them in the expression.
JavaScript Projects: Decimal to Binary Converter
In this article you will learn to write an application using HTML,CSS and JavaScript to convert a decimal number into a binary equivalent.
The source code of the program is given below. You can use any text editor and still it will work.
Program Code: Decimal To Binary Converter
<!DOCTYPE html>
<html>
<head>
<title>Decimal To Binary Converter</title>
<meta charset="utf-8">
<style>
#main{
position:absolute;
top:10%;
left:15%;
width:60%;
margin:auto;
padding:5%;
background:gray;
font-family: helvetica, sans-serif;
font-size: 1em;
text-align:center;
}
#decimal,#bin,#bit{
width:30%;
padding:2%;
margin:2%;
font-size:16px;
font-weight:bold;
font-family:arial,sans-serif;
}
#bit{
width:20%;
padding:2%;
margin:2%;
align:center;
font-size:16px;
font-family:arial,sans-serif;
font-weight:bold;
}
#con ,#reset{
width:20%;
padding:2%;
margin:2%;
background-color:#a4a4a4;
}
</style>
</head>
<body>
<div id="main">
<h2>Decimal To Binary Calculator</h2>
<label for="bit" class="dd">Enter number of Bits:</label><br>
<input type="text" id="bit"><br>
<label for="decimal" class="dd">Decimal Number:</label><br>
<input type="text" id="decimal"><br>
<label for="bin" class="dd">Binary Number:</label><br>
<input type="text" id="bin"><br>
<button onclick="decToBinaryConvert()" id="con">Convert</button>
<button onclick="decToBinaryReset()" id="reset">Reset</button>
</div>
<script>
function decToBinaryConvert() {
var binary = "";
var bitvalue = document.getElementById("bit").value;
var decimal_number = document.getElementById("decimal").value;
for(i=0;i<bitvalue;i++)
{
var remainder = decimal_number % 2;
if(remainder == 0)
{
binary = binary + "0";
}
else
{
binary = binary + "1";
}
decimal_number = Math.trunc(decimal_number/2);
}
var binaryStr1 = binary.split("");
var binaryStr2 = binaryStr1.reverse();
var binaryStrFinal = binaryStr2.join("");
document.getElementById("bin").value = binaryStrFinal;
}
function decToBinaryReset() {
document.getElementById("decimal").value = "";
document.getElementById("bit").value = "";
document.getElementById("bin").value = "";
}
</script>
</body>
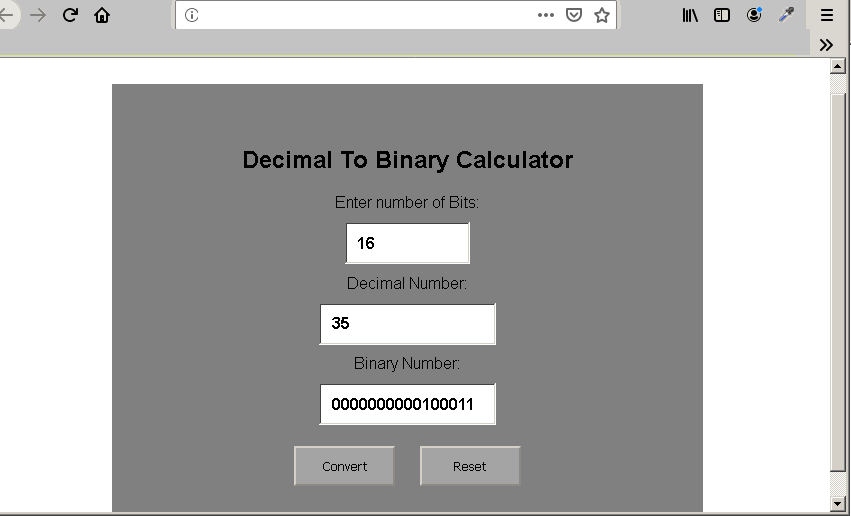
</html>Output to the Browser: Decimal To Binary Converter
JavaScript – Exercise 16 – Array of Objects
Earlier in the previous articles, you learned about objects and nested objects. In this article, you will learn about array of object. This kind of representation is known as JavaScript Object Notation(JSON) where objects are stored in key: value pair or arrays.
The JSON is open standard to store and transmit data objects between applications such as AJAX, etc.
This exercise has three parts.
- Create an array of objects.
- Write a function with parameters to access the list.
- Use
HTMLbutton to callJavaScriptfunction to display the content of the object.
JavaScript Code: Create an Array of Objects
In this section we will write the required JavaScript code to create an array of object. The objects will be employees with their official details.You may put this code in between <body> ...</body> tag of the HTML page.
     var list = [

	      {
		     "firstName": "Kiran",
			 "lastName" : "Kumar",
			 "salary"   : 25000
			 },
		  {
		     "firstName": "Mohan",
			 "lastName" : "Srivastav",
			 "salary"   : 20000
		    },
		  {
		     "firstName": "Mary",
			 "lastName" : "Kom",
			 "salary"   : 23000
		     }
	        ];
The list array contains objects employees with following properties – firstName, lastName, and salary.
Function To Access the Object Property
Now, we can write a JavaScript function to access the property of the objects. We need to check following things before we could access the property.
- Check if the employee exist or not
- If yes, then proceed to display the content of the property supplied in the function parameters.
- If no, display “No such employee found!”
function lookup(num, prop){

	    for(var i=0;i<3;i++)
		{
		    if(num == i)
			{
		         document.getElementById("demo").innerHTML =
                         list[num][prop];
		         break;
		        }
	            else
		        {
		         document.getElementById("demo").innerHTML =
                         num + " " + i + " " +"No such contact found";
		        }
                 }
	 }
The function <span style="color:#cf2e2e" class="tadv-color">lookup(num, prop);</span> takes two arguments.
- The index of the object to be accessed.
- The property name whose value you want to display.
HTML Code: Display the Object Property Value
It is time to create the required HTML elements that our JavaScript code will access to display the object property value.
<p id="demo">Output Here</p>
<button onclick="lookup(1, 'firstName')">Display</button>
We only created a button and a paragraph element in HTML. When the user clicks the button, it will fire the JavaScript function and output is displayed in the paragraph.
Complete Program Code: Array of Objects
<!DOCTYPE html>
<html>
<head>
<title>Array of Objects</title>
<meta charset="utf-8">
</head>
<body>
<p id="demo">Output Here</p>
<button onclick="lookup(1, 'firstName')">Display</button>
<script>
var list = [
{
"firstName": "Kiran",
"lastName" : "Kumar",
"salary" : 25000
},
{
"firstName": "Mohan",
"lastName" : "Srivastav",
"salary" : 20000
},
{
"firstName": "Mary",
"lastName" : "Kom",
"salary" : 23000
}
];
function lookup(num, prop){
for(var i=0;i<3;i++)
{
if(num == i)
{
document.getElementById("demo").innerHTML =
list[num][prop];
break;
}
else
{
document.getElementById("demo").innerHTML =
num + " " + i + " " +"No such contact found";
}
}
}
</script>
</body>
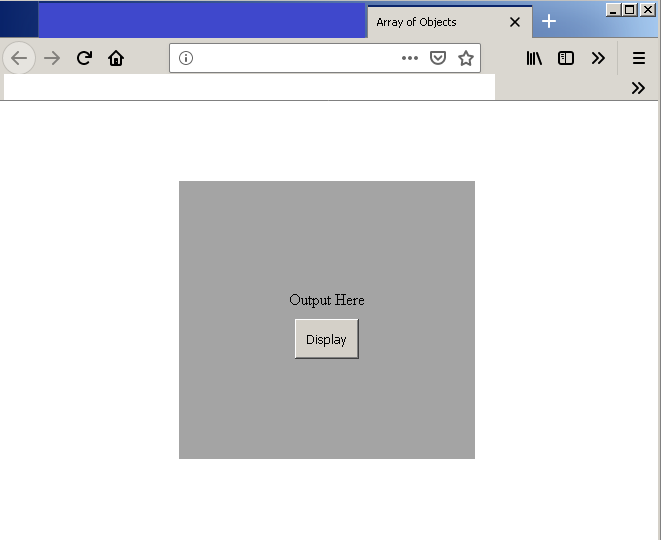
</html>Output in Browser: Array of Objects
JavaScript – Exercise 15 – Nested Objects
In the previous article, you learned about the objects and its properties. In this article, you will learn about JavaScript nested objects, that is, objects with in another object. This is very important to create a list of objects.
Structure of nested objects
The nested objects are objects themselves becoming properties of another object. They way to create a nested object is not different from creating a simple object. Consider the following example.
var students = {

    2457: {
                name: "John dunn",
                section: "A",
                class: 10,
                address: {
                             "building no": 12,
                             "street"  : "parker lane",
                             "city" : "New York",
                             "country" : "USA"
                         };
          };
    2458: {
                name: "Akbar ali",
                section: "B",
                class : 10,
                address: {
                              "building no" : 17,
                              "street" : "rampur",
                              "city" : "new delhi",
                              "country" : "INDIA"
                         };
         };
     };
In the example above, the student is the primary object and 2458 (student id) is a nested object in student object. The address object is nested inside the 2458 object.
Accessing the property in nested object
You can access the property of a nested object in the same way you would do for any ordinary JavaScript object.
You must specify the fully qualified path to that property in order to access that nested object property. There is a hierarchical relationship between primary and nested objects.
Consider the following example:
student.2458.address.city = "Mumbai";In the example above, we accessed the student object whole id is 2458 and whose city is set to Mumbai. In this way you can specify and access other properties at any level.
For example.
student.2458["name"] = "Akbar Ali Hansari";In the example above, we changed the name of the student with id 2458. The path to the property is shorter this time.
In this way you can do following operations on JavaScript nested objects.
- Create new properties.
- Update the value of a nested object property.
- Display nested object properties.
- Delete a nested object property.
Example Program: Nested Objects
<!DOCTYPE html>
<html>
<head>
<title>JavaScript - Nested Objects</title>
<meta charset = "utf-8">
</head>
<body>
<h3 id="result">Get output for creating property</h3>
<h3 id="result2">Get output for display property</h3>
<h3 id="result3">Get output for property delete</h3>
<button onclick="myNestedObject()">Click me!</button>
<script>
function myNestedObject(){
var students = {
2457: {
name: "John dunn",
section: "A",
standard: 10,
address: {
"building no": 12,
"street" : "parker lane",
"city" : "New York",
"country" : "USA"
}
},
2458: {
name: "Akbar ali",
section: "B",
standard: 10,
address: {
"building no" : 17,
"street" : "rampur",
"city" : "new delhi",
"country" : "INDIA"
}
}
};
/* Create a new property called age for student 2458 */
students[2458].age = 16;
document.getElementById("result").innerHTML =
students[2458].age;
/* Display a property */
document.getElementById("result2").innerHTML =
students[2458].address.city;
/* Delete Property */
delete students[2457].section;
document.getElementById("result3").innerHTML =
"Property deleted successfully";
}
</script>
</body>
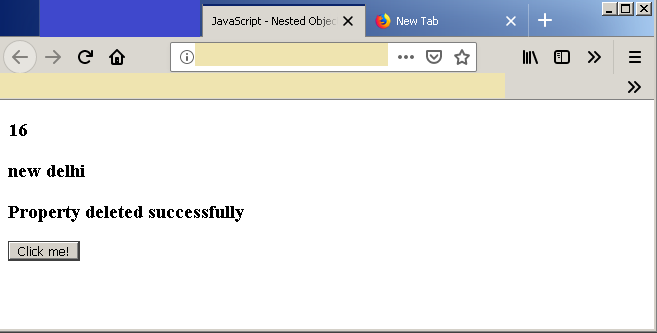
</html>Output – JavaScript Nested Objects
JavaScript – Exercise 14 – Functions
JavaScript functions are named block of codes that can be called several times. It save time by programmers not writing the same code several times. Since, it is widely used feature, we decided to introduce it in object example section and not earlier.
In this article, we are going to understand a function and its types. Also, you will write an example program with the help of functions.
Function types
There are several types of functions in JavaScript. Since, JavaScript is not a strictly typed language, the functions in JavaScript are different.
- Function without arguments
- Function with arguments
- Function with return
- Function with no return
Function without arguments
Function without arguments are those functions that does not take any arguments. The function can compute using local or global variables and may be return or not return anything.
The structure of such a function is given below:
function functionName () {
    statements;           //function can execute some statements
    return variableName; //optionally return something
}
Function with arguments
Another kind of function is function with arguments. You have already seen an example of such a function – the array push() function. The push() function takes elements and push them to the array.
The structure of function with arguments is given below.
function functionName ( arg1, arg2,...,arg n) {
    arg3 = arg1 + arg2; //execute some statements using arguments
   return arg3;         //optionally return values
}
Function with return
Though it is not compulsory for JavaScript functions to return any value. However, some functions return a value after computation. You can output this value or use them for further computation.
The structure of function with return is given below:
function add(number1, number2) {
    return number1 + number2;
}
We can assign the returned value to another variable for further calculations. For example.
var total = add(number1, number2); //calling add() with argumentsFunction with no return
A function with no return will compute the result and directly output it to HTML or the web console.
Typical structure of such a function is as follows:
function print-output () {
     document.write("Hello World");
}
Example Program: JavaScript Functions
In this example, we are going to evaluate an expression using functions. You must use different types of function while doing the exercises.
- Write a function to compute square of a number.
- Write a function to evaluate an expression.
- Print the results.
Program Code:
<!DOCTYPE html>
<html>
<head>
<title>JavaScript - Functions</title>
<meta charset = "utf-8">
</head>
<body>
<h1 id="result">Get output now</h1>
<script>
/* Variable declarations */
var square;
var number;
/* Find square of a number */
function varSquare(number){
return number * number;
}
/* assign the returned value to variable square */
square = varSquare(25);
/* print the output */
/* evaluate expression */
function evalExpression(square){
var output = square + 100;
return output;
}
var result = evalExpression(square);
document.getElementById("result").innerHTML =
"Result=" + " " + result;
</script>
</body>
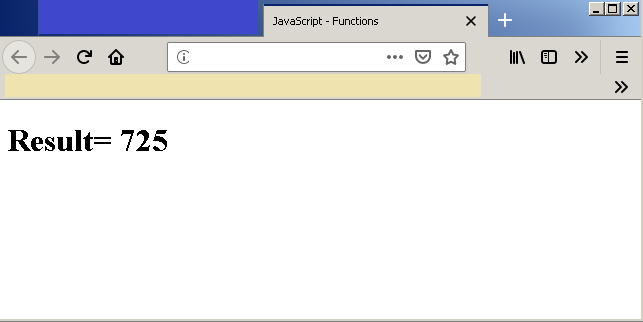
</html>Output – JavaScript Functions
JavaScript – Exercise 13 – Objects
JavaScript objects are variables that hold multiple types of data. The objects represents real life or abstract ideas using properties and methods. In this article, you will learn to create a JavaScript object and access its members.
JavaScript Object Concept
Suppose you want to represent a car in you program. To represent a car object you must describe its properties and behaviors with methods or functions.
For example, if the car object is red in color. You can create property called color and give a value called red. Similarly, you can create function start() and stop() to describe the behavior of the car object.
JavaScript Object Structure
To create an object use the following examples:
var myCar = {
    "Type: "Toyota",
    "Model": "23VXV",
    "Wheel": 4,
    "Color": "Red",
    "Price" : 2000000
};
You can describe object property without making it a string like above example. Consider the following example:
var student = {
firstName  : "Ram",
lastName   :  "Kumar",
Roll Number:  1232,
Course     : "BSc",
Major      : "Computer Science"
}
Accessing Object Property
There are two ways to access the object property.
- Use the (.) dot notation
- Use the ([ ]) bracket notation.
Example of dot notation is as follows: The object name is student and property name is Major.
student.Major;For multiple words property use [ ] bracket notation to access the object property.
student["Roll Number"];How to update a JavaScript object property ?
If the object is available and has a property with some value. Then use following method to update that value.
student.Major = "Mathematics";The above code will set a new value for student object's property called Major.
How to delete a JavaScript object property ?
Sometimes it is necessary to delete a JavaScript object property. You can delete the property using following statement;
delete student.Course;Example Program: Objects
In this example, we will create and object called student, access a property, change value of another property and delete a property of object student.
<!DOCTYPE html>
<html>
<head>
  <title>JavaScript - Objects</title>
  <meta charset = "utf-8">
 </head>
 <body>

<script>
/* Creating a new object */
var student = {
  "firstName":"Peter",
  "lastName":"Pan",
  "roll No": 2367,
  "course": "BSc",
  "major": "Computer Science"
  }

 /* Display a property value */

 document.write("First Name = " + student.firstName + "");

 /* Update a property value */

 student["roll no"] = 5555;

 /* Delete a property */

 delete student.course;

 /* Creating a new property */

 student.subject = "MSc";

 document.write("Subject=" + student.subject + "<br>");
 document.write("Roll No=" + student["roll no"]+ "<br>");
</script>
 </body>
 </html>
Output – JavaScript Objects
