In Student Attendance Management System Using VB 6 Part 3, we will learn to create an interface for the attendance system that will meet the user requirements.
Here is the list of interfaces that we need to create.
- Login for Student (frmLogin)
- Login for Teacher (frmTLogin)
- Login for Admin (frmALogin)
- Main Screen (frmSplash)
- View Attendance (frmViewAttendance)
- Today’s Attendance (frmTodayAttendance)
- Student Record Management (frmStudent)
- Teacher Record Management (frmTeacherRecord)


For each of the above interfaces which also the VB form we will list out the following things.
- System Diagram
- Form Design
- Components and its properties
- Visual basic code
The system design is a high-level overview of individual components which show how each component of interface is related.
Connect To MS Access Database
Before we do anything we must first establish connection with MS Access database that we created earlier. If you did not create a database go to attendance management part-2 and create a database first.
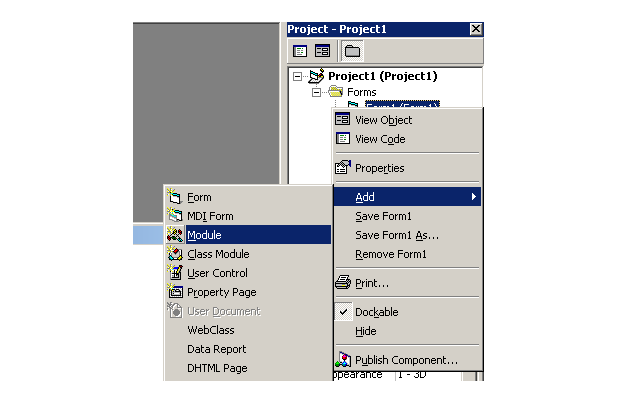
To connect to database we will create a VB 6 module. Modules in VB are files that contain source codes. You can use them throughout your project without repeating them on each form. We must create a single module to connect with ms access database automatically.
To create a module, go to project explorer, right-click Form, select Add, and click Module.

Code For Module.bas
Now we must add code so that our VB project can programmatically connect to the MS Access database.
Public con As New ADODB.Connection
Public rs As New ADODB.Recordset
Dim rsgrid As New ADODB.Recordset
Public constr As String
Public Sub loadcon()
constr = "Provider=Microsoft.Jet.OLEDB.4.0;Data Source=C:\VBProjects\Attendance\attendance.mdb;Persist Security Info=False"
con.Open constr
MsgBox ("connected")
End Sub
The function loadcon() is called whenever database connectivity is required. All connections must be closed as soon as form unloads
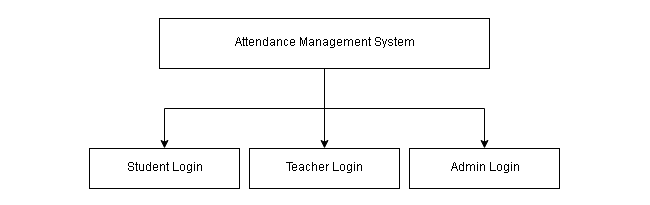
Main Screen
The main screen is the first screen that a user is going to see. This section discusses the design of the Student Attendance Management System Using VB 6 Part 3 main splash screen.
System Diagram for Main Screen

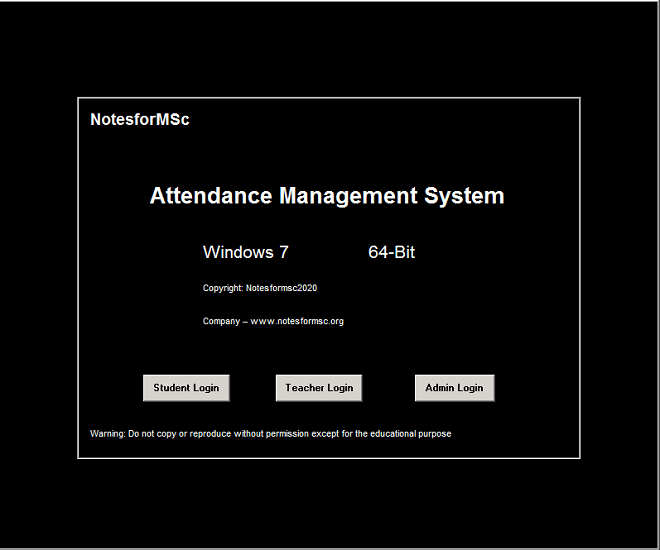
Form Design (frmSpalsh)
The splash screen is a special screen. You can add a splash screen from Standard Toolbar > Form > under Add Form, select Add a Splash and modify the form according to your project.

Components for Main Screen
The splash screen comes with pre-configured labels. You need to modify them and add some new controls in this project. Here are the list of components.
Form Details
Name : frmSplash
Caption : Attendance Management System
BackColor : Window Text
ForeColor : Highlight Text
Frame Control
Now you need to add a frame control and right click and click “send to back”. Existing controls are not visible;therefore, delete them and create identical labels on top of frame control. If you wish, skip frame control and continue creating rest of the controls.
Name : frameMain
Caption : 'leave empty'
BackColor : Window Text
Labels
Name : lblCompanyProduct
Caption : NotesforMSc
BackColor : Window Text
ForeColor : Highlight Text
Font : Arimo 14px Bold
Name : lblProductName
Caption : Attendance Management System
BackColor : Window Text
ForeColor : Highlight Text
Font : Arimo 20px Bold
Name : lblPlatform
Caption : Windows 7
BackColor : Window Text
ForeColor : Highlight Text
Font : Arimo 16px Regular
Name : lblPlatform
Caption : 64-Bit
BackColor : Window Text
ForeColor : Highlight Text
Font : Arimo 16px Regular
Name : lblCopyright
Caption : Copyright:Notesformsc2020
BackColor : Window Text
ForeColor : Highlight Text
Font : Arimo 8px Regular
Name : lblCompany
Caption : Company-www.Notesformsc.org
BackColor : Window Text
ForeColor : Highlight Text
Font : Arimo 8px Regular
Name : lblWarning
Caption : Warning: Do not copy or reproduce without permission except for the educational purpose
BackColor : Window Text
ForeColor : Highlight Text
Font : Arimo 8px Regular
Buttons
Name : cmdStu
Caption : Student Login
BackColor : Button Highlight
Style : 1-Graphical
Name : cmdTeach
Caption : Teacher Login
BackColor : Button Highlight
Style : 1-Graphical
Name : cmdAdmin
Caption : Admin Login
BackColor : Button Highlight
Style : 1-Graphical
Code For Main Screen
Option Explicit
Public userlogin As Integer
Private Sub cmdAdmin_Click()
frmALogin.Show
End Sub
Private Sub cmdStu_Click()
frmLogin.Show
End Sub
Private Sub cmdTeach_Click()
frmTULogin.Show
End Sub
Private Sub Form_KeyPress(KeyAscii As Integer)
    Unload Me

End Sub
Private Sub Form_Load()
    lblVersion.Caption = "Version " & App.Major & "." & App.Minor & "." & App.Revision
    lblProductName.Caption = App.Title

End Sub
Private Sub Frame1_Click()
    Unload Me
End Sub
Note that above code may give error because login forms are not created yet. Continue to create login forms.
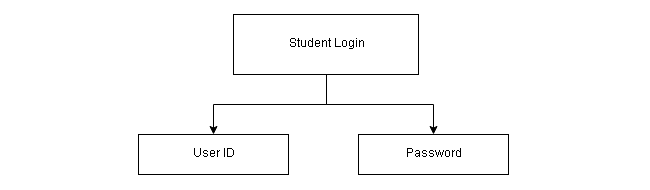
Student Login
System Diagram For Student Login
The student login has two inputs – user id and password.
The easiest way to create a login form is to click Standard toolbar on VB project editor and click Form > select Log in Dialog from Add Form Window. The login in dialog comes with a preexisting code which you can modify later. In this example project, we have used the login dialog.

Form Design(frmLogin)
The second option is to create a new form and design the login screen yourself. Later , you can modify the appearance for the form.


Components for Student Login
The components for student login is listed below.
Form Details
Name : frmLogin
Caption :Login
BackColor : Window Text
ForeColor : Highlight Text
Labels
Name : lblUserID
Caption : SID
BackColor : Window Text
ForeColor : Highlight Text
Name : lblPassword
Caption : Password
BackColor : Window Text
ForeColor : Highlight Text
Textboxes
Name : txtSID
Text : 'leave blank'
Name : txtPassword
Text : 'leave blank'
All other properties remain same.
Code for Student Login
Option Explicit
Public LoginSucceeded As Boolean
Private Sub cmdCancel_Click()
 'set the global var to false ' to denote a failed login
 LoginSucceeded = False
 Me.Hide
 End Sub
 Private Sub cmdOK_Click()

 'making connection

 Call loadcon

rs.Open "SELECT * FROM Student ", con, adOpenDynamic, adLockReadOnly
While Not rs.EOF
 If rs!SID = Val(txtSID) Then
 'check for correct password
 If rs!Password = txtPassword Then
 frmSplash.userlogin = rs!SID
  'place code to here to pass the 'success to the calling sub 'setting a global var is the easiest LoginSucceeded = True
 frmMenu.Show
 Unload Me
  'closing connection and recordset
  rs.Close
  con.Close

 Exit Sub
 Else
 MsgBox "Invalid Password, try again!", , "Login"
 txtPassword.SetFocus
 SendKeys "{Home}+{End}"
 End If
 End If
 rs.MoveNext
 Wend
End Sub
 Private Sub Form_Load()
 frmSplash.Hide
 End Sub
Teacher Login
System Diagram for Teacher Login

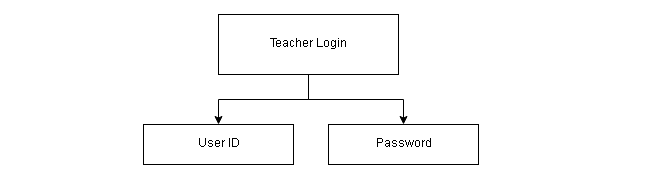
Form Design(frmTLogin)
You can create a form from the Standard Toolbar > Form > Log in Dialog and modify the form and its code. The second option is to create a new form and write login code which is difficult/

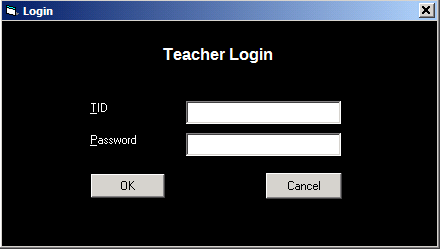
Components for Teacher Login
The components for teacher login is listed below. These are controls used in the form design according to the system diagram.
Form Details
Name : frmTULogin
Caption : Login
BackColor : Window Text
Labels
Name : lblTeacherLogin
Alignment : Center
Caption : TeacherLogin
BackColor : Window Text
ForeColor : Hightlight Text
Font : Arimo 12px Bold
Name : lblTID
Caption : TID
BackColor : Window Text
ForeColor : Hightlight Text
Name : lblTPassword
Caption : Password
BackColor : Window Text
ForeColor : Hightlight Text
Textboxes
Name : txtTID
Text : 'leave blank'
Name : txtPassword
Text : 'leave blank'
All other properties and controls stay the same. Note that the ‘leave blank‘ means you must remove any text already there.
Code for Teacher Login
The code for teacher login is created by modifying the preexisting code of “login dialog” form.
Option Explicit
Public LoginSucceeded As Boolean
Private Sub cmdCancel_Click()
 'set the global var to false ' to denote a failed login
 LoginSucceeded = False
 Me.Hide
 End Sub
 Private Sub cmdOK_Click()

 'making connection
 Call loadcon
rs.Open "SELECT * FROM Teacher ", con, adOpenDynamic, adLockReadOnly
While Not rs.EOF
 If rs!tid = Val(txtTID) Then
 'check for correct password
 If rs!Password = txtPassword Then
 frmSplash.userlogin = rs!tid
 'place code to here to pass the 'success to the calling sub 'setting a global var is the easiest LoginSucceeded = True
 frmMenu.Show
 Unload Me
  'closing connection and recordset
  rs.Close
  con.Close

 Exit Sub
 Else
 MsgBox "Invalid Password, try again!", , "Login"
 txtPassword.SetFocus
 SendKeys "{Home}+{End}"
 End If
 End If
 rs.MoveNext
 Wend
End Sub
 Private Sub Form_Load()
 frmSplash.Hide
 End Sub
Administrator Login
System Diagram for Admin Login
The admin is the user with highest privileges, but the login behavior of administrator staff is the same as everyone.

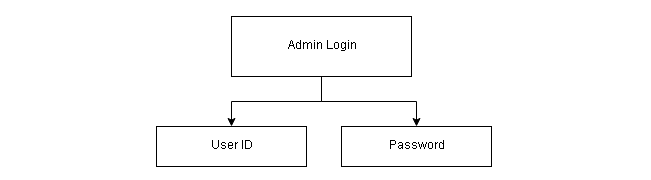
Form Design (frmALogin)
Create the login form in the same way that you did for student and teacher. See section above.


Component for Admin Login
The list of components for admin login is given below.
Form Details
Name : frmALogin
Caption : Login
BackColor : Window Text
Labels
Name : lblAdminLogin
Caption : Admin Login
BackColor : Window Text
ForeColor : Highlight Text
Font : Arimo 12px Bold
Name : lblAID
Caption : AID
BackColor : Window Text
ForeColor : Highlight Text
Name : lblAPassword
Caption : Password
BackColor : Window Text
ForeColor : Highlight Text
TextBoxes
Name :txtAID
Text : 'leave blank'
Name :txtPassword
Text : 'leave blank'
Code for Admin Login
Option Explicit
Public LoginSucceeded As Boolean
Private Sub cmdCancel_Click()
 'set the global var to false ' to denote a failed login
 LoginSucceeded = False
 Me.Hide
 End Sub
 Private Sub cmdOK_Click()

 'making connection
   Call loadcon
  rs.Open "SELECT * FROM Admin ", con, adOpenDynamic, adLockReadOnly
While Not rs.EOF
 If rs!AID = Val(txtAID) Then
 'check for correct password
 If rs!Password = txtPassword Then
 frmSplash.userlogin = rs!AID
 'place code to here to pass the 'success to the calling sub 'setting a global var is the easiest LoginSucceeded = True
 frmMenu.Show
 Unload Me
  'closing connection and recordset
  rs.Close
  con.Close

 Exit Sub
 Else
 MsgBox "Invalid Password, try again!", , "Login"
 txtPassword.SetFocus
 SendKeys "{Home}+{End}"
 End If
 End If
 rs.MoveNext
 Wend
End Sub
 Private Sub Form_Load()
 frmSplash.Hide
 End Sub
In the next part we will continue building the interface for the attendance management system.