Visual Basic 6 Controls
The visual basic 6 controls are objects that are placed on the form. Even a form is a control object. Each of the control objects has properties, methods, and events associated with them.
Learn visual basic 6 basics before you begin with vb controls.
Properties are attributes that describe the type of control. Methods are functions performed by the control object. A method is triggered due to some events such as mouse click, mouse over, key press and so on.
A list of visual basic common controls is given below.
- Form
- Command Button
- Labels
- Text box
- Image control and Picture boxes
- Frame controls
- Option buttons
- Check boxes
Naming Conventions for Each Controls
You can name forms in many ways, but the more meaningful the name is, the better it is for others to read and understand your visual basic program.
The convention is to use 3 letter to describe the control and rest of the name for purpose of the control.
For example,
frmBankAccount
btnSubmit
btnReset
imgBaloon
chkMale
optNo
Control Properties
Every control object have properties that uniquely describes that control. You can change the properties both in design view as well as in run time.
Some property values are necessary and global to all controls such as Name, Caption, Visible, etc. and some are very specific to a control, no other control can have that property.
For example,
A checkbox has a property called value – checked, unchecked, grayed. These are unique to check boxes.
Radio buttons have a property called value – true or false. These will check or uncheck the radio option and unique properties for radio buttons.
Methods and Events
Visual basic methods and events are visible in a code editor. You can choose a control and then the event for the control. Finally, choose an appropriate method as a response.
For example,
Private Sub btnSubmit_Click()

MsgBox ("Hello World")

End Sub
In the example above, the command is a button and event is click(). When the user clicks the button, the response if a method – Message box with “Hello World” as message.
The output of the code is displayed below.

How to Write a Visual Basic Program
In the previous lesson, you were introduced to the visual basic 6 ide (integrated development environment). It is also called the design interface. This lesson you will learn how to write a visual basic program.
To learn about VB IDE, visit the link below.
In this lesson, you will learn how to write your first visual basic 6 programs and test the program. This lesson is intended for beginners of visual basic to teach them how to break a given problem in many tasks and develop a solution.
Program development
Any visual basic program development has 4 phases listed below.
- Planning
- Program development /Implementation
- Testing
- Maintenance/Debugging
When you are given a problem and asked to develop a solution to the problem. The first thing to do is to plan the solution. There are three phase to planning.
- Identify the inputs
- Identify all the process or tasks
- Identify all output.
First, you need to identify all the inputs to the solution, then identify how to break the solution into many tasks and sub tasks, and finally, each task should lead to the identified outputs.
After the planning phase is done and you are satisfied with the solution, you can proceed with the implementation phase. This phase is the development phase and there is two part to this phase.
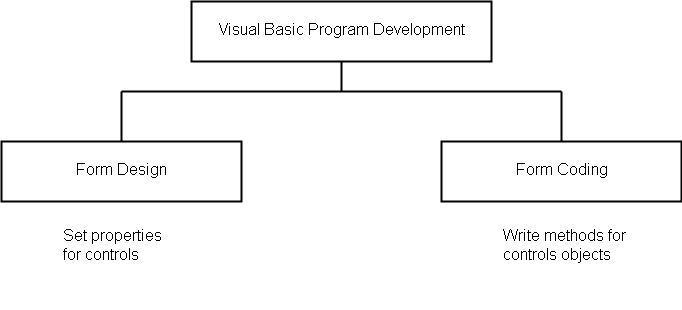
The program development has two phases – the form design phase and the form coding phase. When you have identified all the inputs, output and process, you decide how to design the form and the control objects that you are going to use. For each of these control object, you have to set properties for them.
The next step is to write methods for each control object so that they can simulate the solution you planned. The choice of form design and control objects depends on two things – the solution and the programmer.
Visual Basic Code Editor
Visual Basic is based on the object-oriented programming paradigm. Everything on the form includes the form itself are objects. There could be button object, textbox object and many more objects in a program. The objects have properties and methods when you write a visual basic program.
You can change the properties from visual basic form design view, but the methods can only be written in a code editor. To access the visual basic code editor, either double-click on the control object and an editor will open. See the image below, and understand how to write a visual basic program using the code editor.
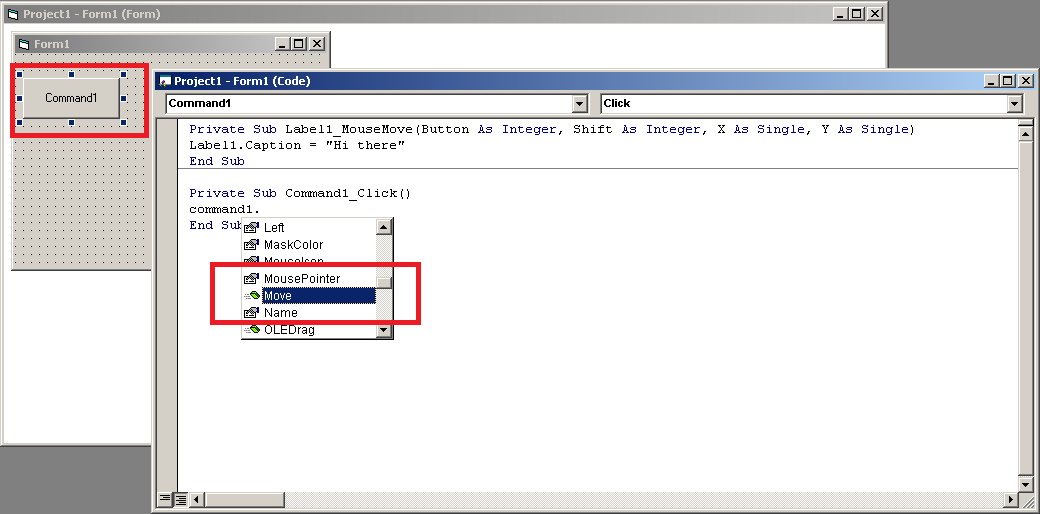
The code editor was opened because we double clicked on the button control called Command1.Now on the top it shows two sections for code editor. One section is control object list and the second drop-down is method list such as click, double click, mouse move and so on.
Whenever you type any control name in the code editor and use the dot (.) operator, it will show you the available properties and methods which you can select.
Testing Phase
The testing phase is to do a trial run for the visual basic application and verify the output. You can try different sets of input values for your program and see if the output is as expected. If not then, you can find out the reason in the next phase which is the debugging phase.
Debugging Phase
You have found errors in your program and output is not as expected. The debugging phase helps you identify the root cause of the problem. This phase depends on how you run your program. Basically, there is three modes to execute your program.
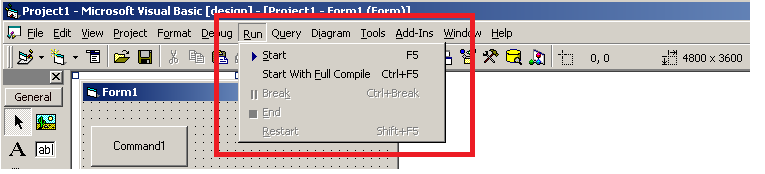
The run menu in the menu bar gives three options – Start, Break and End. To begin the execution, you can click start and break will pause the program in between the execution process. You can try a different input value in run-time with Break mode. The Break mode gives an immediate window to try different input values.
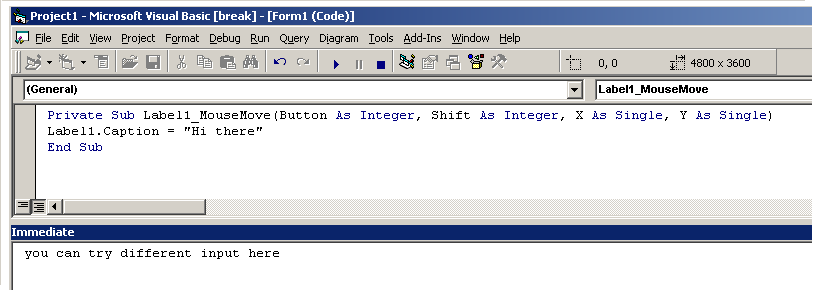
Finally, terminate the program execution with End mode.
Example Program
In this section, we will write an example program using all the knowledge gained in the previous sections.
Q. Write a VB application to calculate simple interest.
To develop this program, you will go through all the stages of development and experience it.
Planning Phase
Input required:
- Principal Amount
- Rate of Interest (in Percent)
- Period in Years
Output Expected:
- Simple Interest
- Total Amount
Process Required:
1. Calculate simple interest using formula
SI = Principal Amount * Rate of Interest * Period in Years2. Convert the Rate of Interest into Decimal
Rate = Rate/1003. Calculate the Total Amount
Total Amount = Simple Interest + Principal AmountProgram Development Phase
In this phase, you will design a form for the Simple Interest Application and then implement the desired code for each control.
Form Design- Simple Interest Application
You must decide the controls needed to receive the input values. We have made a list below.
- Principal Amount = textbox
- Rate (in percentage) = textbox
- Period (in Years) = textbox
Now, you can decide control objects for output, as how you want to display the output. Again, we make a list, but you are free to make changes.
- Simple Interest = textbox
- Total Amount = textbox
User Stories or Use Case
Identifying input and output is a simple process, the difficult process is to meet the requirement of a user. The users have real-world problems which they want to solve and each problem involve a scenario. These problems are known as User Stories.
For example, you go to a store, select an item for purchase, the teller scans the price and ask you to pay, you pay the bill and the teller hand over a receipt.
The above involves a lot of user stories like
“As a customer, I want to be able to select many items for purchase”
“As a customer, I want a receipt for each item I purchase”
In our application, a user inputs the values and get the output simple interest. You can create many user stories.
“As a user, I want to able to input principal amount, rate, and period”

“As a user, I want to do something like press a button and get the output”

“As a user, I want my output displayed on the screen in big fonts”
You can create as many stories you want and from that design the interface for the application.
The input and output is as per the user requirements, user wants a button to display outputs. So we create two buttons – Simple Interest and Total Amount to compute results. Then display output through text boxes.
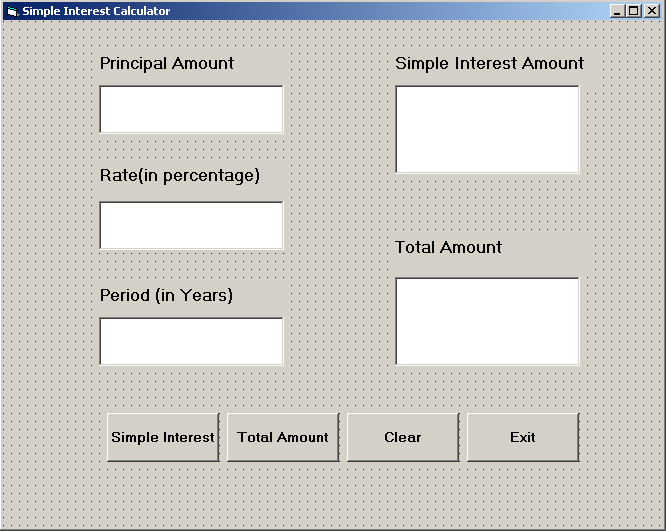
Create the following layout for simple interest calculator application.
Form Design
Name: SIcalculator
Caption: Simple Interest Calculator
Width: 10000
Height: 8000
Textboxes
Name: txtPrincipal
Text: 'leave empty'
Name: txtRate
Text: 'leave empty'Name: txtPeriod
Text: 'leave empty'Name: txtSI
Text: 'leave empty'Name: txtTot
Text: 'leave empty'Buttons
Name: btnSI
Caption: Simple Interest
Name: btnTot
Caption: Total AmountName: btnClear
Caption: ClearName: btnExit
Caption: ExitLabels
Name: lblPrincipal
Caption: Principal Amount
Name: lblPrincipal
Caption: Principal AmountName: lblPeriod
Caption: Period (in years)Name: lblSI
Caption: Simple InterestName: lblTot
Caption: Total AmountFinally, your form should look following. You can change the layout in whatever way you like, but the number of controls should be the same. In other words, you need 5 textboxes and two button control objects.
Next, we write code for each of the controls, one by one. Click on the principal textbox and following code will appear.
Option Explicit
Dim principal As Double

Dim rate As Double

Dim period As Double

Dim simple_interest As Double

Dim total_amount As Double

Private Sub btnClear_Click ()

    txtPrincipal. Text = " "

    txtPeriod. Text = " "

    txtRate. Text = " "

    txtTot. Text = " "

    txtSI. Text = " "

End Sub

Private Sub btnExit_Click ()

    SIcalculator.Hide

End Sub

Private Sub btnSI_Click()

    simple_interest = principal * rate * period

    txtSI. Text = Str (simple_interest)

End Sub

Private Sub btnTot_Click()

    total_amount = simple_interest + principal

    txtTot. Text = Str(total_amount)

End Sub

Private Sub txtPeriod_Change ()

    txtRate. Text = Str(rate)

    period = Val(txtPeriod. Text)

End Sub

Private Sub txtPrincipal_Change()

    principal = Val(txtPrincipal.Text)

End Sub

Private Sub txtRate_Change()

    rate = Val(txtRate. Text)

    rate = rate / 100

End Sub
Now, it’s the testing phase, where you can try to run the program.
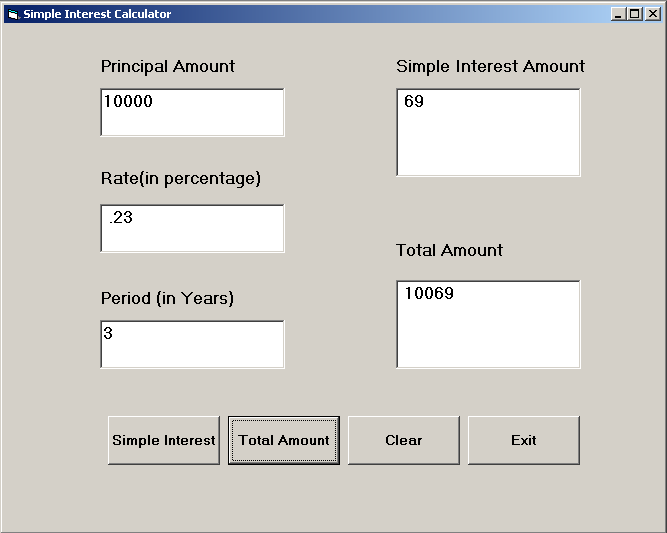
In case, you run into the problem try to check the code in break mode line by line. In this way, you can easily identify the problem.
References
- Holzner, Steven. 1998. Visual Basic 6 Black Book. The Coriolis Group.
- Vine, Michael. 2001. Visual Basic Programming for absolute beginner. Prima Publishing.
VB6 IDE
In this lesson, you will learn about the layout of standard interface and its components used in visual basic programming.
When you open visual basic 6.0 software for the first time, you will see that it opens with the default “Standard.EXE” template. As a beginner, you will work with this interface most of the time. We will leave advanced templates for future tutorials because this is visual basic basics lesson.
The prerequisite to this lesson is that you must install the Visual Basic 6 software on a Windows PC.
The Visual Basic basics – The Design View
The visual basic 6.0 design view is the first interface for a visual basic programmer. You must know this interface in and out to master visual basic basics. You must know how to add controls, manage your project modules and forms, and change the properties of each control that you use in your program.
The following figure shows the standard design view of visual basic 6.0 software. You can click on the image to make it larger.

The interface contains 7 sections and each has a specific functionality.
- Project Container
- Form
- Project Explorer
- Properties Window
- Toolbox
- Standard Toolbar
- Menu Bar
Every visual basic 6.0 project is made of forms and modules. Each of these forms uses controls like buttons, textboxes, whose properties can be controlled using visual basic interface. Also, you can open or close these components, add, delete, and update forms, modules, controls and databases.
In the following section, you will learn about each component and the role they play in a visual basic 6.0 programming project.
Project Container
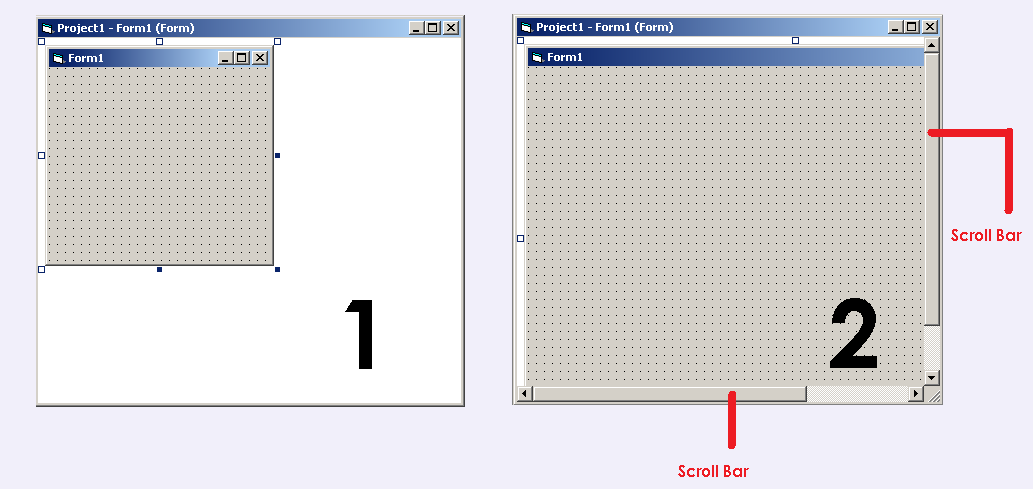
The project container contains the Form object for visual basic 6.0 projects. The Form cannot exceed the project container, if you try to increase the width or the height of a Form, it expands the width or height of the project container also, by adding a scrollbar.
See the example below.
How many project container can you open at the same time?
For each instance of visual basic 6.0, you can open one and only one project container. The visual basic software will ask you to close any open projects before opening a new project.

To know which project you are currently working on, check the title bar of the project container, where it is displayed. The title of the project can be changed from properties windows on the bottom right corner of the visual basic design interface.
Project Explorer
A project explorer is a place where you can see all forms and modules associated with your project. You can also add or delete modules form the project explorer. It is located in the top-right corner of the visual basic design view.
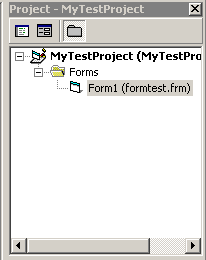
In the above figure, you can see the formtest.frm is part of the MyTestProject. The form object contains many control object which is added or deleted from the toolbox.
Tool Box
The toolbox is one of the best features of the visual basic 6.0 programming interface. You can rapidly add any control or delete any control from the form element and change the entire feature. This is was not possible with a high-level language such a C or Java. That’s why Visual Basic 6.0 is so popular among beginners.
The toolbox is located on the left sidebar of the visual basic 6.0 design interface. It is very noticeable because it’s located on the left sidebar.

There are many controls that you can pick from the toolbox. We made a list of those tools that you can use.
- Pointer
- PictureBox
- Label
- TextBox
- Frame
- CommandButton
- CheckBox
- OptionButton
- ComboBox
- ListBox
- Horizontal ScrollBar (HScrollBar)
- Vertical ScrollBar (VScrollBar)
- Timer
- DriveListBox
- DirListBox
- FileListBox
Each of these control objects have specific properties and methods that it is responsible for. Which control to use on a form is up to the discretion of the visual basic programmer?
Menu Bar and Standard Toolbar
A menu bar is given on the top of the screen along with standard toolbar. The menu bar gives following options to a programmer
- File – You can control open, close or save projects.
- Edit – Perform edits within your project.
- View – Give all kinds of view like project explorer, toolbox, visual component manager, code editor, etc.
- Project – Complete control of adding forms and module including data connections.
- Format – Give options to align Form and Control objects.
- Add–ins – You can include or exclude various visual basic add-ins.
Other menu items are Query, Diagram and so on. The Standard toolbar is nothing but a list of icons to standard components – project explorer, toolbox, properties, etc.
Properties
The last and final component of visual basic 6.0 design interface is properties. It is located at the bottom-right corner of the design interface. The properties windows is the most frequently used item for a visual basic programmer.
Each and every element that you add to the form, you must change its properties.
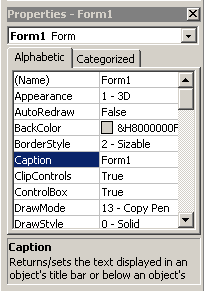
There are global properties and there are local properties to every element. The global property is the name and caption, you must provide for each control object because using the name property, you can decide the behavior of the control object in a visual basic form.
For example
You can change the background color, width or height of an object at run-time.
References
- Holzner, Steven. 1998. Visual Basic 6 Black Book. The Coriolis Group.
- Vine, Michael. 2001. Visual Basic Programming for absolute beginner. Prima Publishing.
Visual Basic 6.0 Installation Guide
In this lesson, you will learn about installing visual basic 6.0 installation for enterprise edition on your computer.
For the purpose of this lesson, we will use windows 7 64-bit. This guide is for a beginner of visual basic 6.0 programming to get them started.You will need the installation disk for visual basic 6.0 enterprise edition.
Installation Requirements
Before installation, you could check for installation requirements as given below. These are based on visual basic .net software installation requirement which is more or less same for visual basic 6.
| Requirements | Hardware/Software Components |
| Processor | Pentium-III or above, 600 MHz |
| RAM | 256 MB or above |
| Operating Systems | Windows 2000, XP, Vista, 2003 server or Windows 7 (both 64-bit or 32-bit ) |
| Disk Space | 900 MB |
| Video | 800 x 600, 256 color resolution minimum |
| CD Drive | If you are using CD drive for installation |
Visual Basic 6.0 Setup
You can now start the installation and each step of installation is shown below, so that there is no surprises. When you start the Visual Basic 6 setup, the installation wizard pops up.
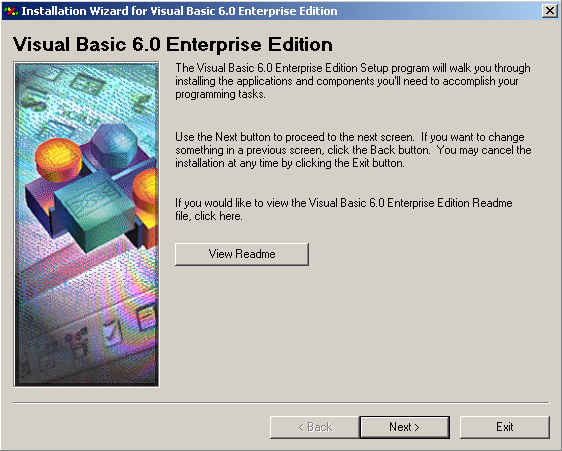
The setup will walk you through the steps to installation. At each step, you will have to provide some information. Click Next to start the installation process.
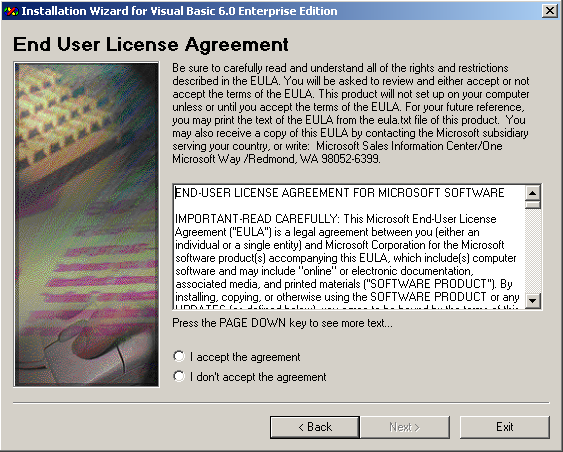
In the next screen, select “I accept the agreement” for the end-user license agreement, people never read the license, but you should read it quickly as it contains some information about the usage of this software product and then click Next again.
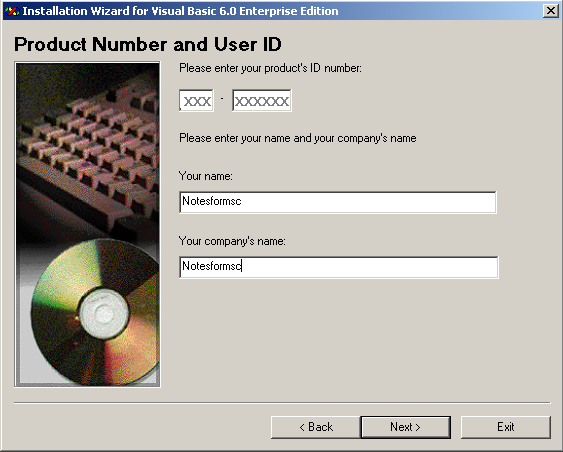
You can now enter the product number and a user id on the next screen. The product number is supplied with the installation disk or written on the disk. The username can be a personal name or an institution name if you are from an institution that has provided you with the software.
Click Next to continue to the next screen.
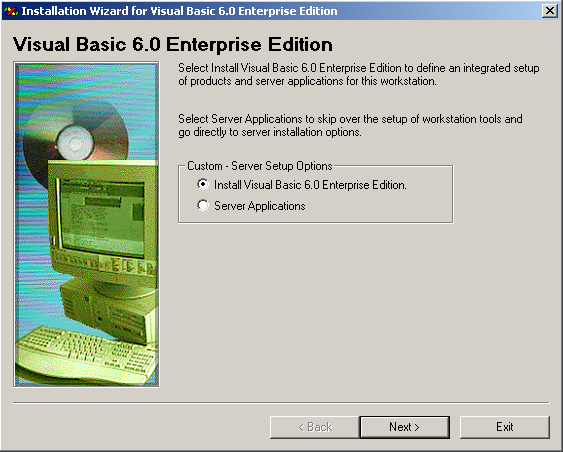
Now you are provided with two options.
- Install Visual Basic 6.0 Enterprise Edition
- Server Applications
The first option installs everything and do not leave an option to choose what you want to install. Whereas, the second option gives you individual application or tools you can choose to install.
Select “Install Visual Basic 6.0 Enterprise Edition” and click Next to continue.
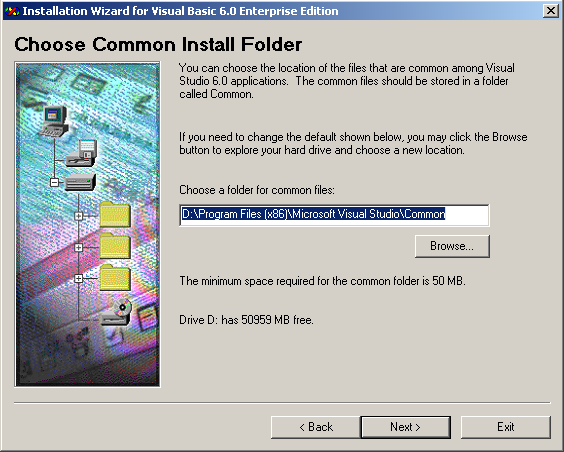
Visual Basic 6.0 setup automatically selects the default installation directory under “Program Files”, however, if you want to change the default installation directory then you can do it now. Then click Next to continue.
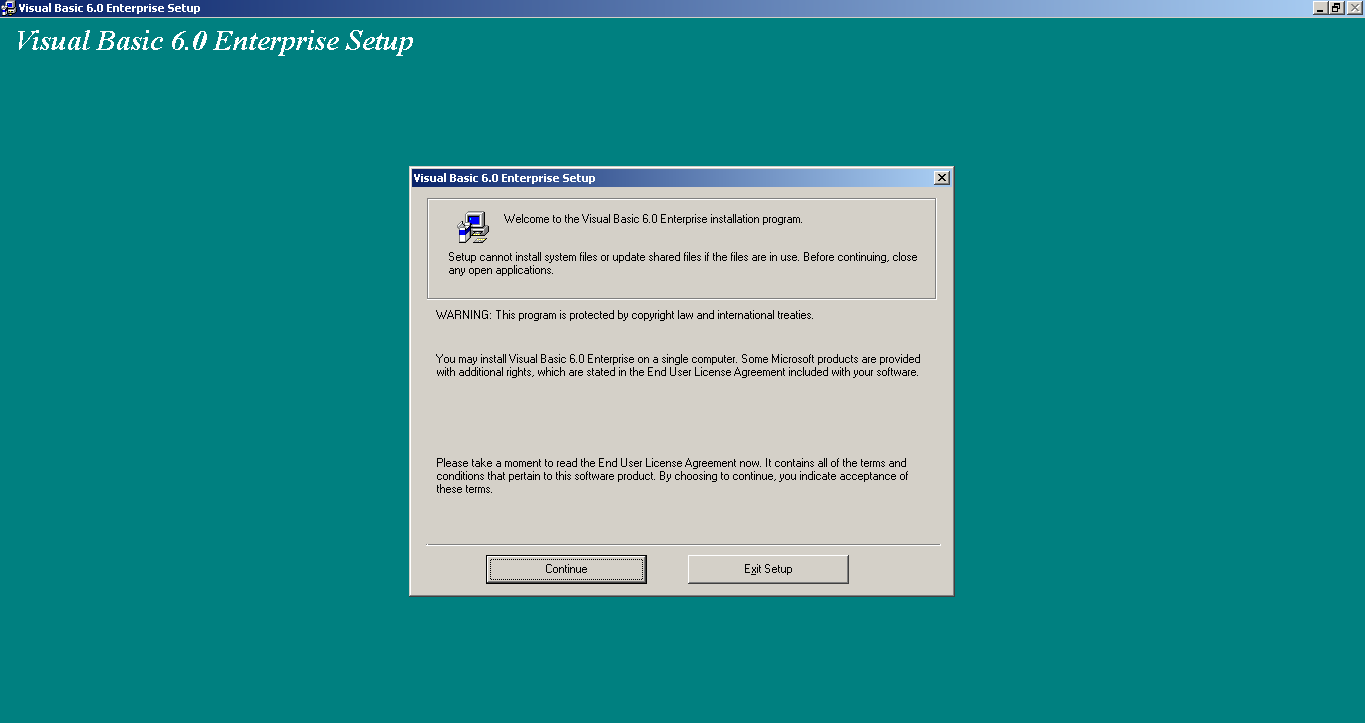
Now you get the Visual Basic 6.0 Enterprise Setup screen, this is the setup which will install VB 6 on your computer. If you are satisfied with inputs provided on previous screens, click Continue.
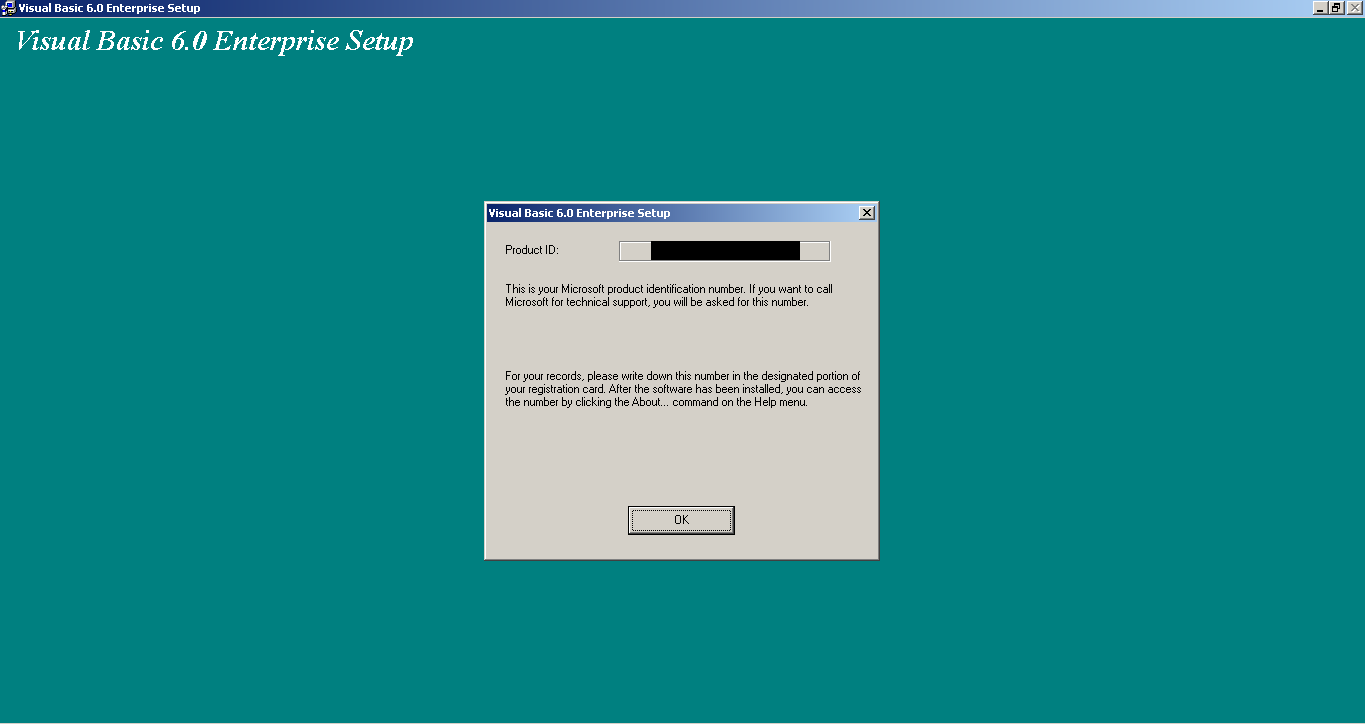
You product ID will be displayed on this screen and it’s just an information before the installation, you can click “OK”.
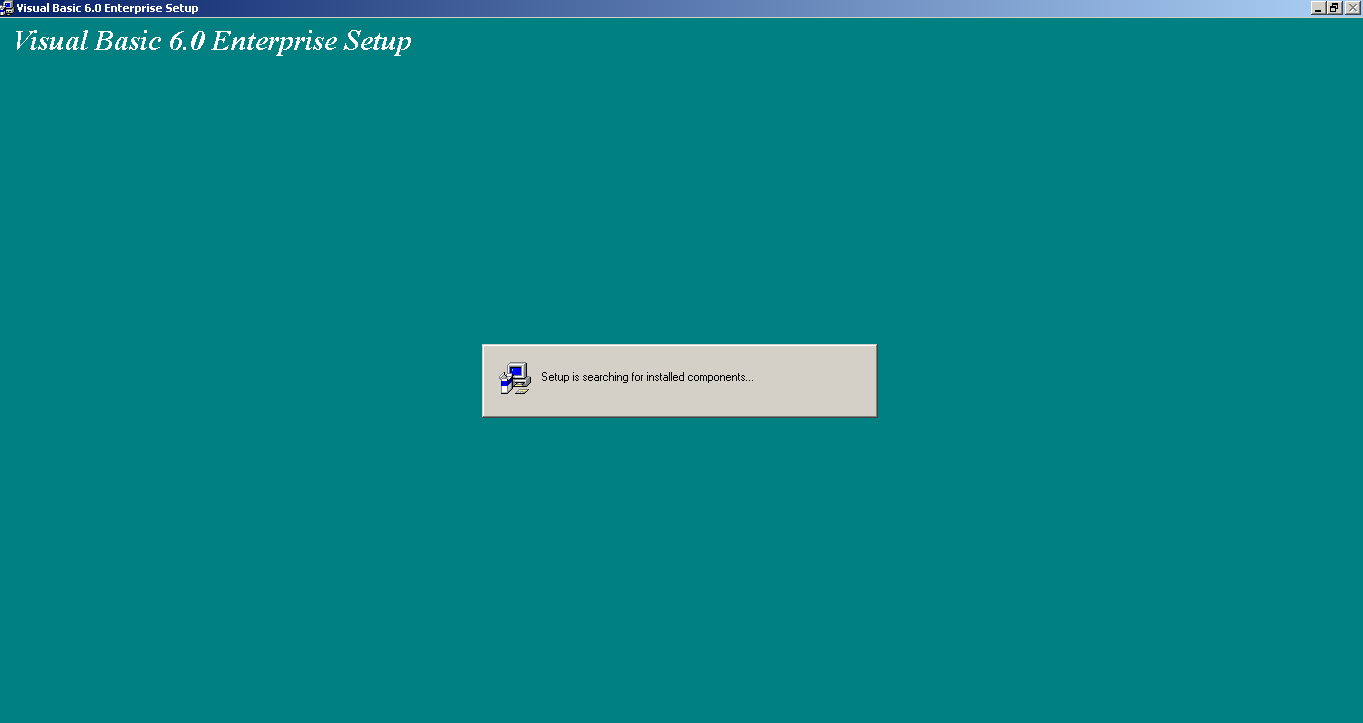
The setup now looks for installed component if any before it starts with the installation.
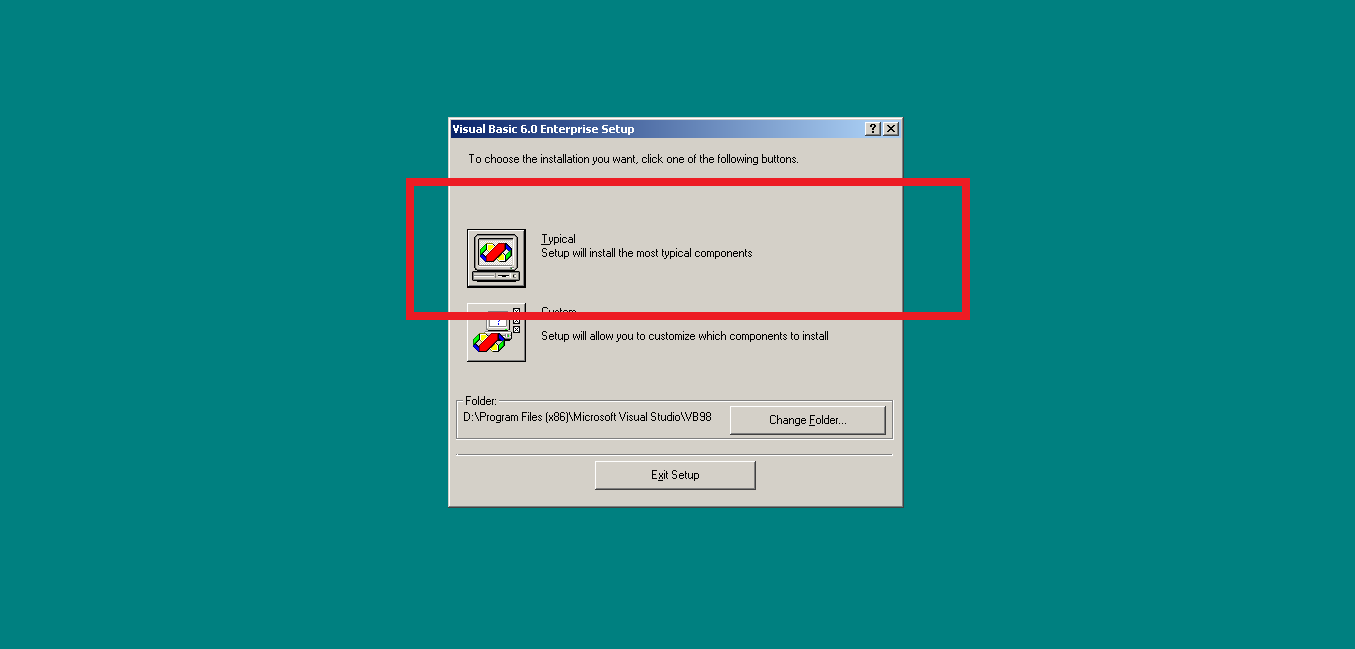
In the next screen, the actual VB 6 installation begins. Here setup gives you two choices.
- Typical Installation
- Custom
The typical components are the essential components of visual basic 6 software. It does not contain features that extends the functionality of visual basic 6 software.
The custom option gives you a chance to select exactly what you want. But you must be an advanced VB programmer to be able to do that. Select “Typical” and begin the installation.
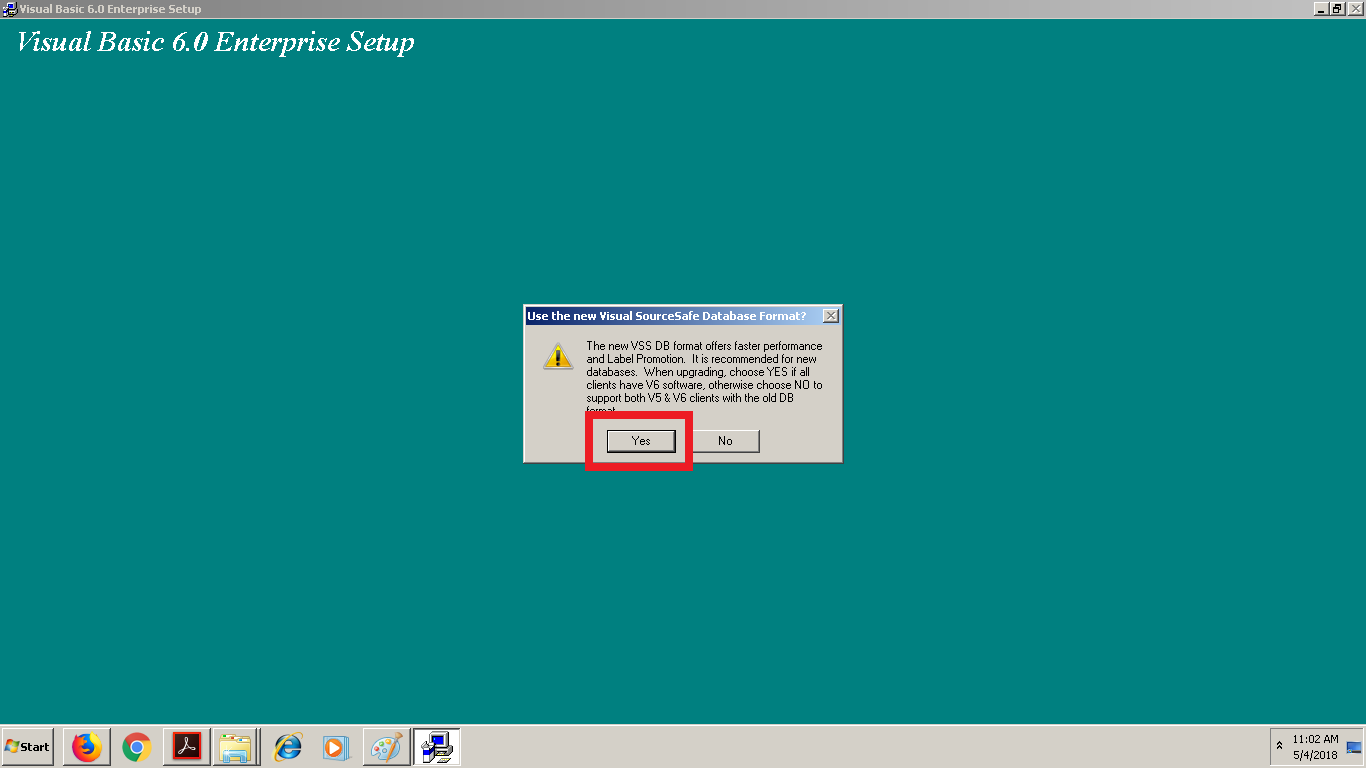
Sometimes, the setup will ask you to select the visual source safe database, instead of the old database. Click yes and continue with the installation.
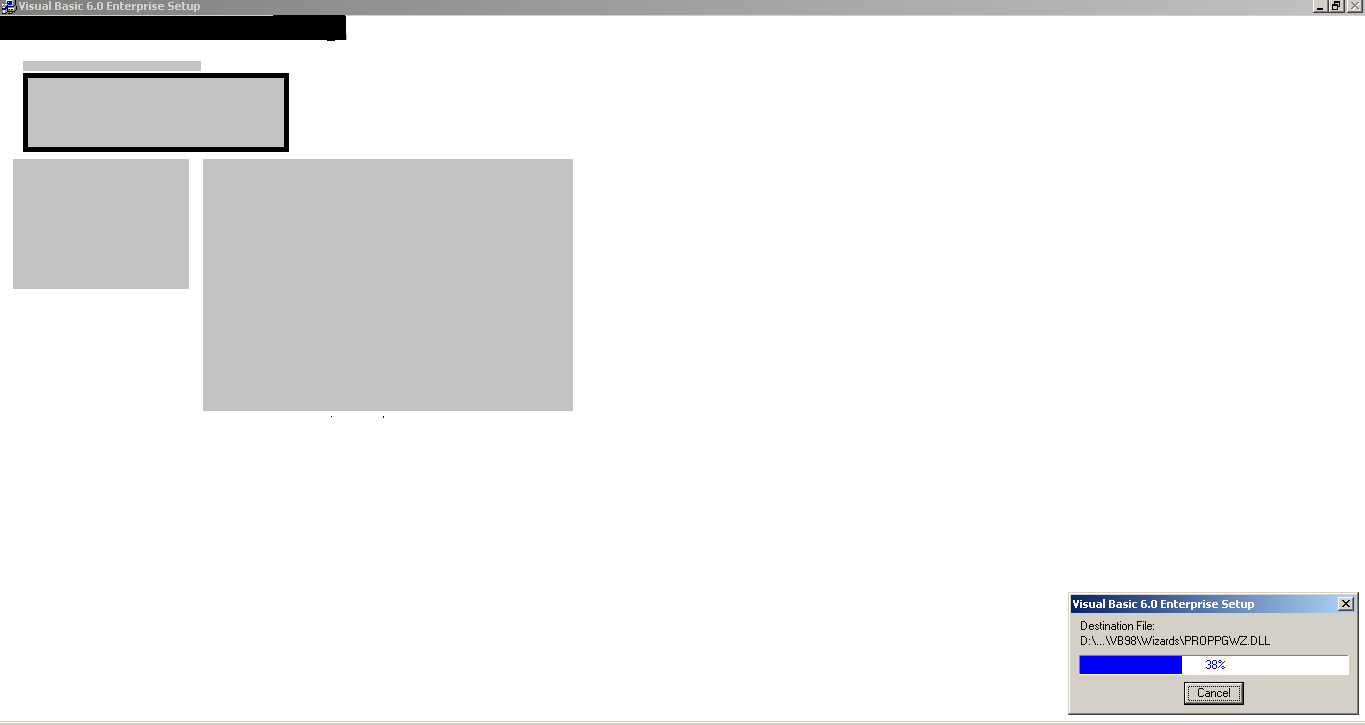
At this point, the setup starts installing your file which may take some time, depending on your computer.
After setup completes, you have to restart the computer to finish the installation.
Click on Restart on the next screen.
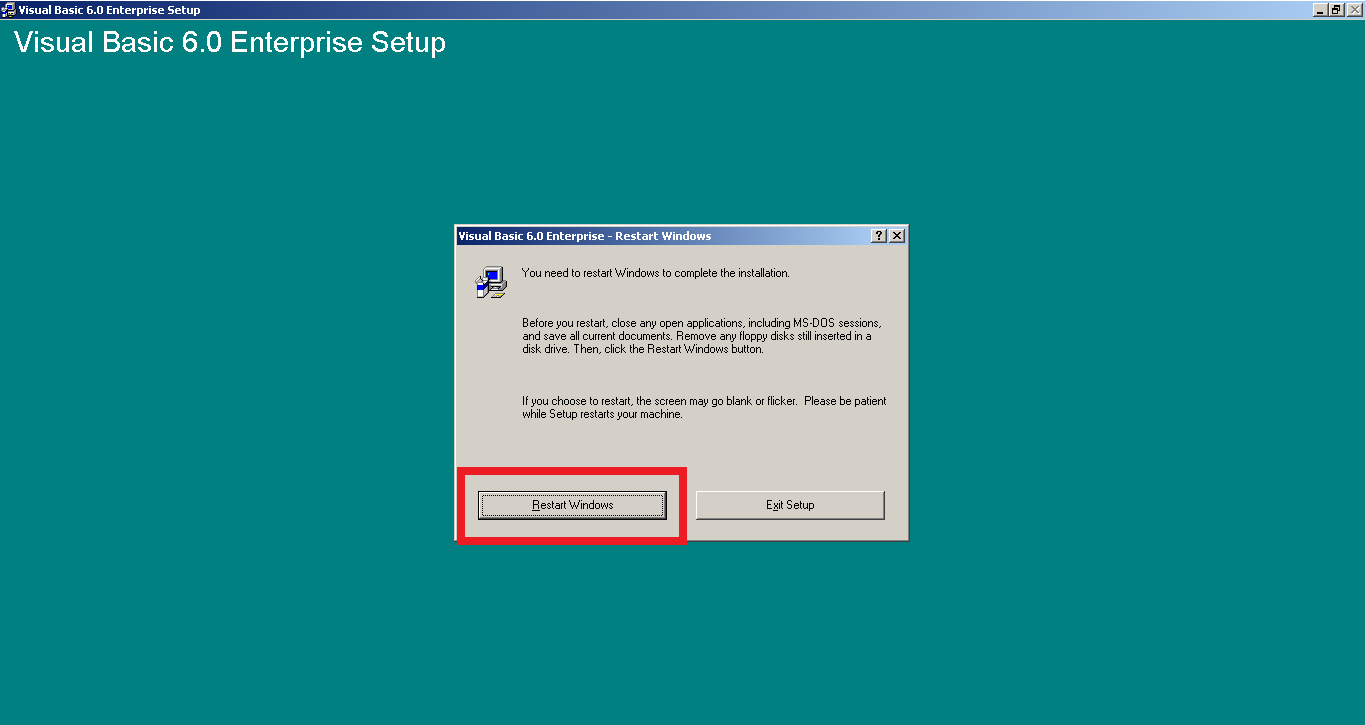
It will take a few minutes to complete the installation. When your computer is restarted and you have logged in successfully.
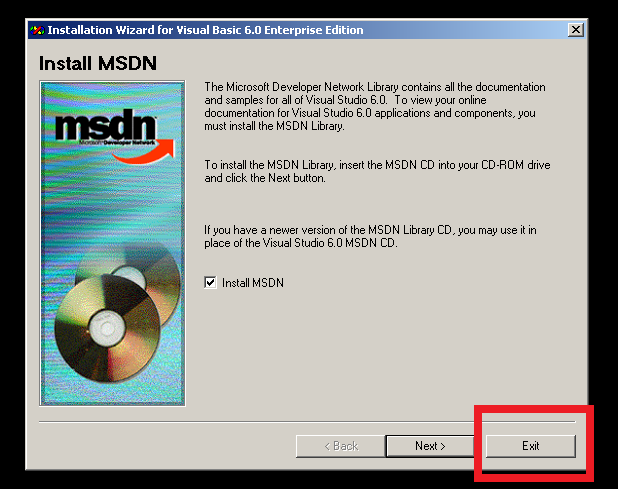
You will see the setup wizard, prompting to install MSDN library. It is nothing but documentation that you view online about Visual Studio 6.0. You can stop the installation by clicking “Exit”.
It is time to verify the Visual Basic 6.0 Enterprise edition installation. So go to start menu and click All Programs.
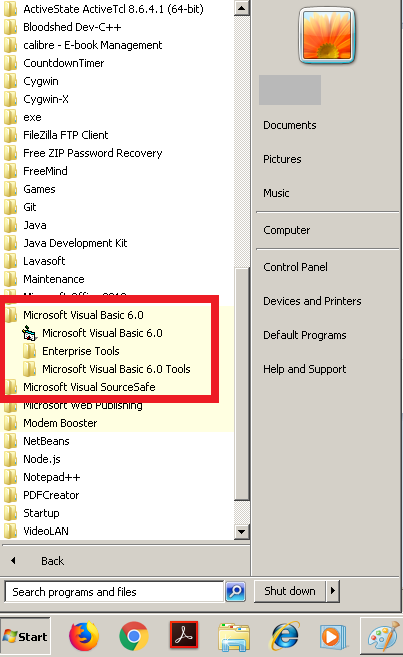
If you see the Visual Basic 6.0 directory entries in the start menu than it is installed successfully.
Common Issues
We have made a list of common issues with installing visual basic 6.0 on a windows computer.
- Program Compatibility
- Not enough disk space
- Very Low Screen Resolution
- Missing files
The most common issue with installing visual basic 6 on modern windows PC like windows 7 or 8 is program compatibility.
To resolve this issue, go to visual basic setup.exe file and right click and select properties.
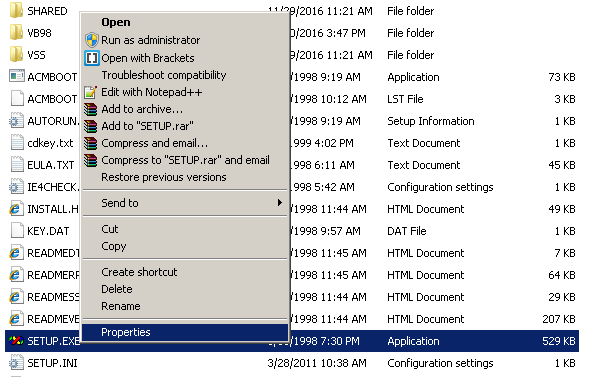
Once you opened the properties window, select the Compatibility tab and change the compatibility mode. You can change it to Windows XP sp3. The software will run as if it is running on windows XP sp3 operating system.
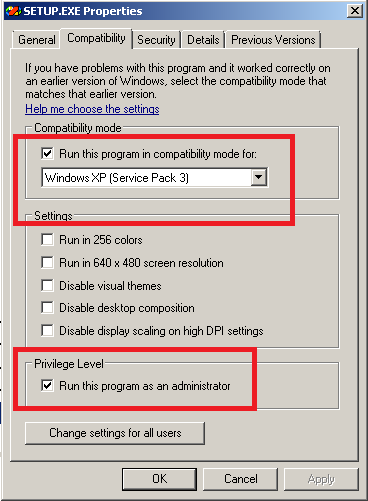
You must also change the administrative control, select “Run this program as an administrator” and click OK.
The second problem you face during installation is “Not enough disk space message” and a disk is due to many reasons. You may have too much junk files under the windows temp folder or there may be less disk space on your computer.
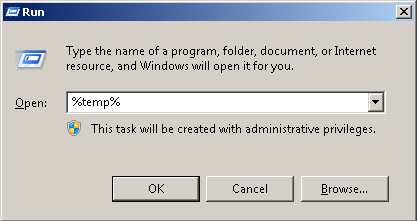
Go to Run dialog on your computer, type %temp% and click OK. You will see the windows as shown below with a lot of temporary files. You must delete all of these files immediately.
Note: Take a careful look at these files and if you find that something is important. Do not delete unless you have a backup.
The next problem is with the screen resolution. If you have a very low resolution it will not stop the installation, but the screen appears blurry and every item will be larger than necessary.
Lastly, the most common problem with visual basic 6 installations is “Missing Dll error” files. If you get those messages, you must download those files from internet and paste them in their respective locations or visit MSDN support forum and post your queries.
Bibliography
Microsoft. n.d. Visual Studio .NET Hardware Requirements. Accessed 5 4, 2018. https://msdn.microsoft.com/en-us/library/4c26cc39(v=vs.71).aspx.
VB 6.0 Programming Notes – Concepts, Examples, and Exam-Ready Revision
Visual Basic 6.0 Programming is a foundational subject in Computer Science and Information Technology (IT) curricula and a key requirement for university exams and competitive examinations.
On this page, you will find structured resources to learn VB 6.0 programming concepts, along with clear explanations, examples and exam-ready revision notes.
What Will You Learn
On this page you will find:
- Core VB 6.0 programming concepts explained clearly and systematically
- Exam-oriented explanations supported with relevant examples
- MCQ-based practice posts to test your understanding
- Detailed articles along with exam-ready revision PDFs
This Page is for:
- Computer science and IT students
- GATE and other competitive exam aspirants
- University exam preparation
- Self learners who want to revise VB 6.0 knowledge.
Topic Sections
Find VB 6.0 programming topics here.
(1) Introduction to Visual Basic 6.0
(2) VB6 Programming Environment
(3) VB6 Program Structure
(4) Data Types in VB6
(5) Variables and Constants
(6) Operators in VB6
(7) Control Statements
- Conditional Statements
- Looping Statements
(8) Arrays in VB6
(9) Procedures and Functions
(10) Strings and String Functions
(11) Date and Time Functions
(12) Error Handling
(13) Forms and Controls
(14) Menu and Dialog Boxes
(15) Graphics and Multimedia
(16) File Handling in VB6
(17) Database Connectivity
(18) Object-Oriented Programming in VB6
(19) ActiveX Controls and Components
(20) Packaging and Deployment
(21) VB 6 References
- Absolute value [ Abs () ]
- Cosine [ Cos () ]
- Exponential value [ Exp () ]
- Random Numbers [ Rnd () ]
- Square Root [ Sqrt () ]
- Logarithm value [ Log () ]
- Convert To Integer [ Int () ]
- Uppercase [ UCase () / LCase () ]
- String Length [ Len () ]
- Convert Strings [ StrConv () ]
- Compare Strings [ StrComp () ]
- VB 6 Handling Financial Data
- VB 6 Math Functions