Table of Contents
In the previous post, you learned that the conditional statements can change the direction or flow of the program. One type of conditional statement use if-else structure. Another type of conditional statement is called the switch-case statement.
A user input the choice from a given set of options and switch receives the input. The switch matches the input value to a number of cases and when a case matches, it executes the commands in that case.
For example.
Switch(choice)
{
    case 1: do something.....;
            break;
    case 2: do something.....;
            break; . . .
    default: do something.....;
}
The switch-case is preferred over if-else whenever you like to give a lot of choices to your users.
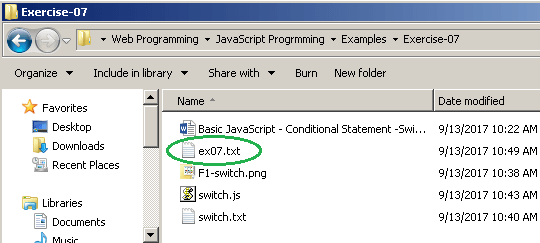
In this article, you will write a JavaScript using switch-case statements. Create a new HTML page called ex07.html and link the JavaScript file to the HTML page, then verify the output of the program in a browser.
JavaScript File with Switch-Case Statements
To create a new JavaScript file with switch-case statements follow the steps below.
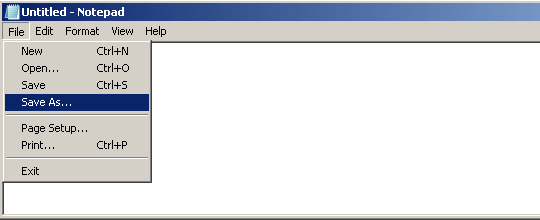
Step 1: Open Notepad and create a new file called switch.txt and save it.
Step 2: Insert the following JavaScript to the text file – switch.txt and save it as switch.js.
function s1()
{
var fruits = document.getElementById("myInput")
.value;
switch(fruits)
{
case "1":
document.write("" + "This is first choice!" + "");
break;
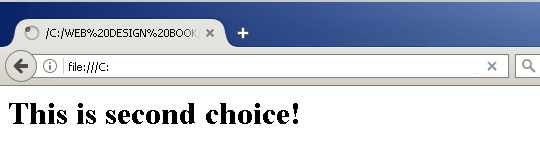
case "2":
document.write("" + "This is second choice!" + "");
break;
case "3":
document.write("" + "This is third choice!" + "");
break;
default:
document.write("" + "Wrong choice! Try again" + "");
}
}Note that if you should check your code before saving it, any typos can break the JavaScript file. Also, you must save your JavaScript file inside the Exercise-07 folder.
HTML Page
Now that you have created JavaScript file, it’s time to create an HTML page and link the JavaScript file to the HTML page. Follow the steps below to create the HTML page and save it under Exercise-07 folder.
Step 1: Open Notepad document and save it as ex07.txt inside the Exercise-07 folder.
Step 2: Open the notepad and insert the following HTML code.
<!DOCTYPE html>
<html>
<head>
<title> Basic JavaScript - Exercise 06 - Switch Case
</title>
</head>
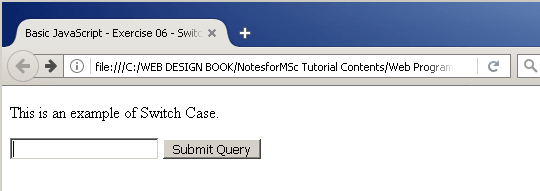
<body> <p> This is an example of Switch Case.</p>
<input id="myInput" type="text">
<input type="submit" onclick="s1()">
</body>
</html>Step 4: Add the following script between the head section to link the JavaScript file to the HTML page.
<script type="text/javascript" src="switch.js"></script>Step 5: Save the file- ex07.txt as ex07.html and close it.
Output of the HTML Page
When you open the ex07.html in a browser, you will get an input textbox and a submit button.
Enter 1, 2, or 3 as a choice and the result will be displayed on the screen.