In this post we will learn to create a simple calculator in Visual basic 6.0. It is a simple application project to help you learn Visual basic programming.
Background Information
The calculator application does simple arithmetic operations. You can construct an advanced calculator which need same kind of coding that we are going to use in this program, however, the computational logic may differ. The overall steps required to create the Calculator application is as follows.
- Design the interface of the calculator application.
- Name the buttons and textbox controls used in the application.
- Write VB6 codes for each controls without making any mistakes.
- Test the calculator application and make sure it works and there is no error of any kind.
- Add style to calculator by changing the background and color of buttons.
Names of Controls
Open your Microsoft Visual basic 6.0 software and under New Project, select Standard EXE and click Open.
Resize the Form for Calculator application appropriately and this can be done changing the width and the height property. Now add buttons and a single text box from Toolbox on the left sidebar of Visual basic editor window.
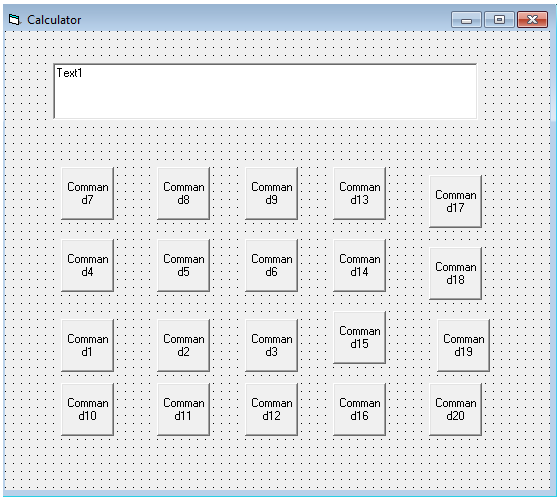
Change the width and the height property of Textbox control, so that it is aligned with the buttons. The original fonts are very small, change the font-size of the buttons to 16px and font-weight to bold.
Only one button in the above figure is of different size which is Command10 because it is for the number 0. Set the width of this button to 1630px.
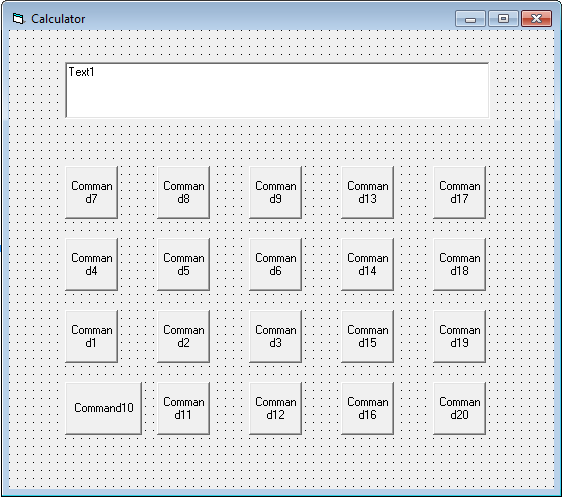
The buttons are not aligned properly – both horizontally and vertically. You can align the controls using Format tab of Visual basic editor menu bar.
Select top row of buttons and select Format tab > go to Align > select Tops. The buttons get aligned to top. Repeat the step for all rows of buttons.
Now we align the buttons column-wise.
Select the first column of buttons and click Format tab > go to Align > select Lefts. The column gets left aligned. Repeat the same step for each column.
Select top row of buttons and select Format tab > got to Horizontal Spacing > select Make Equal. The button space becomes equal between the first and the last button of the row. Repeat the step for all rows of buttons.
Select top row of buttons and select Format tab > go to Vertical Spacing > select Make Equal. The button space vertically becomes equal between the first and the last button of the column. Repeat the step for all column of buttons.
The naming convention of the buttons should be consistent.
For example, if it is label control and text for label is number 9, then the name of the label control should be “lblNine“. We follow this convention throughout the post.
Form Name
Next we start naming form controls by putting caption for our button and textbox controls, but before that name the form to frmCALC and set form caption to Calculator. Similarly, change the names and caption of all the other buttons and textbox.
For your convenience here is the list of controls and their names, caption values and other properties.
Buttons
Command1: btnOne
Caption: 1
Height: 800
Width: 800
Font: MS Sans Serif
Font-weight: Bold
Font-size: 24 px
Command2: cmdTwo
Caption: 2
Height: 800
Width: 800
Font: MS Sans Serif
Font-weight: Bold
Font-size: 24 px
Command3: cmdThree
Caption: 3
Height: 800
Width: 800
Font: MS Sans Serif
Font-weight: Bold
Font-size: 24px
Command4 : btnFour
Caption: 4
Height: 800
Width: 800
Font: MS Sans Serif
Font-weight: Bold
Font-size: 24px
Command5: cmdFive
Caption: 5
Height: 800
Width: 800
Font: MS Sans Serif
Font-weight: Bold
Font-size: 24px
Command6: cmdSix
Caption: 6
Height: 800
Width: 800
Font: MS Sans Serif
Font-weight: Bold
Font-size: 24px
Command7: cmdSeven
Caption: 7
Height: 800
Width: 800
Font: MS Sans Serif
Font-weight: Bold
Font-zise: 24px
Command8: cmdEight
Caption: 8
Height: 800
Width: 800
Font: MS Sans Serif
Font-weight: Bold
Font-size: 24px
Command9: cmdNine
Caption: 9
Height: 800
Width: 800
Font: MS Sans Serif
Font-weight: Bold
Font-size: 24px
Command0: cmdZero
Caption: 0
Height: 800
Width: 800
Font: MS Sans Serif
Font-weight: Bold
Font-size: 24px
Textbox
TextBox1: txtOutput
Height: 855
Width: 6375
Font: MS Sans Serif
Font-weight: Bold
Font-size: 18px
Alignment:  1-Right-Justify
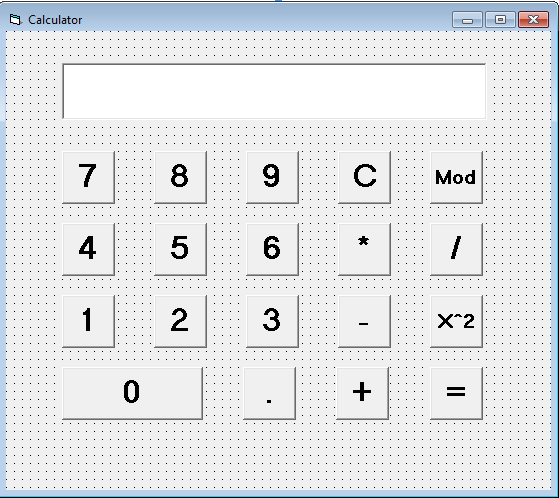
Note: Remove the default text from the TextBox1.
Now the Calculator should appear as in the following figure. Make correction if you did not get it right.
Coding for Calculator Application
Declare global variable at the top of the coding windows in VB and type the following code.
Dim sd As Integer

Dim operator As Integer

Dim result As Integer
cmdOne
Private Sub cmdOne_Click()

txtOutput = txtOutput & 1

End Sub
cmdTwo
Private Sub cmdTwo_Click()

txtOutput = txtOutput & 2

End Sub
cmdThree
Private Sub cmdThree_Click()

txtOutput = txtOutput & 3

End Sub
cmdFour
Private Sub cmdFour_Click()

txtOutput = txtOutput & 4

End Sub
cmdFive
Private Sub cmdFive_Click()

txtOutput = txtOutput & 5

End Sub
cmdSix
Private Sub cmdSix_Click()

txtOutput = txtOutput & 6

End Sub
cmdSeven
Private Sub cmdSeven_Click()

txtOutput = txtOutput & 7

End Sub
cmdEight
Private Sub cmdEight_Click()

txtOutput = txtOutput & 8

End Sub
cmdNine
Private Sub cmdNine_Click()

txtOutput = txtOutput & 9

End Sub
cmdZero
Private Sub cmdZero_Click()

txtOutput = txtOutput & 0

End Sub
Code for Operators
cmdPlus
Private Sub cmdZero_Click()

txtOutput = txtOutput & 0

End Sub
Private Sub cmdPlus_Click()

operator = 1

sd = txtOutput.Text

txtOutput.Text = ""

End Sub
cmdMinus
Private Sub cmdMinus_Click()

operator = 2

sd = txtOutput.Text

txtOutput.Text = ""

End Sub
cmdMul
Private Sub cmdMul_Click()

operator = 3

sd = txtOutput.Text

txtOutput.Text = ""

End Sub
cmdDivide
Private Sub cmdDivide_Click()

operator = 4

sd = txtOutput.Text

txtOutput.Text = ""

End Sub
cmdMod
Private Sub cmdMod_Click()

operator = 5

sd = txtOutput.Text

txtOutput.Text = ""

End Sub
cmdSquare
Private Sub cmdSquare_Click()

operator = 6

sd =

txtOutput.Text = ""

End Sub
cmdEquals
Private Sub cmdEQUALS_Click()

If operator = 1 Then

result = Val(num) + Val(txtOUTPUT.Text) txtOUTPUT.Text = result

ElseIf operator = 2 Then

result = Val(num) - Val(txtOUTPUT.Text) txtOUTPUT.Text = result

ElseIf operator = 3 Then

result = Val(num) * Val(txtOUTPUT.Text) txtOUTPUT.Text = result

ElseIf operator = 4 Then

result = Val(num) / Val(txtOUTPUT.Text) txtOUTPUT.Text = result

ElseIf operator = 5 Then

result = Val(num) Mod Val(txtOUTPUT.Text) txtOUTPUT.Text =

ElseIf operator = 6 Then

result = Val(num) * Val(num)

txtOUTPUT.Text = result

End If

End Sub
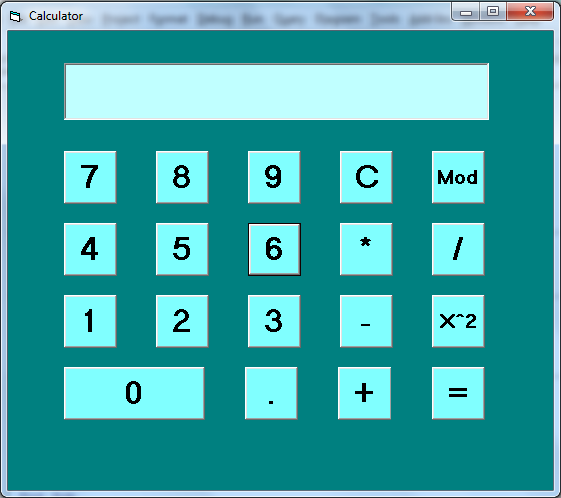
Adding Style information to Calculator Application
To add style and change the appearance of Calculator application, you can do a lot of things in Visual basic 6.0. We will change the appearance of Calculator by doing following
- Change the Background color of the Form.
- Change the Background color of the button and Textbox.
- Change the Fore-color of the Form and Form elements.