A Beginner’s Guide to Installing MySQL for Learning and Practice
To learn SQL, the best way is to practice different sets of commands and get hands on experience. If you have learned the SQL basics, then it is time for practice and reinforce your learning.
This is a simple beginner’s guide to help you install MySQL for learning and practice SQL commands. If you are not familiar with the SQL commands.
Visit our comprehensive guide on sql – SQL Basics Explained: Command, Queries, and Examples.
What is MySQL ?
MySQL is an open-source Relational Database Management System (RDBMS). It has all the features of a relational database model. The data is stored in database tables and it support SQL.
From a student’s perspective, you can download it free of cost and start practicing SQL immediately. However, you need:
- sufficient amount of disk space on your PC.
- memory
- network
- install necessary software dependencies for a successful installation.
This guide is strictly for Windows PC running Windows 7 or higher. For installation guides for Mac, Linux and other operating systems, visit MySQL installation guide.
Prerequisites to Install MySQL
There are many types of MySQL installer such as Enterprise Server, Standard Edition, and more. However, for learning purposes, we are going to install the MySQL 8.0.44 Community Edition under GPL License, which means it is open-source free software.
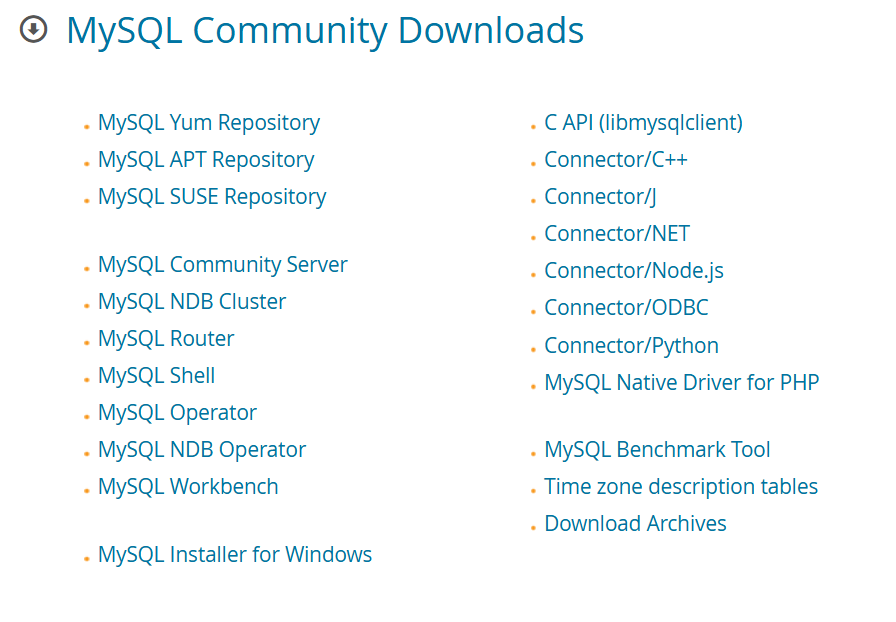
To download MySQL visit: MySQL Community Edition Download.

You must download the larger file and install on your Windows PC.
Before installation, make sure you meet the minimum requirements for installing MySQL server. Here is a list of prerequisites.
Hardware Requirements
There are three hardware requirements.
- CPU – A single core processor is enough for testing or practice, however, 2- 4 core processor is recommended for medium load.
- Memory – Minimum 2 GB RAM is required.
- Disk Space – Minimum 800 MB to 1 GB disk space is required.
- Networking – The SQL ports must be open inbound and outbound , if you are using Windows Firewall. Most of the time it is not a problem.
Software Requirements
On Windows, you need latest Visual C++ redistributable is present. The Microsoft Visual C++ redistribution package depends on the version of MySQL you are installing. The new version of MySQL 8.0 requires VC++ 2019 and above. The older version need VC++ 2015-2019.
Installing MySQL Community Server on Windows PC
The MySQL Community Version 8.0.44 and above, installation is divided into two parts:
- MySQL 8.0.44 Community Server Installation
- MySQL 8.0 Community Workbench
After installation, you need to connect your MySQL Workbench to the server in order to create databases and run SQL queries or commands.
MySQL 8.0.44 Community Server Installation
At the time of writing this post, MySQL 8.0.44 is the available version, and the installation for future version may not be different. In case, you are installing a higher version of MySQL, refer to the online documentation.
Step 1: Run the mysql-installer
After you have finished the download for MySQL Community Edition , run the MSI file. This will open the MySQL Installer window.
Step 2: Choose the setup type
The installer will give you options to install different types of setup. Since, we only want a simple server to create database and tables, choose “Server only“.
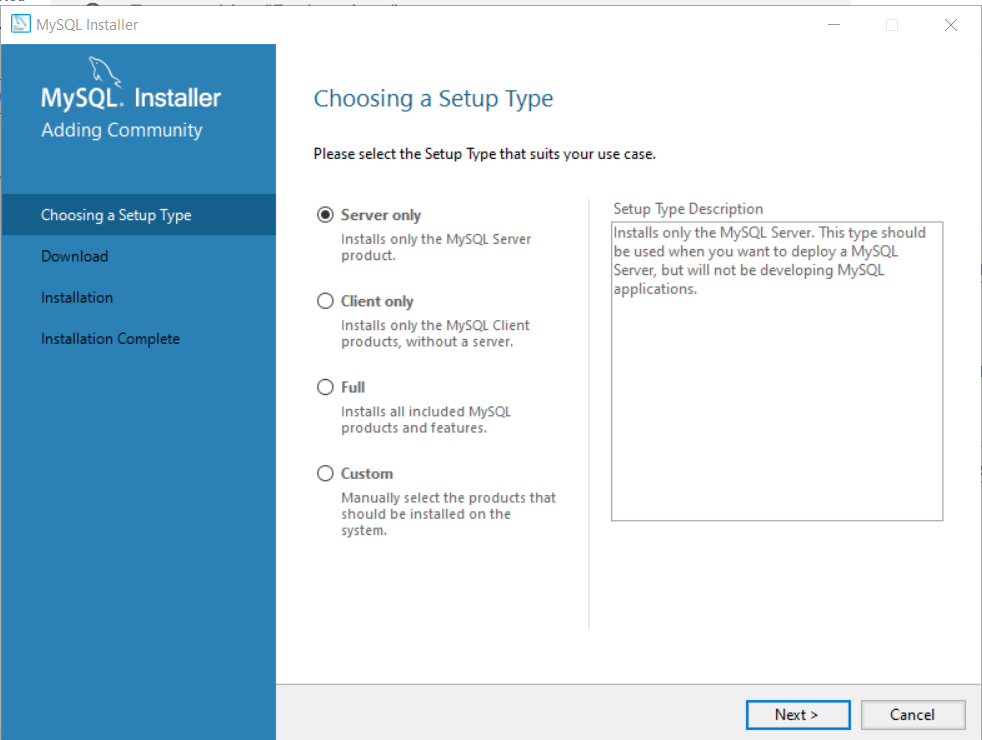
Click “Next” to continue installation.
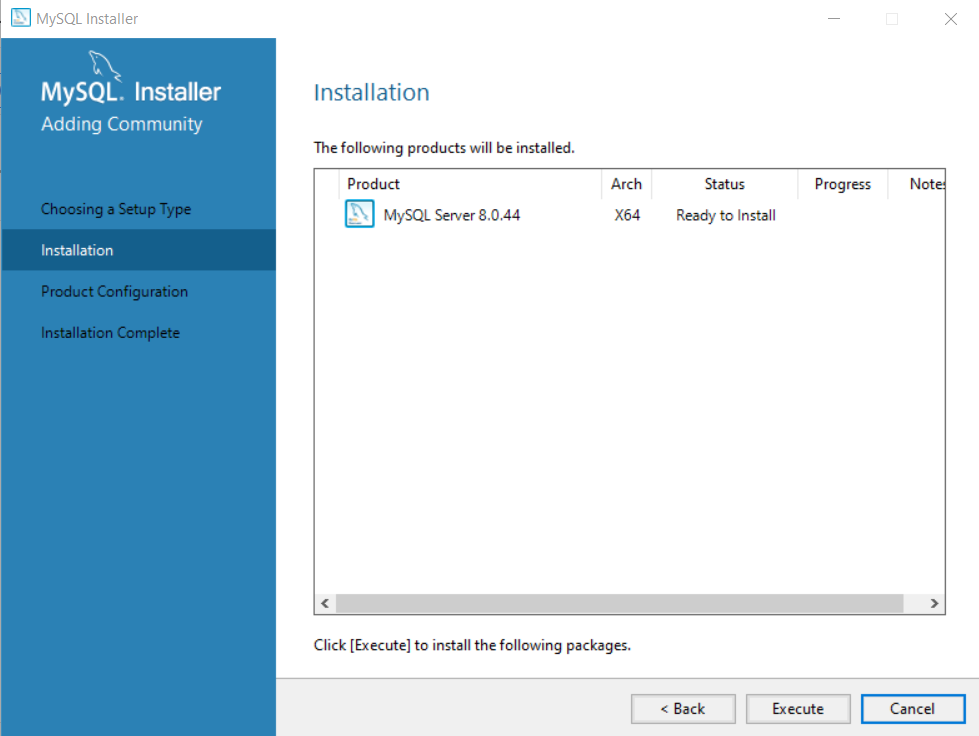
Step 3: Continue installation
In the next windows, there is nothing to do. The setup is only confirming the products you are going to install. We are only installing the server.
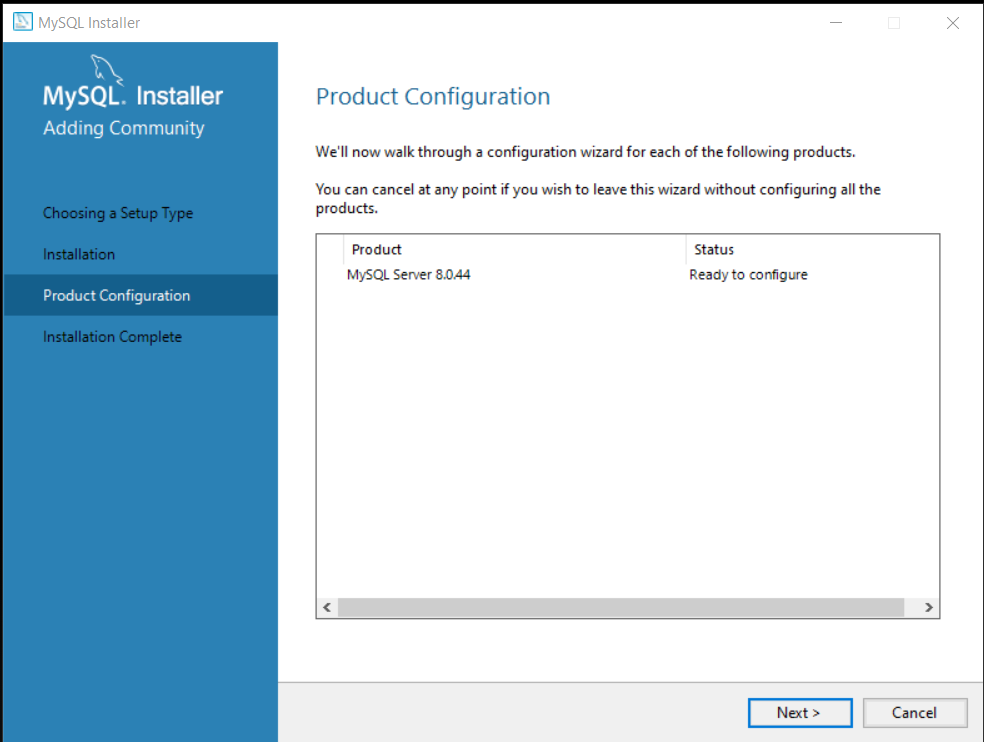
Step 4: Product Configuration Wizard
After installation is complete. You will see a ‘product configuration‘ window. The product configuration will show screens based on number of products, you have chosen to install.
In our case, we have only installed ‘MySQL server‘.
Step 5: Choose the Authentication Method.
In the Authentication Method, leave the default recommended setting, which is “Use Strong Password Encryption for Authentication”.
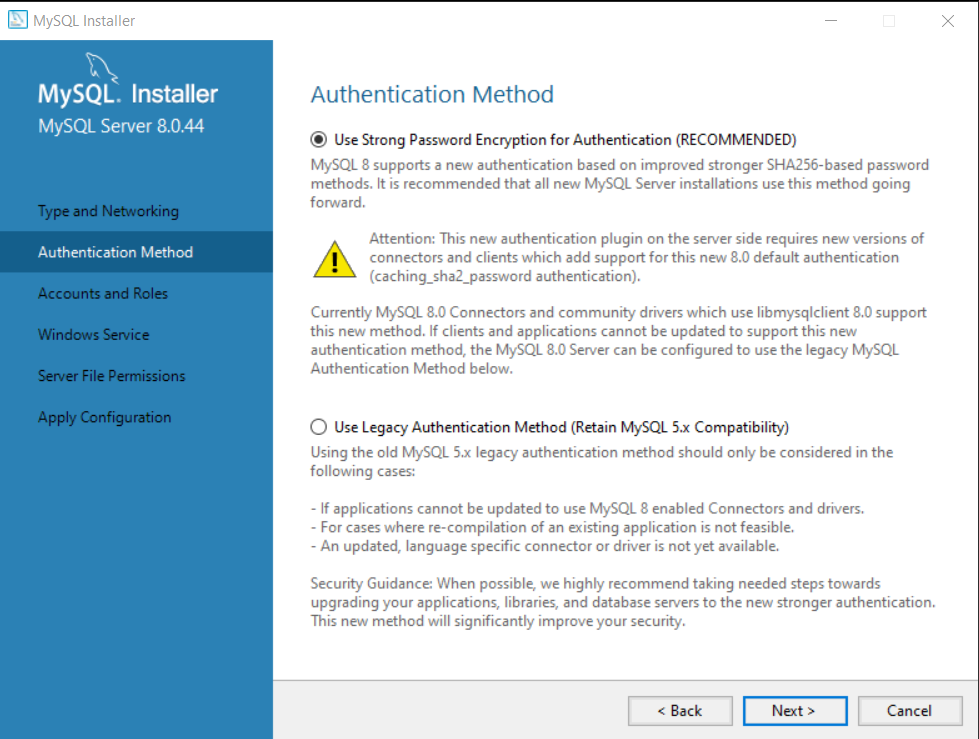
Click “Next” to continue.
Step 6: Set password under Accounts and Roles.
The default administrator user for MySQL is “root“. Set a strong password for this user in Accounts and Roles window. You can add more users in MySQL User Account section. You can also assign privileges to these new users based on their role.
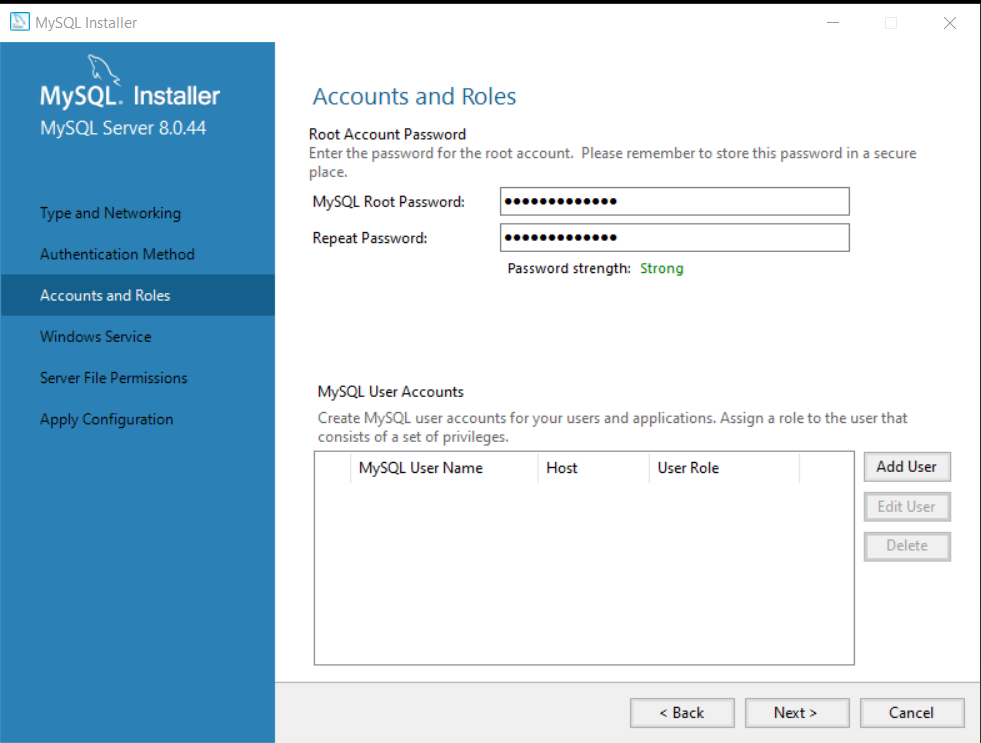
Important ! Note down the password because we will need it again, When we connect Workbench to the MySQL server.
Click on “Next” to continue configuration.
Step 7: Run MySQL Server as a Service.
In the next window, you don’t need to change anything. Make sure that the following options are selected:
- Configure MySQL Server as a Windows Service.
- Standard System Account
Leave the service name as it is. This will list MySQL Server as a a Windows service. You can confirm this after completing the installation.
Go to Start > Search > Run > type Services.msc and click Ok. The Services windows will pop up and SQL services are listed here.
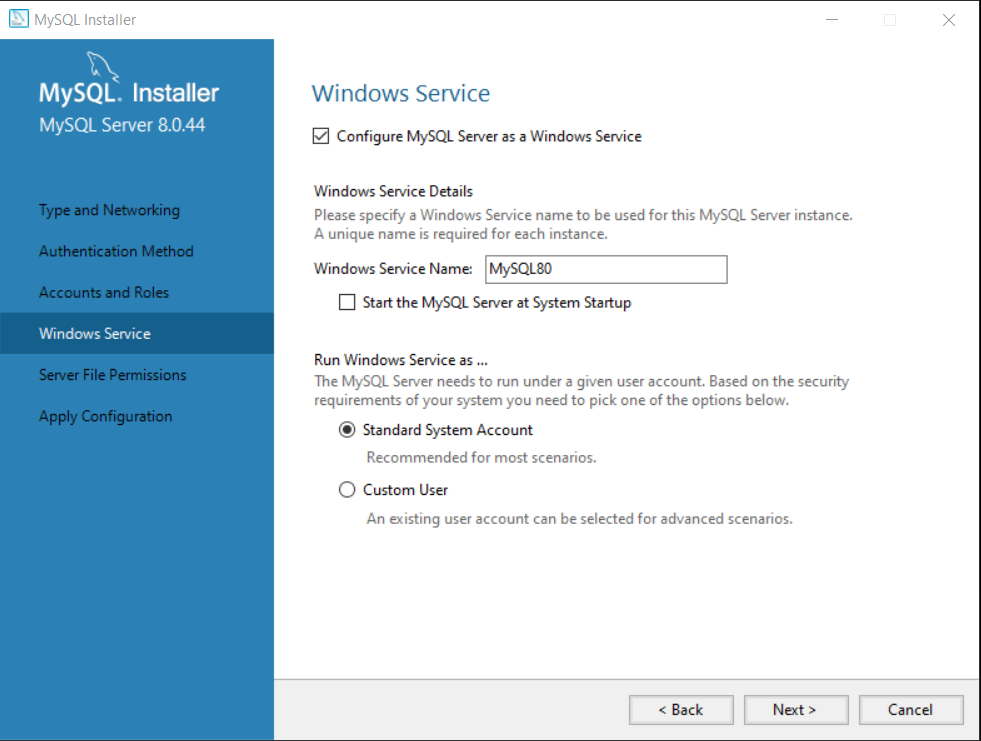
Click “Next” to continue.
Step 8: Set Server File Permissions
The MySQL service needs appropriate file permissions. To set the file permissions , make sure “Yes, grant full access to the user running Windows Service and the administrators group only” is selected.
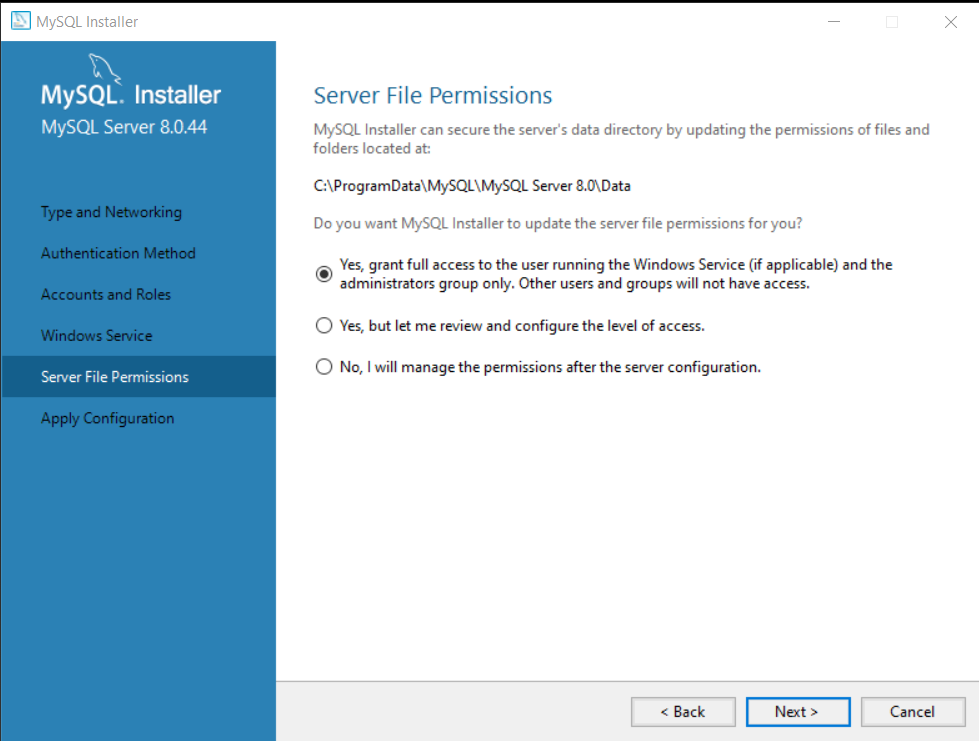
Click “Next” to continue.
Step 9: Apply Configuration
A page with list of configuration steps will show up. At this step, you only need to review the settings, if you are unsatisfied with any of these settings, click “Back” and adjust the settings.
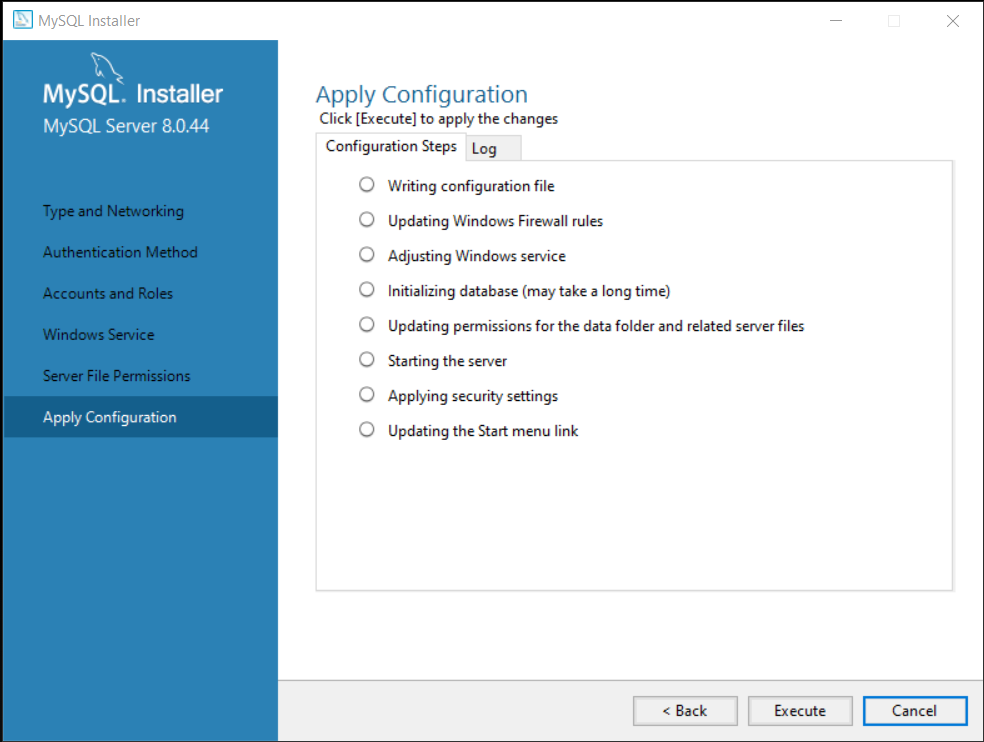
Click on “Execute” to continue.
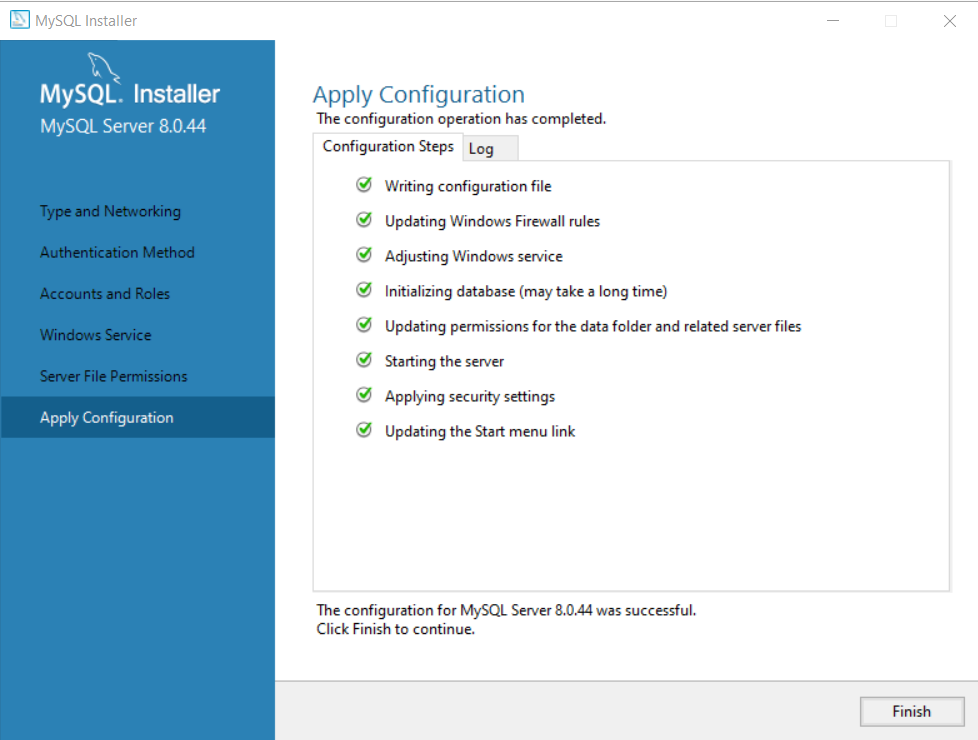
Step 10: Finish the Configuration.
After applying the configuration, click “Finish” to complete the installation.
Step 11: Complete the installation of MySQL Server.
We completed the configuration steps, and now you are back the installation Wizard. The Installation Wizard wants you to complete the installation. Click “Next” to complete the installation.
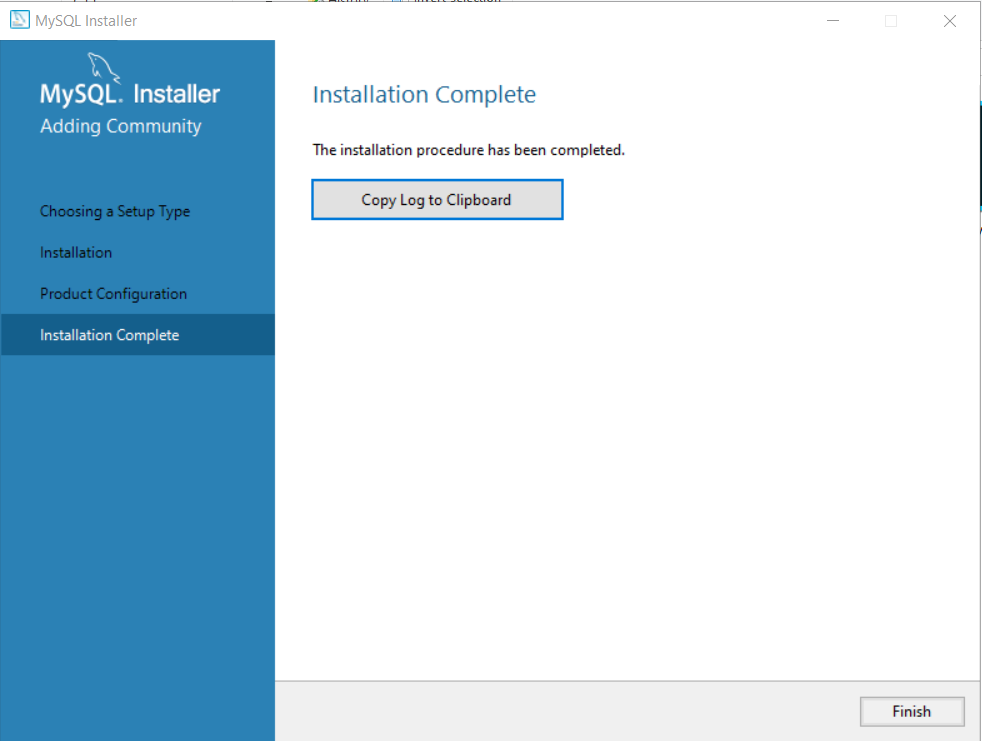
Click “Finish” to complete the installation.
The first part of MySQL Server installation is complete. In the second part, we will install the MySQL Workbench Community Version and connect it to the server.
MySQL Workbench Setup
In this section, we will complete the second part of our MySQL setup by installing MySQL Workbench. It is a software that allows you to connect to SQL server and manage databases.
The software and hardware requirement is similar to MySQL server and since, we are only installing for practice. You don’t need anything extra.
Step 1: Download the latest MySQL Community Workbench and run the setup.
Visit the following : MySQL Community Workbench.
Select the Workbench from available downloads.
Once downloaded, run setup for Workbench.
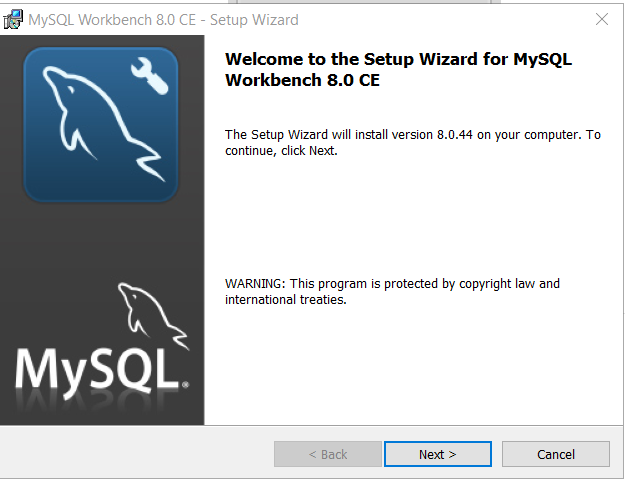
Click “Next” to continue.
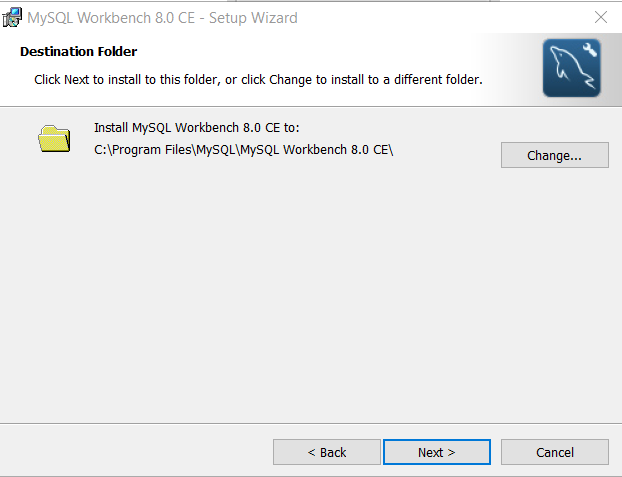
Step 2: Select the destination folder for Installation
The setup now ask you to select the destination folder for installation files. There is no need to change the location unless you are running out of disk space. In that case, you may want to install the Workbench on a different disk.
Click “Change” if you want to change the location.
Step 3: Select the features to Install.
The setup wizard want you to specify how you want the installation. You can go for a “Complete” setup, if disk space is not an issue.
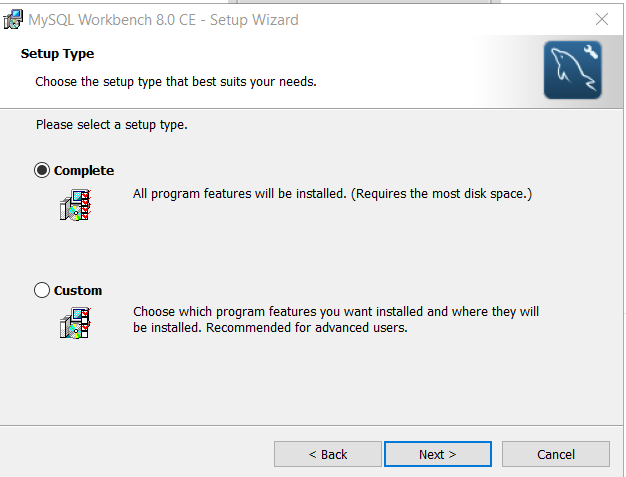
Click “Next” to continue installation.
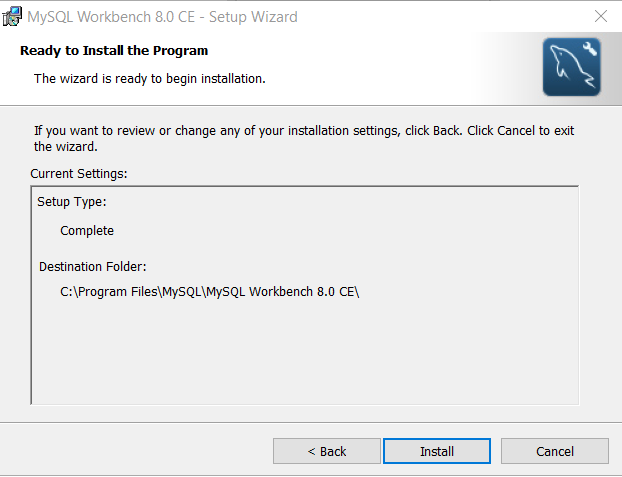
Step 4: Review Installation Setup and Install.
At this stage, you must review setup type and destination folder. If you are satisfied, click “Install“.
Step 5: Complete the setup
Once the setup is complete, click “Finish“.
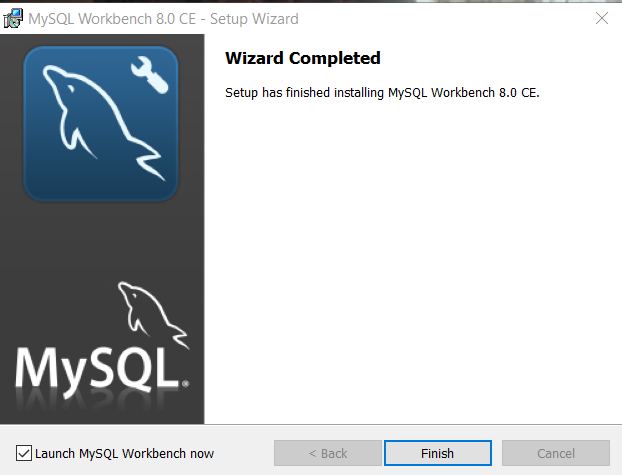
If you keep “Launch MySQL Workbench now” selected. The Workbench will open automatically when you click “Finish“.
Configuring MySQL Workbench for Practice
When you open Workbench, you get the following screen.

Currently, there is one Local Interface connection. You need to make a connection for yourself. That connection is used to create databases and run SQL queries.
To connect to a database, select Database > Connect to Database. You will get a dialog box for connection.
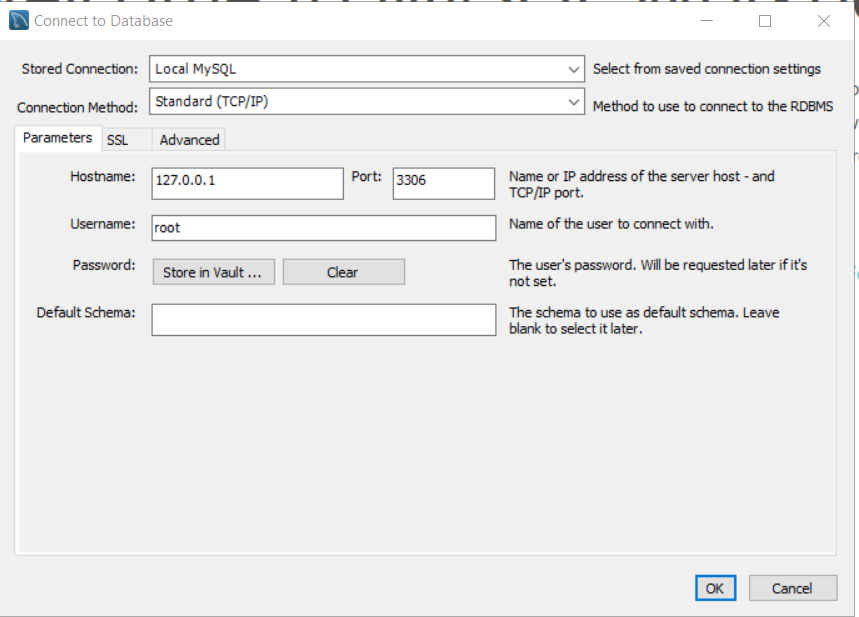
Stored Connection: Local MySQL
Connection Method: Standard TCP/IP
Hostname : 127.0.0.1 (The ipaddress of localhost)
Port: 3306 (Standard port for SQL)
Username: root
You need to provide password for root user. It is the same password that you entered during MySQL Server configuration.
Enter the password and click ok to connect. Once you are connected, write queries. It will work.
Summary
MySQL is open source software to manage relational databases (RDBMS). On Windows, you need 2-4 core processor, 2 GB RAM, and VC++ redistributable package.
You need to install two part software for MySQL on windows.
- Install MySQL Server
- Install MySQL Workbench
Lastly, you must make a connection from Workbench to SQL Server to run commands and queries.
ACID Properties in DBMS
ACID properties are related to transaction in database management systems (DBMS). Before we dive into the topic, understand the importance of database transaction. Transactions simulate real life events of an individual, organization or enterprise. The transactions are many read and write operation in database terms and without database transactions, there will not be any change in database system.
Download our ACID Properties Mini PDF — includes examples, diagrams, and MCQs for quick revision and self-assessment.
The four key ACID properties that ensure the reliability of database transactions. These properties are – Atomicity, Consistency, Isolation and Durability. I will discuss each of these properties in this article with examples.
“This mini-post is a condensed version of our detailed guide on Transaction Processing in DBMS: Concepts, Properties and Examples“.
What is a Transaction in DBMS ?
Real life events are transactions. You transfer money to another account is a transaction. But, you take small individual steps to complete a transaction such as opening account page, selecting the recipient , adding bank details and account number , followed by entering desired amount that you want to send and finally send operation. All of these operations are part of the same transaction. Formally, a transaction represents a real life event broken into a single logical unit of work which consists of a sequence of operations.
We identify three things from the definition.
- Transaction represents some real life event.
- It is shown as one logical unit of work eg. transferring money
- It has a sequence of operations
Transaction States and ACID Properties
Let take two examples to understand how transaction works.
- Transferring Rs 15000 from Krishna to Ram.
- Online Ticket Booking
Each of these transaction goes through different states – Active state, Partially-Committed state, Committed state, if the transaction fails before the Committed state, it will enter a Failed state, then Abort state to rollback changes and final state for Committed or Failed transaction is a Terminated state where it is removed from the system.
Example 1: Transferring Rs 15000 from Krishna to Ram.
- Rs 15000 is debited from Krishna’s account. (Active state)
- All operations of transaction is completed, but Rs 15000 is only changed in buffer, not yet credited to Ram’s account. (Partially-Committed state)
- All operation done and changes are updated in database permanently. (Committed state)
- Suppose power failed, transaction entered failed state. (Failed state)
- Roll back the changes means recover Rs 15000 to Krishna’s account. (Abort state)
- Nothing to do more, remove the transaction from the system. (Terminated state)
Example 2: Online Airline Ticket Booking
- Open the airline website and enter travellers details or login.( Active state)
- Select source and destination City to travel. ( Active state)
- Select available flight. (Active state)
- Select number of seats. (Active state)
- Select avalable payment method. (Active state)
- Use “Pay now” button to pay. ( Partially-committed state)
- Payment is done and tickets are booked. (Committed state)
- If the system crashed, you cannot book the tickets. (Failed state)
- All changes are rollbacked. (Abort state)
- System remove the transaction whether it is committed or failed.
ACID Properties in DBMS
To understand the ACID properties, we will try to use the examples discussed in the previous section. As mentioned earlier, ACID property ensure the reliability of DBMS transactions. Four ACID properties are:
- Atomicity
- Consistency
- Isolation
- Durability
I will explain each of these in detail.
Atomicity
Atomicity means all or nothng. Atomicity property ensures that a reliable transaction must complete all its operations completely or do nothing at all.
In our example of money transfer, Krishna’s account must be debited with Rs 15000 and Ram’s account is credited with the same amount. If transaction enters a failed state, the atomicity property is violated and a roll back by DBMS recovery ensures that database is not updated.
In our example 2 of airline ticket booking, all operations including payment for the seats must be completed, before booking is confirmed. In case, the system crashes, no change is reflected in the airline database using roll back operations.
Consistency
Consistency means database should start transaction with a valid consistent state to another valid consistent state. The updates or changes to the database should not leave database in an incosistent state.
From our example of money transfer, a debit of Rs 15000 from Krishna’s account and a credit of Rs 15000 to Ram’s account must be updated permanently and system should reflect these changes everywhere, thus preserving the integrity constraint of the database. In another word, a consistent database reflect new information after a successful transaction.
If book a seat with airline, then the seat must not be “Available” for others and database must show this information consistently.
Isolation
Modern database systems are a multi-user system. Users may access database concurrently. Isolation means that these concurrent transactions must no interfere with each other. Most common method employed is a lock based protocol.
Each transaction is run in isolation and these reliable transactions do not cause problem with other concurrent transaction. It gurantees that the database will be in consistent state, no matter what happens to these transactions. If there is a conflict then a rollback will resolve it. Concurrency is outside the scope of this article.
In our example of money transfer, the two transactions trying to debit Krishna’s account, then only one transaction will be given preference and be allowed to make changes.
The same thing happens in the case of Airline ticket booking, two travellers trying to book ticket simultenously, one transaction has to wait until the first transaction comlete the booking proess or fail to do so.
Durability
Durability means once the transaction has finished all operations and stored changes to the database, its effects are permanent and a power failure, system crash, or errors cannot change the information.
Once Rs 15000 debited from Krishna’s account and credited to Ram’s account, its stays with database permanently until deleted or updated or database is destroyed. Similarly, booked ticket is reserved for a passenger, until a new transaction is initiated to cancel the existing ticket or flight is gone.
(You can also download the ACID Properties Mini PDF with examples, diagrams, and MCQs — perfect for quick revision and self-assessment.)
If you think about transaction states , then Consistent state is the mark of durability for a transaction.

Why ACID Properties are Critical ?
The ACID properties are mission critical in situations where transaction involves money, sensitive information or of high-value. The ACID properties ensure reliability, accuracy and adhere to database integrity constraints.
For example, banking transactions, loan processing, updates of account information requires to apply Atomicity and Consistency properties.
Take our example of Airline ticket booking, many travelers may be booking at the same time, this is concurrency , so Isolation and durability of booking information is the priority. Also, seats must be booked properly and their status updated after booking. The Atomicity is also important inthe ticket booking system.
Summary
ACID properties make a transaction accurate, reliable and that which respect integrity constraints. Here is a summary of ACID properties.
| Property Name | Description |
| Atomicity | Transaction complete all operations or nothing at all. |
| Consistency | Transaction must start with a consistent database and leave it in a consistent state. |
| Isolation | In concurrent access, each transaction run separately and do not interfere with other transactions. |
| Durability | One transaction is committed, the information is permanently stored in database. |
“For a complete explanation, examples, and practice questions, see the full article: Transaction Processing in DBMS.”
Don’t forget to download the ACID Properties Mini PDF for a quick review and self-assessment.
DBMS Transaction States: A Simple Guide for Students
A simple real life event is a transaction in DBMS. In DBMS, a transaction represents a logical unit of work that simulates some real life event of an individual, organization, or an enterprise. The logical unit of work is sub-divided into operations and executed one-by-one until the transaction is completed.
The operations are database operations like READ, WRITE, UPDATE and DELETE. In a small database, there is no use of transaction processing because of simplicity, however, a huge database has concurrent users trying to execute multiple transactions at the same time, and it where the DBMS emply transaction processing system.
Introduction to Transaction states in DBMS
Every transaction must complete successfully , and after the changes in database (committed) , it must leave database in consistent stable state. If there is a failure, the transaction must abort and rollback the changes. It’s all or nothing. This implies that a transaction always try to leave database in consistent state.
Download our Transaction States Concept Explainer PDF — includes clear notes, diagrams, and MCQs for quick self-assessment.
To ensure the reliability of transaction and maintaining the consistency of database, all transactions go through different states from start to finish. It ensures that update anomalies , duplicates entries does not happen and other database integrity constraints are not violated. The will in turn maintain the consistent state of the database regardless of the success or failure of transactions.
“This mini-post is a condensed version of our detailed guide on Transaction Processing in DBMS: Concepts, Properties and Examples“.
The Six Transaction States
Every transaction goes through the six transaction states mentioned below.
- Active State
- Partially-Committed State
- Committed State
- Failed State
- Abort State
- Terminated State
Active State
The active state is the start or beginning of a transaction. It is also a state in which operations – READ, WRITE , UPDATE and DELETE are carried out, yet all operations are not finished yet. If all operations are successful transaction can go to partially-committed state or if there is a failure like power outage, system crash, etc , it ca go to failed state.
For example : Transaction – Online Shopping
All activities before makig payment are Active state for online shopping transaction. Let’s list them.
- Open shopping website
- Selecting items for purchase
- Adding items to cart
- Addig shippijng address and contact details
- Clicking “Proceed to Checkout “
- Selecting a payment method
Before you press that “Pay now” button, all activities come under active state.
Partially Committed State
The active state is where you perform the last operation and about to commit you changes permanently to database. Partially-committed state is a state where you have completed all operations and make your changes in a buffer memory , not yet committed.
For example: Transaction – Online Shopping
- Press that “Pay Now” button.
All activities after Active state and before Committed state are in Partially-Committed State. Let’s list them from our Online Shopping example.
When you press that pay now button , all operations of the transaction is completed and you are ready to commit to the database.
Committed State
The Committed state is a state of completion of the transaction. The changes are permanently stored in the database. It cannot be undone even after a failure and mark a successful transaction.
For example: All operations after Partially-Committd state before a Failed state is Committed State. There is a chance that during the process of committing changes database or system could fail. Then the transaction enter failed state instead of committed state.
For example : Transaction – Online Shopping
- You pay the amount using selected payment method.
After the payment , your purchase is completed and cannot be undone because amount is deducted from your bank account. This means your transaction is committed and successful.
Failed State
In database management system (DBMS) , a Failed State is a state which means the transaction could not continue its execution due to system error , power failure or violation of integrity constraints. or example: Transaction – Online Shopping
- You lost internet trying to pay for the purchase.
There are two ways to enter a Failed state.
- from active state
- from partially-committed state
In all cases, the transaction cannot proceed to a Committed state, instead it goes to an Abort state.
Abort State
In the Abort state, all the changes are rolled back. If a transaction enters Failed state , and suppose the problem is fixed, that does not mean a Failed state goes to Consistent state automatically. Instead, a roll back is initiated and the transaction is marked to be in Aborted state.
For example: Transaction – Online Shopping
- Because you lose internet connection and cannot pay. The roll back operation is to cancel the purchase and send you back to the cart. Any amount deducted from your bank account will be refunded. The DBMS roll back the amount deducted from you and database be still in a consistent state.
Two thinks can happen after a rollback (Abort state).
- User can restart the transaction.
- System can terminate the transaction permanently.
Terminated State
Regardless of the outcome of the transaction, a successful or a failed transaction is terminated. It means it is removed from the system completely. It means DBMS has nothing more to do.
In our example transaction, Online Shopping
- You were able to pay for the purchase and completed transaction committed to database. DBMS mark this transaction as terminated.
- You entered a failed state because of failed internet connection while paying for the purchase online, changes made so far is rollbacked(Abort state). The DBMS mark this as terminated because there is nothing to do unless problem is fixed.
These six transaction states complete the life cycle of a DBMS transaction.
(You can also download the Transaction States Mini PDF with examples, diagrams, and MCQs — perfect for quick revision.)
Transaction States Diagram in DBMS
The simple diagram for six states diagram is given below;

Summary
Transaction represents some real life events of an enterprise or organization. A transaction is logical unit of works divided into several read/write operations. When a transaction begins it must complete successfully or roll back changes in case of failure to leave the database in a consistent stable state.
| Transaction State | Description |
| Active State | Transaction begin executing operations but not yet finished. |
| Partially-Committed State | Transaction finished all operations and ready to commit. |
| Committed State | Transaction has stored all information to the database permanently. |
| Failed State | Transaction unable to proceed due to error or failure. |
| Abort State | Transaction has completed the roll back for changes. |
| Terminated State | Transaction committed or failed , must be removed from the system (terminated). |
“For a complete explanation, examples, and practice questions, see the full article: Transaction Processing in DBMS.”
👉 Don’t forget to download the Transaction States Mini PDF for quick revision and self-assessment.
How to create a local repository with Git
As a software developer or a upcoming developer, knowledge of Git and GitHub is most essential skill. This article will help you get started if you already installed and configured Git on your computer. Also, I assume you are familiar with command-line tools and know how to use them. We will setup a local repository using Git and let you explore the version control system (VCS) on your own.
Note that this article is intended for beginners only. If you feel that it’s too easy for you, its still worth reviewing the steps in this article.
About Git and GitHub
Before I start with the main topic, let’s understand a bit about Git and GitHub. Git is a software called Version Control System(VCS). It simply keep track of all the changes in your project. It will store different versions of your code and help restore them efficiently. That’s why Git is one of the most popular way to manage software projects.
How Git works
Git has most of the abilities of other version control systems like Centralized Version Control Systems(CVCSs) and Local Version Control Systems(LVCSs).
The Centralize Version Control depends on a single server that keeps your project (a repository) and all its developers stay connected and synced for modifying, updating the project files.
All is fine with CVCSs until, you lose connection to the central server. You cannot work on files locally unless a connection is established between the developer and the CVCS. Not only that sometimes connection to the central server is slow which creates latency in updating information.
The LVCS gives you lot of freedom to work on projects, but real challenges are merging files, inconsistency and mistakes or accidents leading to mismanagement and confusion.
Git on the other hand, is both local system and a central system with lot of security and consistency in storing data. That’s why Git is called Distributed Version Control System(DVCS). Any change in the project will be shared with all the people working on the project and stay up to date. GitHub acts like a centralized server to create repositories and share with anyone. Yet, every developer connected to Git repository is able to work independently.
Difference between Git and Other VCSs
The main difference between Git other VCSs like Subversion(a centralized version control system) , and RCS(a local version control system) is the way it stores data. The Subversion and RCS store data in files and changes as revisions which are also documents.
Git saves changes to the files as Snapshots. Whenever you make changes to project file and save it, and perform commit, a snapshot and a reference to snapshot is created.
Suppose you created a snapshot by making change to a file a.txt and committing it. Later you made another change and something went wrong, you can use the previous commit(snapshot) to restore your file – a.txt.
All operation on Git are local and not like central system which has connection problems, latency issues. Git allow you to continue working on the project and update later. Git also allow you to clone a remote repository like GitHub to your computer and work on those files independently.
What is Git workflow
A typical Git workflow consists of three stages.
- Modified – In this stage you create or change or update existing project files.
- Staged – You finished modifications and set the files for your next commit.
- Committed – You have saved the project files and Git snapshot is ready.
All the three stages have their own command, and you can check the status with command git status and git log. Once all changes are committed , you can even sync it with the remote repository with git push or git push origin main.
Setting up local repository using Git
You can make a git repository on your computer – Windows, Linux and Mac. So, there are two ways to setup local Git repository.
- Use existing folder as Git repository.
- Clone a remote repository.
Let’s create a local repository on your computer. The method varies depending on the system you are using. We leave the cloning part for another article.
Setting up local repository in Windows
Before we begin, I assume you have git installed and configured it. We are going to use command prompt on Windows. For this experiment, I am using a Windows 10 system.
To setup a local git repository on Windows computer, first you need to make a project folder , then make that project folder your git repository. Finally, test the git workflow by creating a new file to make sure everything is working file.
Step 1: Make a project directory
This project directory will be your local Git repository.
Go to Search, and type cmd and when command prompt shows up , open it. When you open command prompt on Windows, it shows you the default path: C:\Users\<your username. You can change the default current directory by typing cd\. This will take you to C drive of your computer.
Your current working directory should be your C: directory or partition , if you have more than one partition, you can change the working directory any other partition or any other folder using the cd command. Once you are in C: directory, create a new project folder using following command.
mkdir myGitProject myGitProject is the folder name.
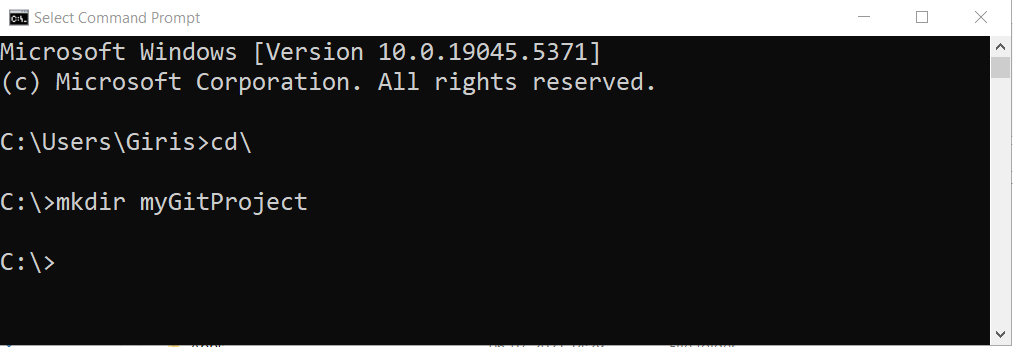
You can open the C: drive and check if there is a myGitProject folder, if it is not visible, make sure you refresh the Windows.
Step 2: Change the current directory to myGitProject
Use the following command to change your current working directory to myGitProject folder. Before you change the directory, make sure that you are in C: directory.
cd gitGitProject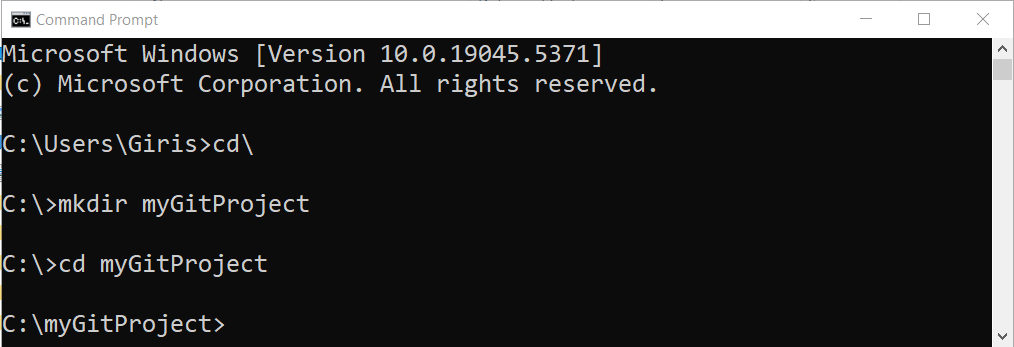
Step 3: Create local git directory
Its time to convert you project folder into a git repository by running following command.
git init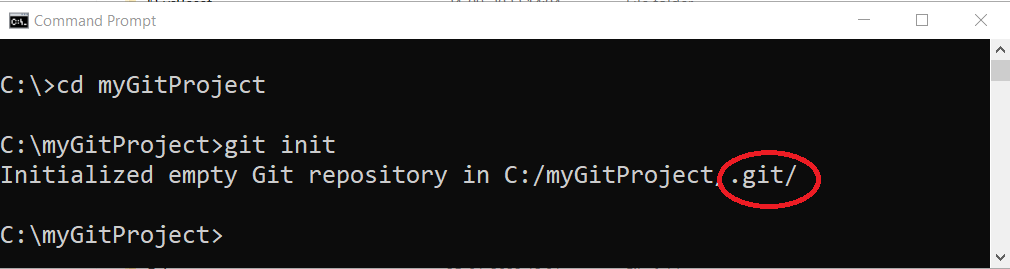
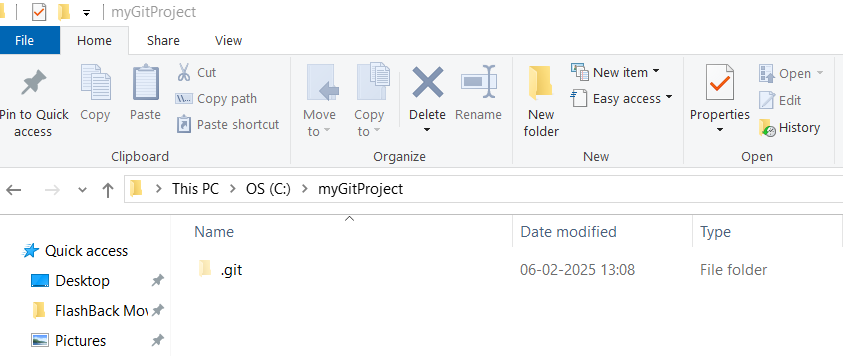
After the git init command , empty git repository is created inside myGitProject folder. You can go to C:\myGitProhect folder and verify that a .git folder exists. This is your local git repository.
You local git repository is empty, there is nothing to test whether your git is working. Next few steps are to test the Git workflow in the new repository.
Testing the Git workflow
Step 4: Create a new file
Create a new text file using Notepad or any text editor of your liking, make sure you save it as a .txt file in the myGitProject directory. You can call this file anything, here I am using test-file.txt as file name.
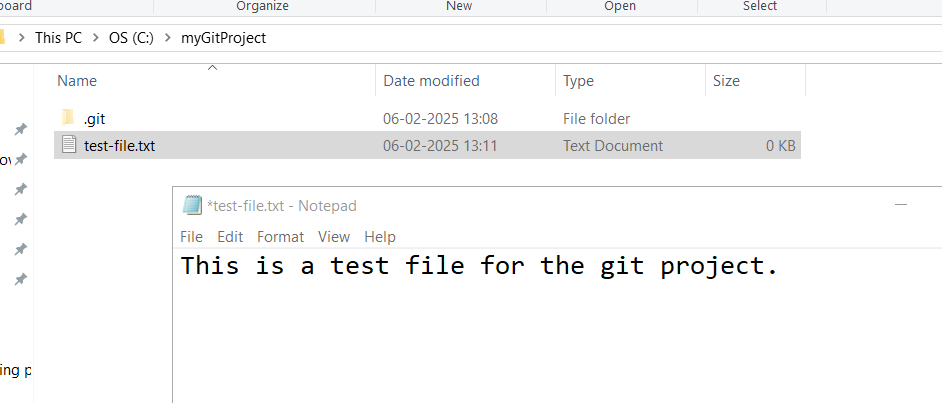
You must add some content to this test file and save it. This is your first project file which we are going to commit using Git. After modifying the test file, you have completed the first stage of Git workflow.
Step 5: Add the test file to staging area
The second stage in Git workflow is to add the modified test file to Git staging area. Once file is staged, it is ready to commit. Use following command to add the test file.
git add <your file-name.txt> Note that the filename should not contain any space or invalid character.

You will not receive any confirmation for the git add command. To confirm that the staging was successful, use git status command which will return the current status of your working directory and staging area.
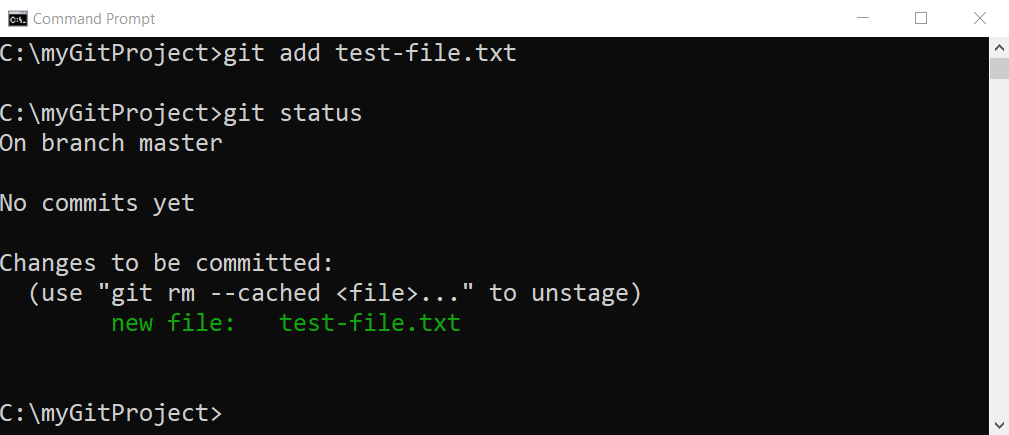
The image shows new file: test-file.txt and confirm that the staging is successful.
Step 6: Commit your staged file and check log for confirmation
The last state of git workflow is to commit the staged file and as soon as you commit , Git saves the staged changes and creates a snapshot of the project files. In future, you can return to this snapshot if something goes wrong.
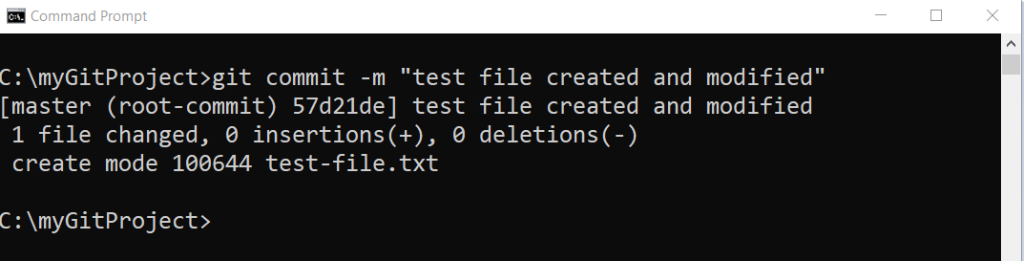
To commit your staged changes, you must run git commit command.
git commit -m "some description of changes made"The -m is commit message and it should be short description about the changes made to the project files. You can write a robust git commit message , however, we keep the discussion for future articles. The message should be written in such a way, that it is help for you or others should anyone visit the snapshot later.
To view your git commit history, run the following command.
git commit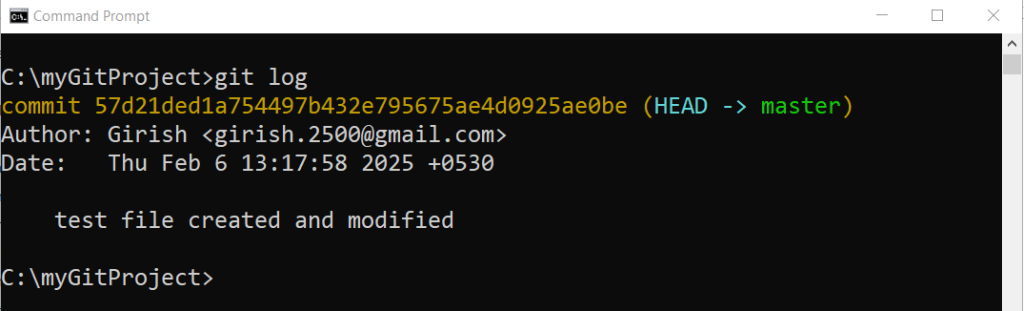
Setting up Git repository in Linux
Some of you might be using a Linux computer. Here is step by step instructions to set up a local git repository on a Linux computer. For this experiment, I am using Xubuntu release 24.04 , Noble Numbat. The process is similar to how we setup local repository on Windows.
Step 1: Open Terminal and create a new directory for git repository
All the operations to setup a Git repository should be done from a terminal. It is faster, if you this way. First open the Linux terminal using
- CTRL + ALT + T on your keyboard, you should press these three keys at the same time.
- Use the Dash bar and click Terminal, which will open the Linux terminal.
There are several other ways to open a terminal on Linux. Choose the easiest one and once the terminal is open make sure you are in the home directory by typing the command pwd, this command will show you path to your home directory. There are two types of home directory you may find in Linux;
- /home/username
- /users/username
After running pwd command your home directory should look like one of the options given above. If you are not in home directory, use command cd ~ which will reset the terminal to your home directory, no matter where your current location is in the directory system. The home directory will be your current working directory.
From the home directory, create a new folder with following command:
mkdir projectThe name “project” is your new repository name.

Once you execute the command, there is no response. Unlike windows, you can use shell to verify the existence of the new directory by running ls command. The image above shows how I created a project directory successfully. You can create the project directory with any valid name, its totally up to you.
Step 2: Make project directory your current directory
Make the project directory created in previous step your current working directory.
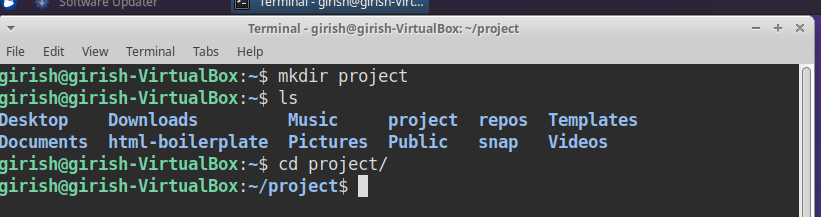
Use cd project/ command at the terminal. You will not get any response unless you are making some mistake such as incorrect command, wrong directory name etc.
Step 3: Make the current directory project as your local git repository
Its time to make your current directory ‘project’ to a git repository. Use the following command:
git initThe command will initialize the git repository by creating a ,git folder. However, running ls command in the terminal will not show anything. The new .git directory is a hidden directory and to show this folder, you must run ls -a which will display all files including hidden files and directories.

If you see a .git repository, then your local git repository is created successfully, we must now, test it.
Step 4: Make a text file and modify it
We must create some file with text, to test the git workflow – modify, staged and commit. This procedure is common for Windows and Linux, but there is still difference in how things are done both systems.
You should use terminal to create a text file in Linux using following command.
touch testfile.txt The touch command will create an empty text file instantly, while the ‘testfile.txt’ is the name of the file with extension.

You should run the ls command to verify the existence of file – testfile.txt. Open the file with following command:
nano testfile.txt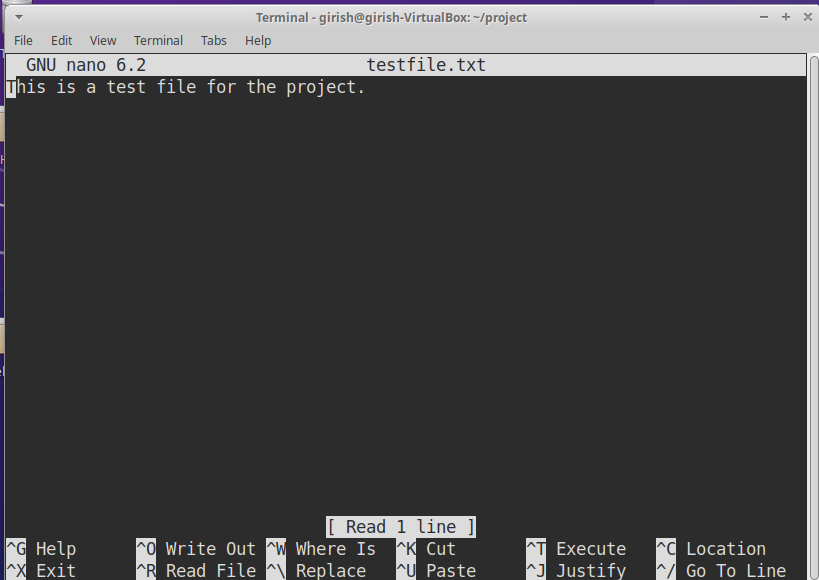
The command nano is the name of the text editor using which you wish to open the testfile.txt. Once the file is open, add some content and save the file by pressing CTRL + o on your keyboard.
Step 5: Add test file to staging area
Its time to add the file in staging area which is the second step in git workflow. Use the following command.
git add testfile.txt 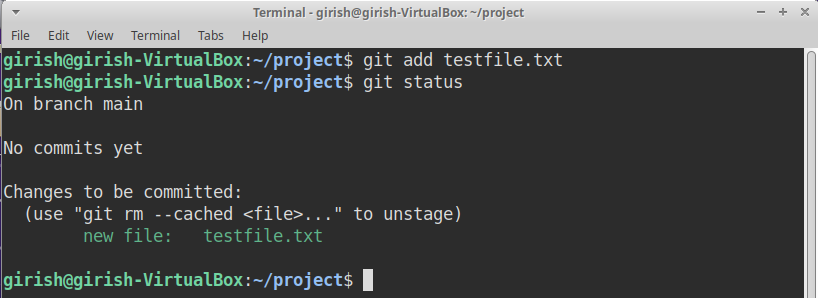
If you have added the testfile.txt to the staging area, the second step of Git workflow is completed. You can check the status of the file using git status command.
Step 6: Commit your changes to Git
The final step in the Git workflow is to commit your staged file. The command to commit in Git is given below:
git commit -m The -m is git message and it is recorded with git history.

Note that ‘Testfile modified’ is the git message that I wrote with the commit command. To check the commit history, use git log command.
Setting Git repository on Mac
The process of creating a local Git repository in Mac is similar to Linux. I have listed the steps below.
- Go to Finder, open /Applications/Utilities folder, and double-click Terminal or you can go to Launchpad icon in Dock, and then type Terminal on the top of the Launchpad screen.
- In the terminal, make a project directory using
mkdir gitproject. - Make gitproject your current directory using
cd gitproject. - Turn gitproject into Git repository using git init command.
- Test the Git workflow by creating, modifying, staging and committing to Git database.
Summary
In this article, you learned about Git as a Version Control System(VCS) and its workflow. The initial local Git repository is must to start using Git. Setting up git for different operating systems require different steps. You learned how to setup Git on Windows, Linux and Mac computer.
Follow the steps carefully to complete this experiment on your computer. You can always refer to internet if any concept or steps are not clear.
How to Convert Markdown Documents to PDF
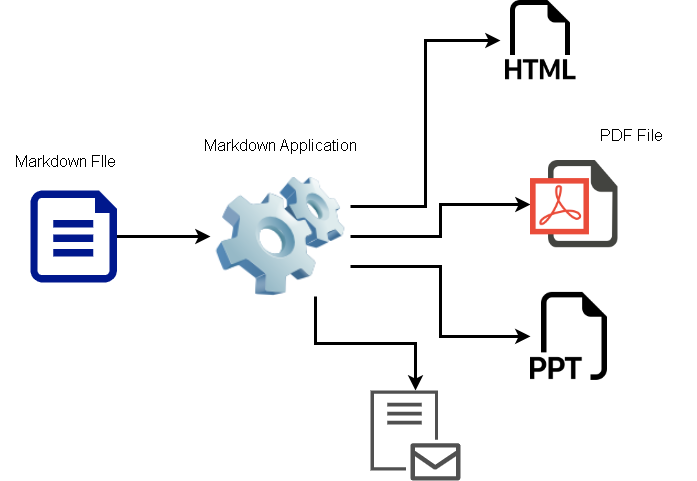
A markdown is a markup language to write readable documents and later convert it into different formats. You can use markdown syntax to write formatted documents whose style is already predefined and get a clean readable document. Read my previous post on how to learn about markdown and how to use it. These markdown files are converted into HTML, PDF or email. In this post, I will describe the process to convert a markdown file to a PDF document using pandoc application.
Writing a markdown document
Writing a markdown document requires only a simple text editors like Notepad or Sublime Text. Once you have written you document in markdown, you need to save it with (.md) file. It means markdown. This markdown file must contain correct syntax and no omissions. It there are errors, then you will receive errors when you try to convert your file to PDF document.
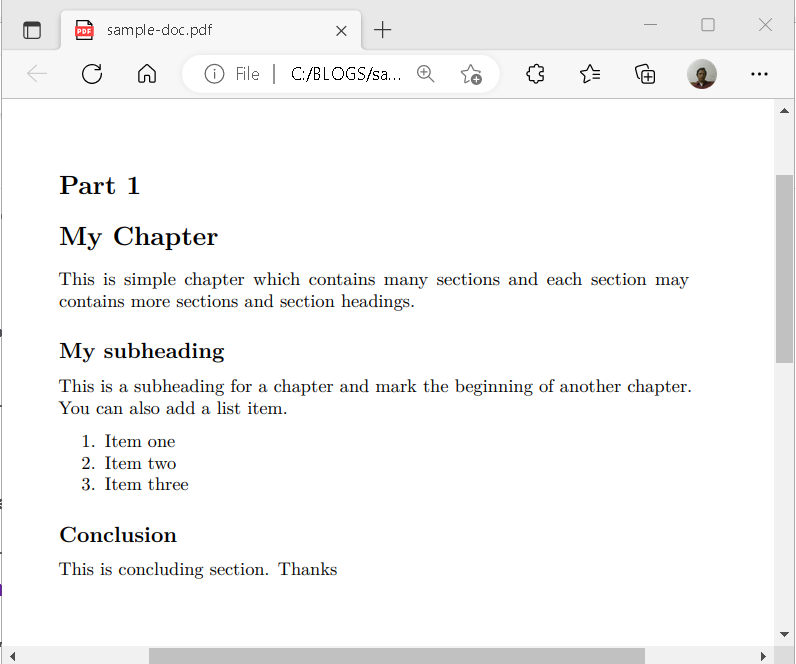
Here is an example of markdown document, this file is saved as simple-doc.md.
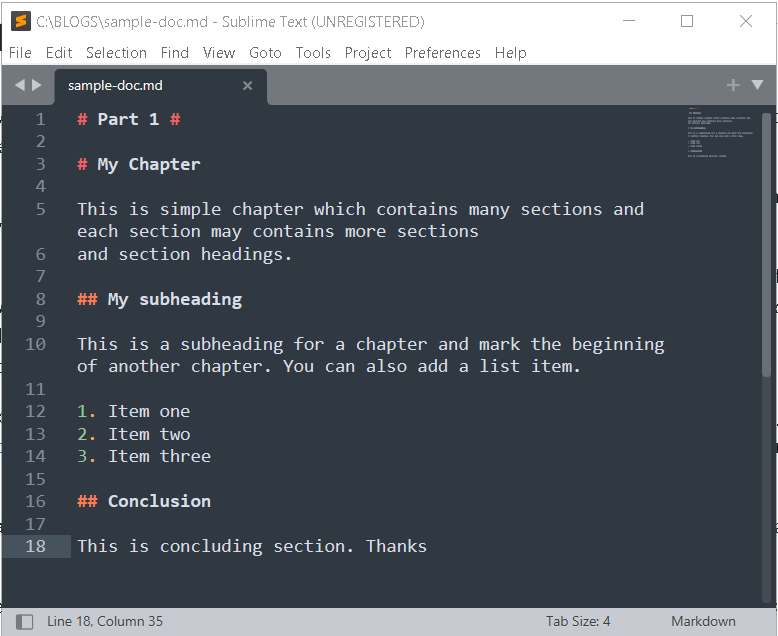
This document can be converted into many other types of document format with the help of markdown applications.
Markdown Application – Pandoc
A markdown application can range from simple text editor to advanced markdown file processors. But I want to exclude the markdown editors from the list of applications. What I meant by markdown application is an application that may or may not have text editors but includes a markdown parser.
The parser is the code that understands the markdown syntax and convert it to other languages. Similarly, parser can read other types of documents and convert them into markdown. files.
Pandoc is an application that will convert from one markup language to another including markdown files. I will not talk much about Pandoc because it is not in the scope of this article, however, you must know that the Pandoc application has Haskell library with modules for different document formats and a command line tool that we are going to use to convert out documents.
Haskell is another programming language for writing software. To convert our markdown file into PDF, first go to the Pandoc – Installing pandoc page and download the software for your operating system. Since, I am using Microsoft Windows, I downloaded the pandoc=3.0.1-x86_64.msi file. This is the version, at the time of writing this article.
The (,msi) is a simple installer and you must double click and follow the instructions to install the software. Here are the steps.
Step1 – Accept the license agreement. If you want to install for all users, then select “Install for all users on this machine” , it will enable “Advanced” button, that will allow you to choose the installation directory.
Step2 – Click Install to continue. The setup will take few minutes to install the software, depending on the speed of your computer.
Step3 – Click Finish to complete the installation.
The next step is to add support to typeset your PDF document.
MiKTex
Think of markdown file as a content creator with some clarity on the document structure. But it is not possible to format in PDF file unless you have a TEX typesetter. The MiKtex is a windows Tex package that contains information on how to convert your markdown file into beautiful formatted PDF file.
Go to Getting MiKTeX page and download it from there for Windows. Instructions to install the package is also given in the same page.
Converting Markdown File to PDF
You can use pandoc in two different way to convert your file into PDF. Use Command Prompt or Windows Powershell, whichever is comfortable for you.
Open Command Prompt on your Windows computer, and it will display the current path of the system. It is usually, C:\Users\<username>. You must change the directory to the location where you have kept the markdown file.
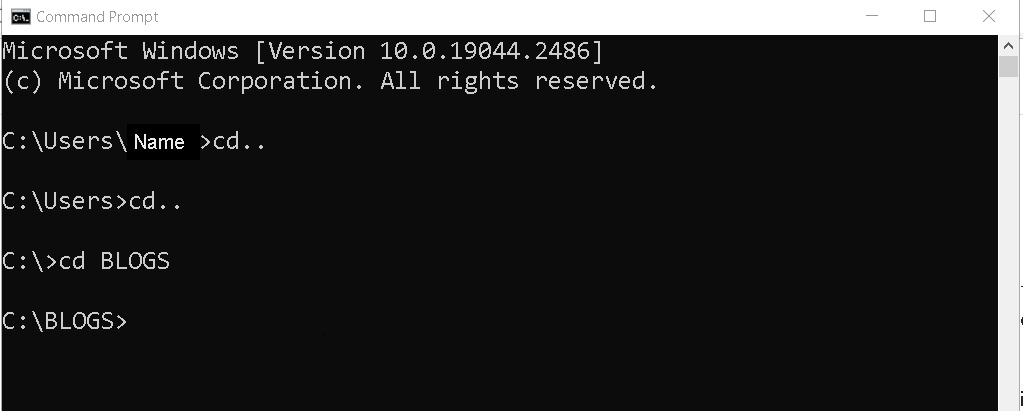
To change directory, type cd . . , this will take you to one level up in the path. For example, if you are in C:\Drum\My files, then cd . . will take you to C:\Drum.
To enter a directory using command prompt, type cd <name of the directory>. For example, if I am at C:\Drum and want to enter a directory My files inside Drum, type cd My files.
Here is how, I changed the directory and set the path to a folder “BOLGS” that contains my markdown file.
The next step is to verify if Pandoc is working of not. Type pandoc –version at the command prompt and you must see the version information as shown below.
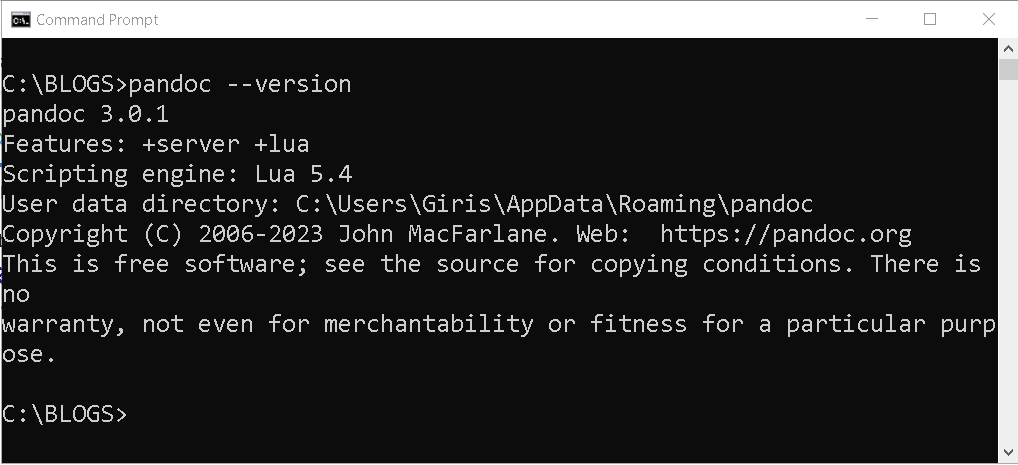
If pandoc is not working, then reinstall it again.
To convert the markdown file to PDF, run the following command.
pandoc -s -o sample-doc.pdf sample-doc.md
This command will take few seconds to run and will convert your markdown file to beautiful PDF file.

Check the Directory for PDF Output
I went to the directory C:\BLOGS for PDF output and here is the output PDF file. It is clean and perfectly formatted for me.
Summary
Markdown to PDF file can be performed using some markdown application with a markdown parser. One such application is Pandoc. To convert markdown to PDF, install Pandoc and Tex package called MiKteX for windows. Then use command prompt to change directory where markdown file is located and run command to convert the document to a PDF file. The PDF file will be created in the same directory as the markdown file.
What is Markdown and How to Use It?
The Markdown is a light-weight markup language, that provide syntax for formatting text documents. A word processor is easy to text editor where you can format text what you see. That is why these applications are WYSIWYG editors. In the MS Word like application, you must format the text and changes are visible immediately.
Markdown language
The markdown syntax is predetermined for each section of the document, and its goal is to make text readable. Each section of the document has a meaning and a syntax to represent the meaning, no special formatting required.
For example, (#) sign will make text a header, two asterisks, **bold text** will make text bold, singe asterisk will make the text italic.
If you know HTML, then you know that the content is not visible, unless you view the HTML document in a web browser. It is not the case with Markdown, you can still be able to view the content in any text editor. A preview is not hindrance for the Markdown document.
How to Write Markdown Document?
The Markdown document is easy to write, and you have two options to write a Markdown documents.
- Text Editor with Operating Systems.
- Advanced Text Editors including Online Editors
- Markdown Applications
I have to explain this a bit. The first option is text editors that comes with your operating system. Windows have Notepad, Apple have TextEdit, and so on. You can write your document in Markdown and save it with (.md) extension.
Some people are tech savvy, and use advanced editor like Sublime Text, or Notepad++ that support syntax highlighting for Markdown. You can clearly differentiate between markup and the content. Unlike the native text editors which use a single typeface with no color.
Benefit Of Using Markdown
There are several benefits of using Markdown documents. Here is the list.
- If HTML is standard for web, and the HTML document can be opened in any browser universally, then Markdown is standard for documents and a Markdown document can be opened in any device, or any text editor.
- The Markdown document can also be converted into a wide variety of documents like webpage, PDF documents, presentations, notes, books and emails.
- Markdown document is platform in depended as it opens on any device or operating systems.
How Markdown Works?
The first step is to write your document in a text editor and save your document as a Markdown file. The rest of the steps depends on what you want to do with the document.
Markdown Language
The markdown language helps us write and format our document called a markdown file with an extension (.md). The markdown application and conversion to other formats in not in the scope of this post, so we talk about it in another time. There are tools which can even convert other formats into a markdown format.
You can open any text editor to state writing your document. Each and every element of document has special markup which I am going to list here.
| Document Element | Markdown Syntax |
| Heading | # Heading 1 ## Subheading ### Sub Subheading |
| Bold | **bold text** |
| Italic | *Italic text* |
| Blockquote | > blockquote |
| Ordered List | 1. One 2. Two 3. Three |
| Unordered List | – First – Second – Third |
| Inline Code | ‘ code ‘ (Note: use backtick, not single quote) |
| Link | [ link title](https://www.somedomain.com) |
| Image |  |
| Horizontal Line | — |
Important Points
There are some common mistakes happen when one doesn’t use the markdown syntax properly.
- There is a space between some of the syntax and you need to maintain those to format your documents, for example, there is a space between heading (# h1) , but (#h1) won’t work. Similarly, list elements also have a space for each item.
- You can combine two elements together in some cases, if I want to show bold italic text, then we can use *** bold italic text*** which contains bold and italic element at the same time.
- Some elements like markdown image does not provide additional properties like caption. So, you must use HTML tags like <figure> and <figurecaption> to give your images a caption. It is true in the case where you want to transform your document into HTML. For other formats, you must find different ways.
Additional Markdown Syntax
Apart from the basic syntax for elements, markdown provide additional elements to format your document.
| Elements | Markdown Syntax |
| Table | | Table Head 1 | Table Head 2| |—————| ————– | | Table data | Table data | | Table data | Table data | |
| Fenced Code Block | ”’ (use backtick) function add() { int a , b; printf(“%d\n”, a + b); } ”’ (use backtick) |
| Heading ID | ## My Heading {#custom-header-id} |
| Footnote | A line with foot note. [^3] [^3] : This is my footnote. |
| Definition List | term 1 : write your definition. term 2 : write another definition. |
| Strikethrough text | ~~This text will be stroked down~~ |
| Task list | – [x] do homework. – [ ] eat breakfast. – [ ] go to school. |
| Highlight | == Hightlighted text == |
| Subscript | C~2~M |
| Superscript | C~2~ |
| Emoji | Thanks ! : joy : |
Summary
In this post, you learnt about the markdown and how to use it. We also know how to write a simple markdown document using the markdown syntax. Overall, the markdown is best when you want to convert your document into a wide variety of formats and preserve it for long time.
Blog
Performance Evaluation Of Link-State Routing Using Simulators
The Link-State Routing is a very popular routing protocol used in a WAN network and subject to number of studies. It is very important to know the performance and cost effectiveness of each routing protocol used in the various types of network such as LAN, WLAN, WAN and WWAN, etc.
This post is analyze the comparative benefits of using Link-State Routing Protocol over wired and wireless WAN network and how this can be achieved using network simulator programs such as NS2 or NetSim.
LAN vs. WAN network
A LAN is a small network that span a small area such as a building or a room. A LAN(local area network) can connect to other LAN using a wired or a wireless medium. Multiple LANs connect to each other and spread across a geographical area, it’s called a WAN or Wide Area Network.
A LAN is faster because the nodes are connected directly to each other. The distance between the WAN nodes is greater and the communication is slower. The major difference between the LAN and WAN is in layer 2 (data link) protocols and equipment.
Since, we are only concerned with WAN, here is a list of WAN protocols.
- Asynchronous Transfer Mode (ATM)
- X. 25
- Frame Relay
- Point-to-Point Protocol (PPP)
- Synchronous Optical Network (SONET)
- Synchronous Digital Hierarchy (SDH)
There are a few other protocols available.
Wireless WANs
Wireless WAN is different from Wireless Local area connection (WLAN) and employs different technology. For Example, GSM , MANET can be considered as WWAN connectivity. Sometimes the WWANs are closed network such as MANET (mobile ad hoc network).
What are routing methods ?
Routing is forwarding network packets from one location to another location in a best way.This process involves knowing the network topology and routing using a routing algorithm.The device responsible for routing is called a ROUTER.
Since the routing is very important when the network is huge such as a WAN network. There are 3 types of routing methods employed.
- Static Routing
- Dynamic Routing
Particularly , dynamic routing is very interesting. Here is a diagram that define two specific dynamic routing.
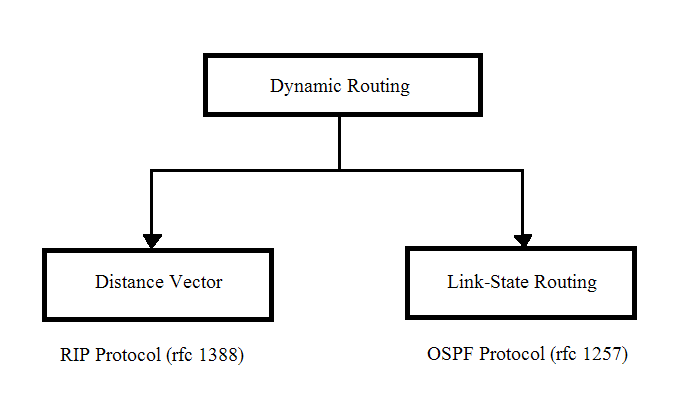
Link-State Routing (LS)
The dynamic routing protocol update the routing information on each router dynamically. Distance vector update the information periodically to it’s neighbor and adds it’s own distance and do not learn anything else. Distance Vector is not suitable for a WAN because of the limited information for routing.
The WAN is a large network and we have to consider the cost of communicating between two nodes. A Link-State Routing Protocol finds the shortest path between two nodes in a WAN network. The Link-State Routing maintains a full information about the network. Each and every node has a “MAP” of the network topology.
The router creates link state packets if there is a change in the network or nodes. LSP flooding is the method to make sure that each an every neighboring router receives the message and update it’s “MAP”. Any previously stored information on the node is overwritten if new info is received.
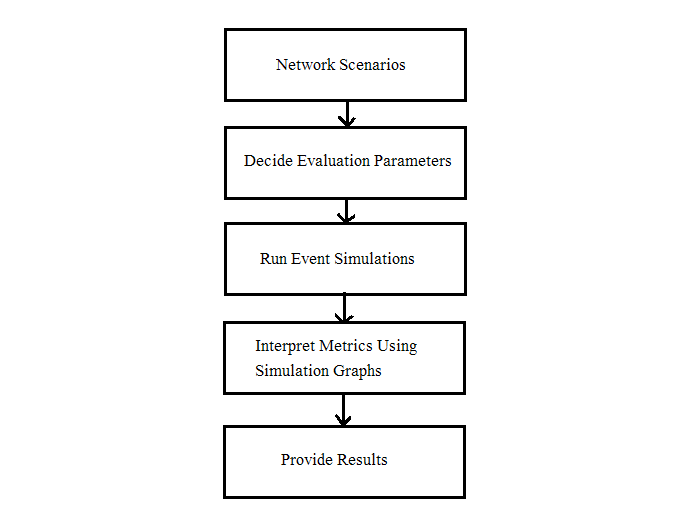
Performance Evaluation Method
There are different types of wired and wireless networks available today. Local Area Networks and Wide Area Network are of various size, complexity and diversity. This makes it very important to measure the performance of the network to understand its current behavior for future improvements and find solution to known issues.
Wide Area Network and Wireless Wide Area Network use the routing protocol for almost all type of communication extensively. It is very important to understand the behavior of commonly used routing protocol such as Link State Routing Protocol. This will help us in deciding which of the protocol is suitable for a particular type of Wide Area Network.
To understand the behavior of networks it important to gather data for analysis using different techniques. The data is gathered online or offline from a network and it is very important to know what we are trying to measure before we start gathering data.
This analysis leads to the development of models to study the network performance. There are three types of models used:
- Statistical Models
- Queuing Model
- Simulation Model
We cannot say that one method is superior to another because each method has its own advantages and disadvantages. Statistical Method is very good in measuring the quantitative data from the network. Queuing Model is very good for network performance analysis because it is used for measuring the response time of the network devices or other resources.
The simulation model is a cost effective way to simulate the network since the cost of creating desired network for analysis is very high. An abstract model of the network and system is generated for analysis using computer programs. It gives lot of flexibility to researcher to try different scenarios.
What to measure ?
The routing protocol has a specific kind of characteristics then the regular network activities. Any routing protocol can be evaluated using four metrics given below
- Delivery Ratio – It is number of packets received by the receiver divided by number of packets
sent from the source. - Latency – It is the time between creating of packet to successful delivery at the destination.
- Path Length Optimality – Difference between a path in the network to send packet and the
length of the best path in the network. - Control Overhead– Number/Size of routing control packets sent by the routing protocol which
indicates the efficiency of the routing protocol.
The routing protocols will be analyzed for following parameters
- Traffic Sent/Received
- Throughput
- Network Convergence
- Point-to-point delay
- IP Traffic Delay
- Utilization
- Process Delay
How to measure the performance using simulation ?
NetSim is the tool that you can use to measure the performance which is single process discrete event simulator. The nodes in the NetSim are finite unlike analytic models that consider the network to be infinite. In NetSim, we can create simple networks and run discrete event simulation (DES) and analyze the results.
Limitations
Since the project is running on a simulated environment using NetSim and both Wired and Wireless network is covered for the project. It is possible that some of the parameter may not be available for performance analysis because of non-availability of the feature in Network Simulator tool.
Also, the performance analysis is to be conducted on a Windows OS which means any affect due to the operating system may be difficult to recognize unless specified by NetSim.
Benefits of NetSim over other performance analysis tools
The simulation software is used for analyzing the network performance over simulated networks. These simulation software are categorized into following types
- Discrete Event Simulators
- Agent-Based Simulators
- Continuous Simulators
- Hybrid Simulators
Discrete Event Simulators models the transactions flows and these models consist of entities of different types and resources that service these entities. These simulators are not suitable to read continuous movement of traffics. There are control elements to know the state of entities and resources.
Agent-Based Simulators are sub class of Discrete Event Simulators and consists of mobile agents that are different from the discrete event simulators. The agents have properties and methods which is not available with discrete event simulators.
Continuous Simulators describe the events that use differential equations and information that move continuously. This is quite opposite to discrete simulators where information flow infrequently. Hybrid is combination of both discrete and continuous simulation.
Related Works
- Performance analysis of AODV, DSR, OLSR and DSDV Routing Protocols using NS2 Simulator
http://www.sciencedirect.com/science/article/pii/S1877705812008454 - Performance Analysis of Wired and Wireless Network using NS2 Simulator
http://research.ijcaonline.org/volume72/number21/pxc3889404.pdf - Performance analysis of Optimized Link-State Routing Protocol for Ad Hoc Network
https://www.cs.jhu.edu/~dholmer/600.647/papers/OLSR.pdf - A Comparative Study and Simulation of AODV MANET Routing Protocol in NS2 & NS3
https://www.researchgate.net/publication/269875985_A_comparative_study_and_simulation_of_AODV_MANET_routing_protocol_in_NS2_NS3 - OSPF for MANNET
http://www.cse.wustl.edu/~jain/cse574-08/ftp/ospf/#sec1
http://citeseerx.ist.psu.edu/viewdoc/download?doi=10.1.1.489.3270&rep=rep1&type=pdf
How To Prepare For GATE Exam
Every year millions of students appear for GATE exams for various streams. Only a few students are successful in clearing GATE exams because of their good study habits. Some students do extraordinary hard work and pass the exam with good ranks. But, the thing is that education is a long term process, therefore, by the time a hardworking student enter any good reputed institution, he or she is totally exhausted or eventually will suffer burnout. Some students just give in after few attempts.
In this post, we try to list out the method, purpose and need for studying GATE. The reader should keep an open mind as there are several other option to study well that suits one’s taste or ability.
How To Study In General ?
Any kind of education or studies in general need one thing – engagement. It means you find a proper time, place and fully committed to study some topic. You must be very specific and purposeful about your engagement. Once you develop this habit then there is not stopping. It is a very useful tool, not only in education but also help you in your professional life.
Even if you devote 10 hours of study in a day for next 3 months. You will forget most of it. Forgetting is our human nature; we forget if we are not in touch with a topic. The tool to overcome forgetfulness is to review what you studied regularly. The reviewing process will make sure that everything stick to your brain.
The final rule of studying is consistency and health. You must be consistent with you studies, means you should not study for 4 days and abandon for 5 days and come back again to start from scratch. It does not work that way. Also, you must not over do it, so that you get sick and tired. Over study, which is overloading of information cause depression. Occasionally, go out and meet friends, watch a movie or eat health. Sports of any kind is good for mind and body as it release stress.
GATE Preparation
The Gate exams are all about solving problems with mathematics being the most dominating subject, throughout all branches. Therefore, most of the student not good at math will fail this exam. If you have lot of time to prepare for Gate exam, then you first thing you must do is to brush up your math skills.
To prepare for the Gate exams, you must go through three stages which are:
- Know the syllabus
- Get the right study material
- Study systematically.
We shall now discuss each point in detail.
Know You Syllabus
The first thing you to start with GATE preparation is to learn what to study. For this, visit the any of the organizing institute and learn download the syllabus. Do not download gate syllabus from other sites as they may be omit subjects or incomplete. It is always better to get it from IIT or IISc websites because you can trust them.
Get The Right Study Materials
Now that you know your syllabus, there is confusion about which books to study from, it is only to join coaching class, or self-study. There are two types of students – one who can manage their study by themselves and students who need some help from others. Those who seek assistance go to a coaching institute that will provide tons of study materials and guide the students.
Whether you are a self preparing student or a student of coaching institute, you are going to need three types of study material.
Lectures – to understand the concepts. Student with coaching resources will attend lectures, and those who do self study may go to NPTEL site where IITs provide you free video lectures on each topic.
Books – to study concepts and solve problems. Gate preparation books are available in online book shops or offline book marts. Some of them are freely available online itself. The best books are those than are mentioned in the NPTEL lectures for a subject matter and any books recommended by your current related course, for example, if you B.Tech student then your collage might recommend some books for you for the preparations. Make sure you get a book that gives you end of the chapter question and practice.
Old Gate question papers – is available for you to practice solving questions and understand the nature of exam. These question are very good and test your abilities and understanding about each subjects. You must try to solve as many as possible questions. Some websites may provide you with question papers with answer keys.
Study Systematically
Your system of study depends on how much time you have before the Gate exam and how much you know already about your subject matter. Therefore, it is always better to work on you weak area first and then go for easy subjects. Another approach is to study the easy subjects first, then devote more time for hard subject.
No matter which strategy you choose, divide your time properly for reading, practice problems, and revisions. So you must know what and how much to study each day, each week and each month.
A week before the exam, when you will be revising your notes, start taking online mock tests to get the feel because you must learn to mark questions that you will review later, and so on.
With dedication, hard-work and a positive attitude it is possible to pass GATE exams.
How To Make GitHub Static Website
GitHub is a community platform where software developer , students, professional programmers and many types of developers collaborate to develop software. Even organization have GitHub accounts and their entire team work and share their works among themselves. Students can learn programming from GitHub tutorials on their static websites.
In this post , we explore how to make a GitHub statics website so that you can showcase you projects to others. Building a software is not enough as you may want to present your work properly to the potential clients or employers.
Tools To Deploy The GitHub Static Site
There are many ways to publish GitHub pages where this article focus on web-based approach which does not involve downloading or installing any software tools. The following are the ways to deploy GitHub pages.
- GitHub Website
- GitHub Desktop Tool
The GitHub deskop tool for Windows and macOS is available for download. Now you will learn to create a repository and publish you first GitHub page in a step-by-step manner. Read each of the step carefully.
Step 1: Create GitHub Account
This step is applicable to only those who do not have a GitHub account. You need to sign up for an account on the GitHub site with an email address. If you have already signed up and have an existing account skip to step 2.
Now sign in to your account and you should see a page given in following figure.

Right now, you don’t have a repository and also note you account name or username. You must create a repository which is nothing but a place to store your project files. In our case, we must store web pages.
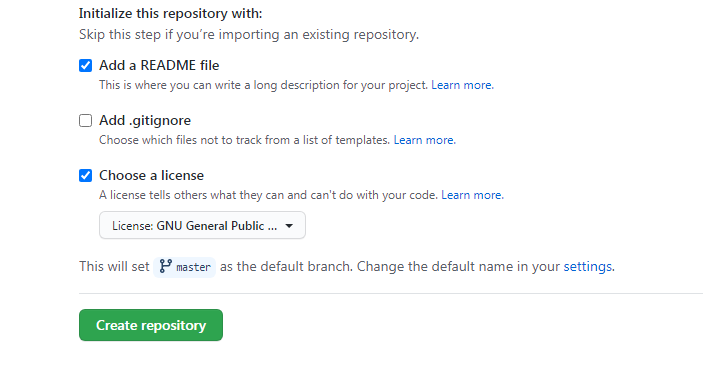
Step 2: Creating a repository
You must be extremely cautious while creating the repository because choosing a wrong name for your repository will break the web site. Our account name is Notesformsc; therefore, we are going to create a repository with the same name.
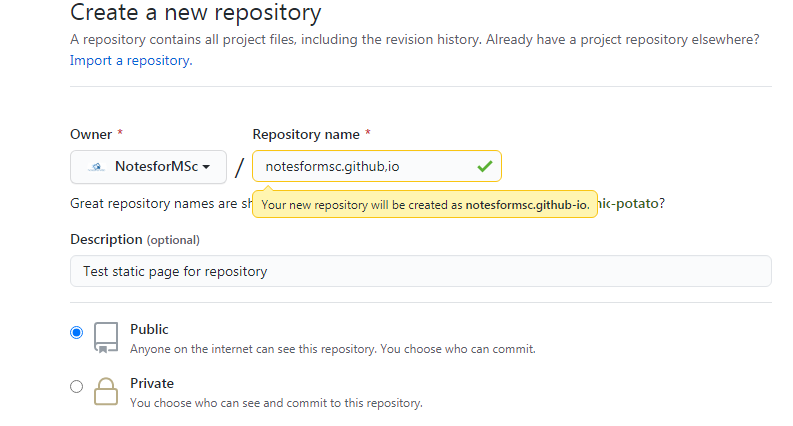
If the account name is “demo”, then the repository name would be “demo.github.io”. Also, select whether you want to make this repository pubic or private which does not affect the web site except that you must be a owner of the repository to visit the pages.
Watch the figure carefully and see how we made a mistake in typing the name. These type of typing mistake should not happen, else the website will not work.
Step 3 : Create files inside repository
The new repository is empty or it may have two files namely – README and Licence file. We must create new files for our web site. The very first file we need is “index.html”. An index.html file is the main page of any web site.
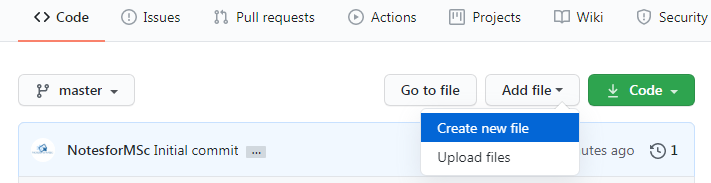
Under the Code section, select Add file drop-down, and select Create new file.
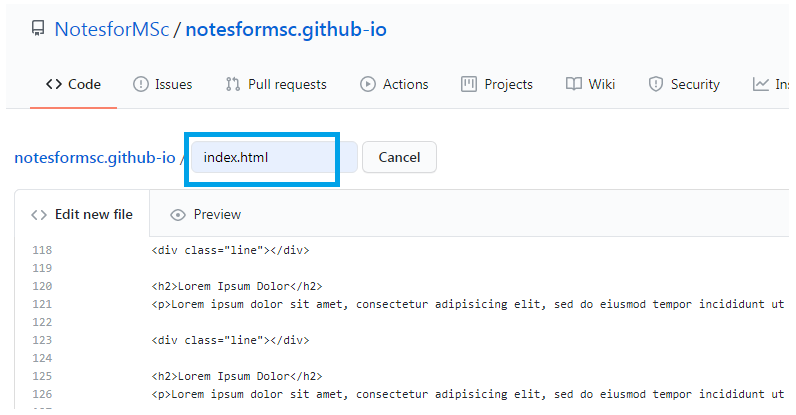
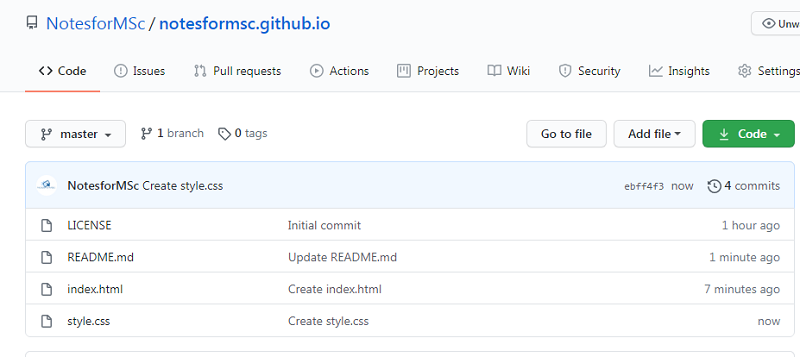
There are number of ways to create files. If the file is ready, then simply upload them from “Upload files “ option under “Add files”. The second way is to create a new file and open the existing index.html file on your computer, copy the content and paste it in the new file you created. Finally, commit your changes.
Suppose you have a folder on your computer called “mywebsite” that contains “index.html”. Open the “index.html” file from the folder to a notepad, then copy all the codes. Go to GitHub , paste your content under “Index.html” as shown in the figure above.
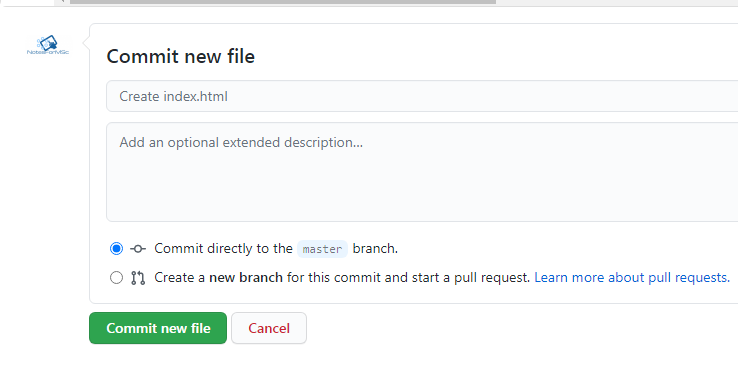
To save your changes, commit the file at the bottom. In the similar manner, you must create style.css . The style document will contain all the style information for index page and other pages if any.
Step 4: Verify and test your static site
If you have done everything correctly, then look for the active GitHub page in the bottom right corner of the website . You should see your GitHub site active as shown in the following figure.

Now it is time to test your page.Open up the repository url – https://notesformsc.github.io and you should see your page published successfully. See the image below.
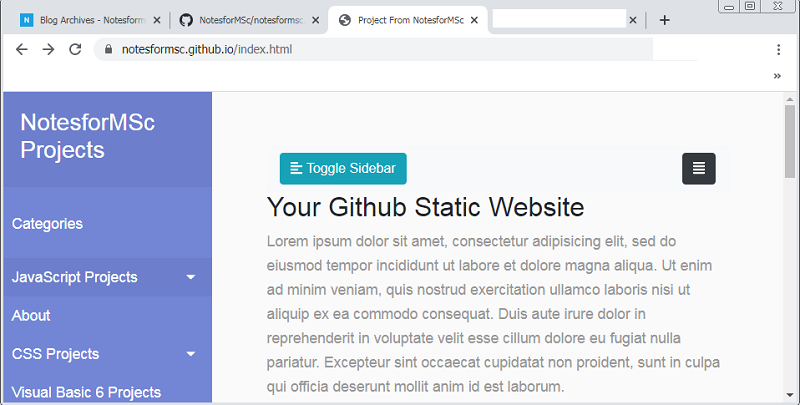
If you do not see the page correctly, the most common problem is your account name and repository name must match. Recheck all the above steps to diagnose the issue.