VB 6 Design A Menu
In this article, we will design a menu in VB 6. To create this program, you may require a windows computer with Windows XP or higher operating system and Visual Basic 6.0 installed.
Step 1: Create a New VB 6 form
Open visual basic 6 and choose “Standard EXE” and your default VB form will show up. The next step is to create a rectangle shape from the toolbar on the left hand side of form. Here are the properties of the form.
Form Name: Menu_Form
Caption: Menu Design
BackColor : Highlight Text
Width: 10515
Height: 6660
Create a rectangle shape with following properties. Do not change other properties of shape.
Name : Shape1
Caption: Shape1
Border Width: 5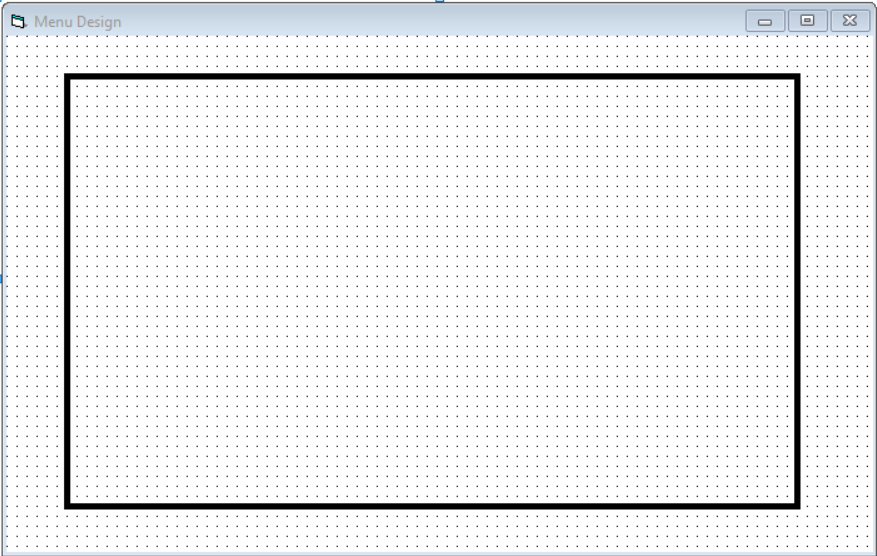
Step 2: Create Menu For Color
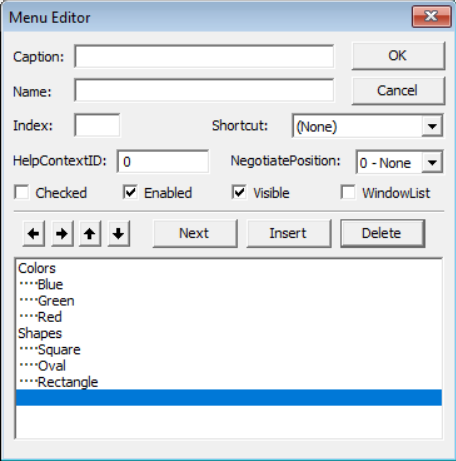
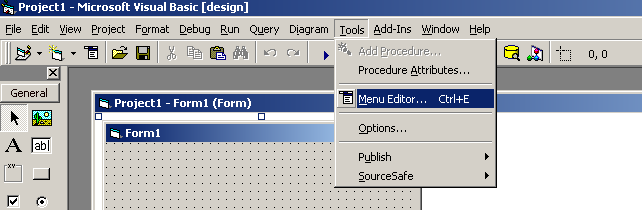
In this section, we will create a new menu to select a color for the shape. Go to Tools > Menu Editor or right-click on the form and select Menu Editor.
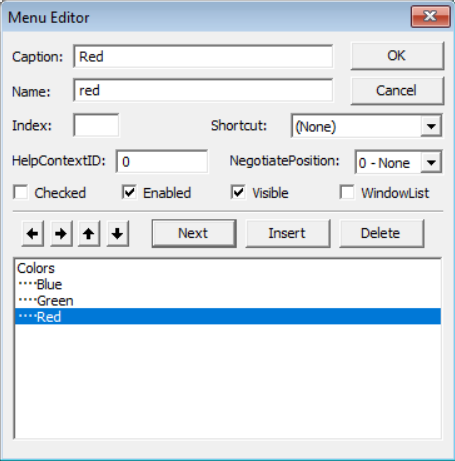
In the Menu Editor, you must enter the values for Caption, Name. You can add Shortcut if necessary. Select Next to add a new menu item and Delete to remove an item from the menu.
To add a sub menu, select the right arrow ( ->) or to move the sub menu, up and down arrow. Then you must add Caption, Name, and Shortcut for sub menu items.
The final menu look like the following.
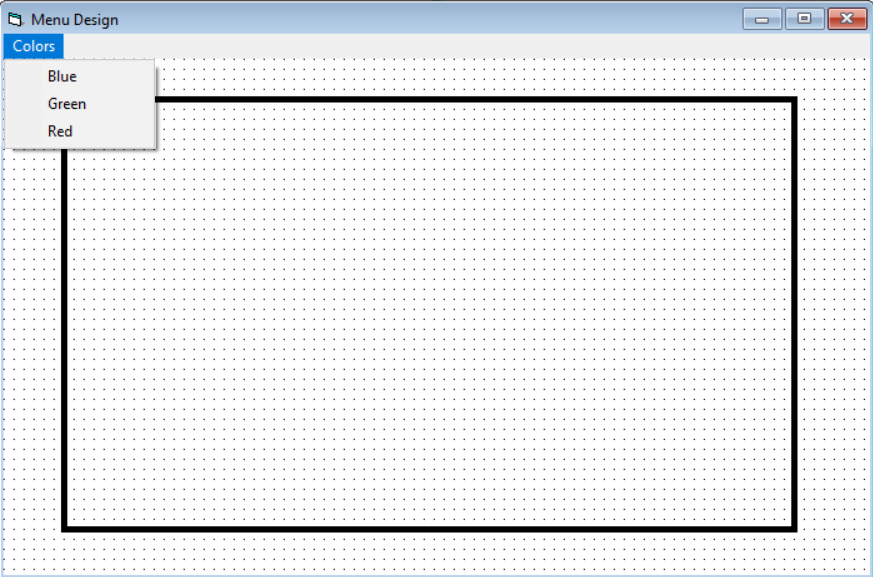
Click each of the sub menu item and add following codes.
Private Sub blue_Click()
Shape1.FillColor = RGB(0, 0, 255)
End Sub

Private Sub green_Click()
Shape1.FillColor = RGB(0, 255, 0)
End Sub

Private Sub red_Click()
Shape1.FillColor = RGB(255, 0, 0)
End Sub
Step 3: Create Menu For Shapes
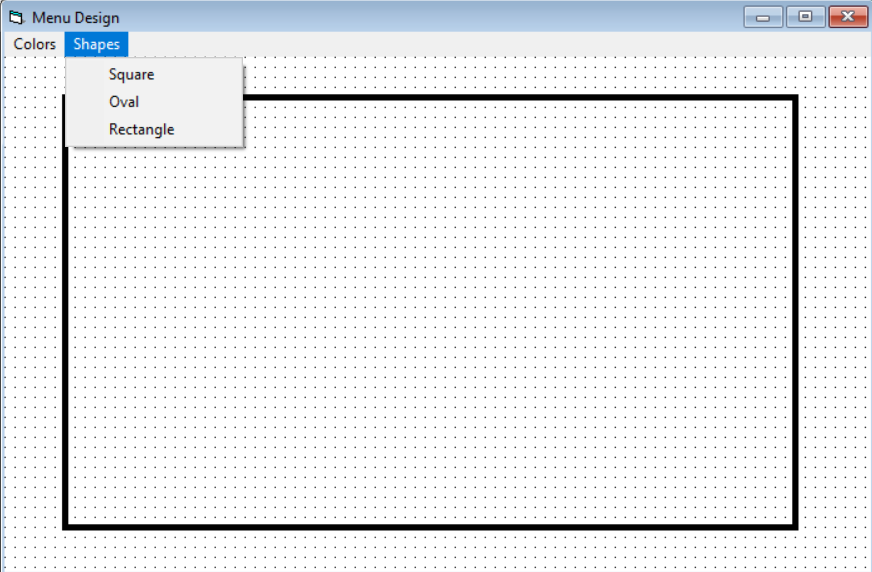
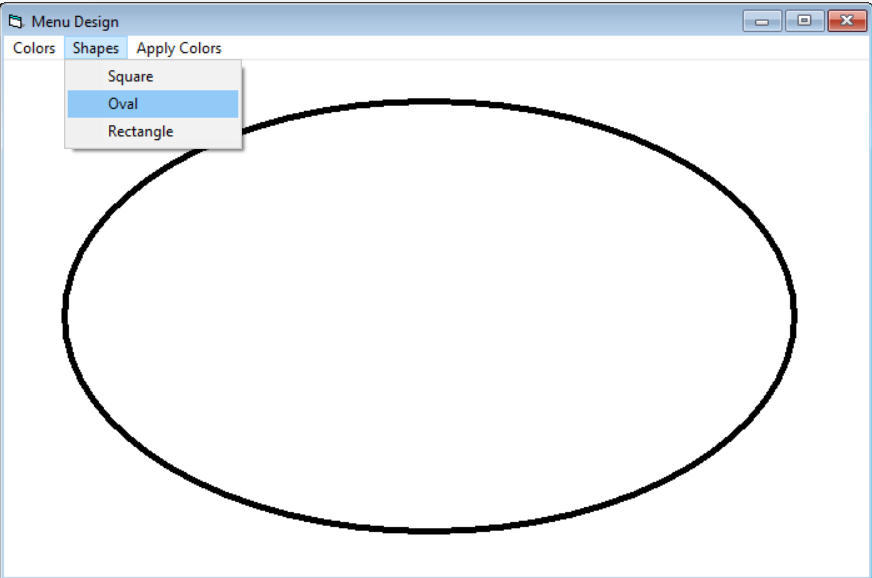
Now that you have created color menu, we must create Shape menu with three sub menu for Oval, Rectangle, and Square shape.
To create this menu, follow all steps mentioned in step 2. Your Shape menu should look like the following.
Now the shape menu with three sub menu look like the following.
Add following codes by clicking each of the sub menu items of shape menu.
Private Sub oval_Click()
Shape1.shape = 2
End Sub

Private Sub rectangle_Click()
Shape1.shape = 0
End Sub

Private Sub square_Click()
Shape1.shape = 1
End Sub
Step 4: Create Menu to Apply Colors
In this section, we create our last menu item that apply the color selected from the color menu.
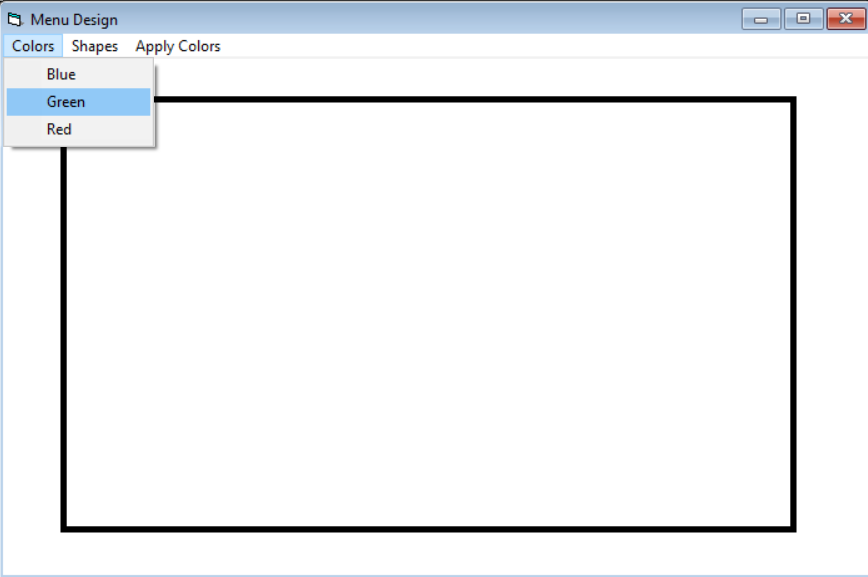
Suppose you choose ‘Green‘ from color menu. It will not change the background color of the shape unless you choose the fill style from apply color menu.
Follow step 2 to create a new menu called Apply Color. The menu should have the following sub menu items.
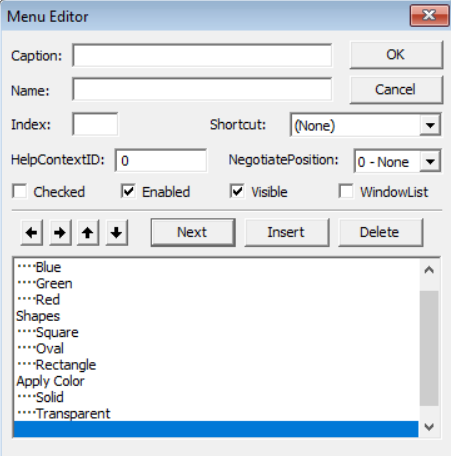
The final menu for the form will look like the following. Look at the sub menu for Apply Color.

Add the following codes for each sub menu by clicking on them.
Private Sub solid_Click()
Shape1.FillStyle = 1
End Sub

Private Sub transparent_Click()
Shape1.FillStyle = 0
End Sub
Testing the Project
Once you have saved your project. It is time to test it.
Color Menu = Choose the color for the shape. e.g Red, Blue, Green
Shape Menu = Choose the shape e.g Oval, Rectangle, or Square
Apply Color = Apply the chosen color style. e.g Transparent, or Solid Fill.
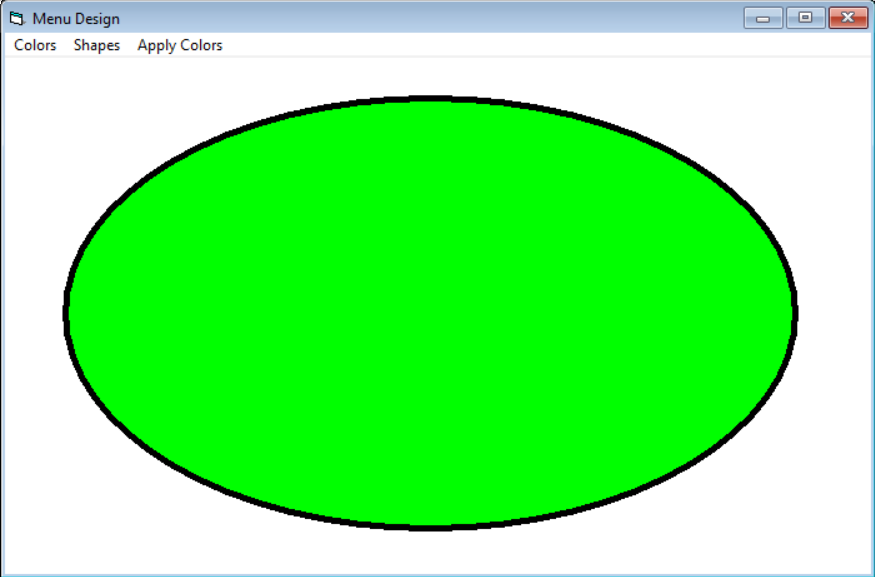
The final step will apply solid fill of selected color green to the shape. Note that you can change the color, shape, or fill at any point in the program.
VB 6 Tool Bar
The VB 6 allows you to add a toolbar to the form object. In this article we will explain the method to add the toolbar .
To create a toolbar you have to follow steps given below.
- Add component, “Microsoft Windows Common Control 6.0″
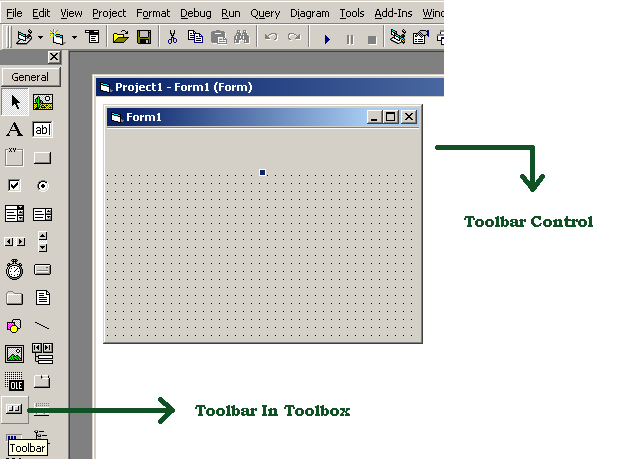
- Select Toolbar control from the Toolbox in VB 6 IDE.
- Configure Toolbar buttons with Caption and Key properties.
- Write code for Toolbar and its buttons.
Now, we will follow the steps above and create a toolbar for the VB 6 form object.
Step 1: Add Microsoft Windows Common Control 6.0
For this step, go to Project tab in your VB 6 IDE, select Components. It will open up the components window.
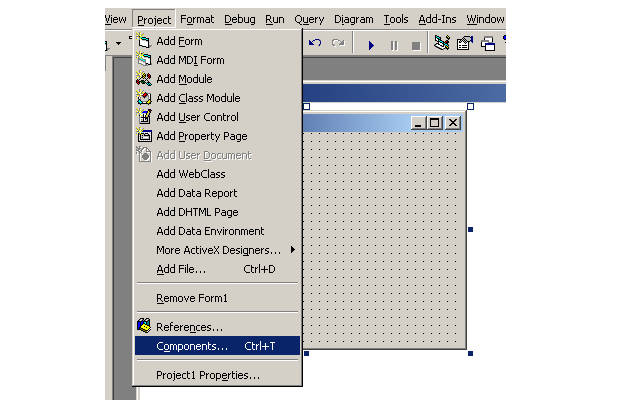
You should see the following window.
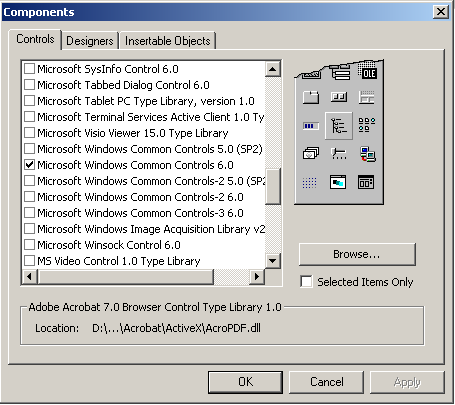
In the components window, select “Microsoft Windows Common Control 6.0” and you will add Toolbar control to the toolbox.
Step 2 – Select Toolbar Control from toolbox
Select the Toolbar from toolbox in VB 6 IDE. See the following figure below.
Step 3: Configure the Toolbar control buttons
You need to go to toolbar properties to add buttons to the toolbar. Right click on the toolbar and click Properties.

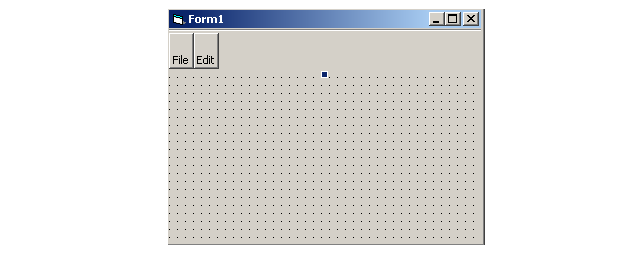
Once the toolbar property is open, select the Buttons tab and click Insert to add new button. Here you can change the index value, you can give new caption to the buttons, given a key value.
The key value is important to access the toolbar button and give it some action once the button is clicked. We will see the next step.
Step 4: Add code for the buttons
You have to add some code for the toolbar, so that, when you click the button, some action take place.
Add following code:
Private Sub Toolbar1_ButtonClick(ByVal Button As MSComctlLib.Button)
Select Case Button.Key
Case "File":
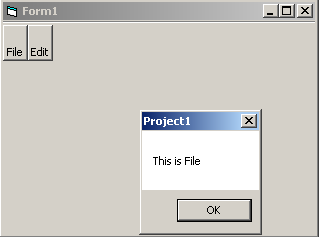
MsgBox "This is File"
Case "Edit":
MsgBox "This is Edit"
End Select
End SubOutput: Toolbar
VB 6 Adding Menu Bar To Form
Visual Basic 6 allows us to add menu bar to the form. You can add your own menu bar to the form and write code to make it work.
In this article, we will add a menu bar to a VB 6 form.
To add a form, go to Tools > select Menu Editor
Once you have clicked the Menu Editor, you will see the following Menu Editor window.
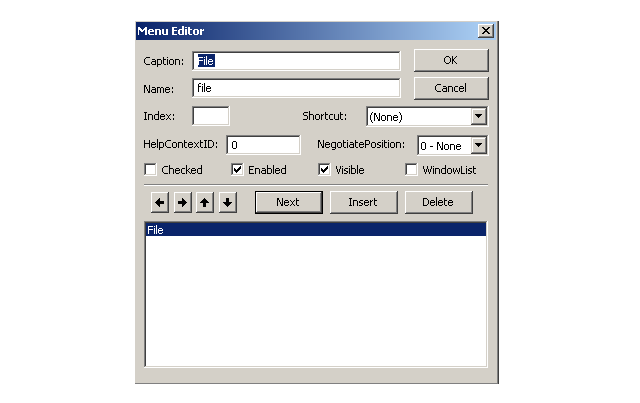
Write a caption for your menu and a name, you can also select an index value which determines the order of the menu. Therefore, least the number, higher the order.
You must click Insert to add your menu item or you can delete an item.
There are four arrows at the bottom left side which indicate the position of the current menu item. You can move an item – up, down, left, and right. Moving up or down will change the order of the menu item. If you move an item right, it will become a sub-menu item for an item(File) above it.

From the above figure, you can see that the File is a top level menu item and Open/Close are sub-menu items. The open and close are move to right for making them as sub-menu item.
Output : Menu Bar

The File menu will appear with two sub-menu items open and close as shown in above figure.
VB 6 Form Title
A VB 6 form has a title bar and the title of the form can be changed. In this article, we will talk about two ways to change the title of a form object.
- Change title from property window.
- Change title during run-time from code editor.
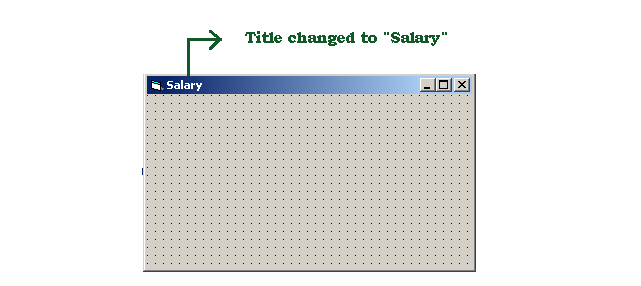
Change title using property window
When you select a VB 6 from in the IDE. You will notice that on left hand corner window , there is a small section called Property Window, which shows all the properties of the form object.
We can change the title and some other property of a form easily. This is most preferred way to things in VB 6.
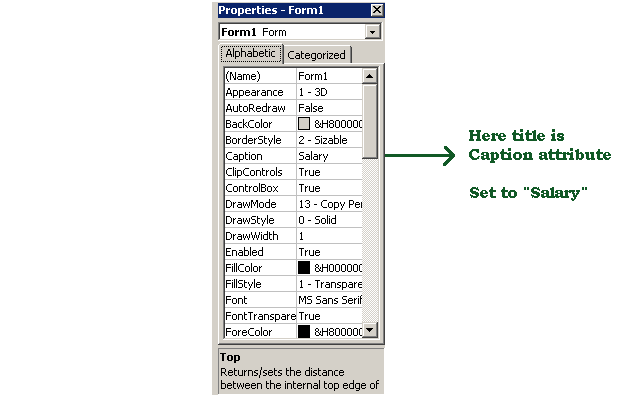
In the above figure, we have used caption attribute to set the title for the form object. In the same way you can change Height and Width of the form, set a background color for the form and so on.
Changing title during run-time
You saw how we can change the title and other properties using property window for the form. Now, we will see another method of changing the title for the form – code editor.
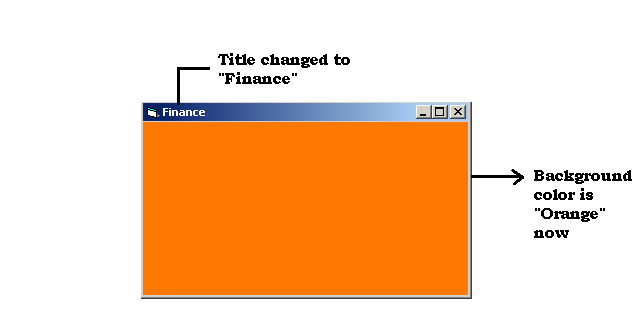
You can write some code that will change the title and other attributes of a form.For example, consider the following code to change the title to “Finance”.
Private Sub Form_Load()
 Me.Caption = "Finance"
 Me.BackColor = RGB(255, 120, 0)
End Sub
The above code will two things:
- Change the title to
"Finance". - Change the background color to
"Orange".
VB Form Basics
In this article, you learn about Vb 6 form and understand the types and different parts of VB 6 form object. There are many things that you can do with VB 6 form object. Here is a list.
- Change form title
- Add new title
- Create menu bar
- Create new toolbar for the form
- Add new status bar for the form
- Control and modify various form properties both design time or run-time.
What is a VB 6 Form ?
A VB 6 form is a window object. You can call this window under design view as Forms.Whenever you open a new project or add new form in VB 6 IDE(Integrated Development Environment), you will get form in design view.
These forms during run-time are Windows.
What can we do with form?
You can change form properties to change how form appears and add codes for both form and its controls to change the behavior.
Speaking of controls, the VB 6 form allows you to add various controls in the form and design it as per your project.
What are different parts of VB 6 form ?
We have listed the different parts of a VB 6 form. Read them carefully as they will be helpful in creating new forms and configuring them for your VB projects.
Title bar – Every VB 6 form has a title bar with form title and a control box on the right-hand side with three buttons – the Minimize, the Maximize, and the Close.
You can change the title in two ways – the property box in the lower right corner of VB 6 IDE or through the code editor. We will see and example of this in future articles.
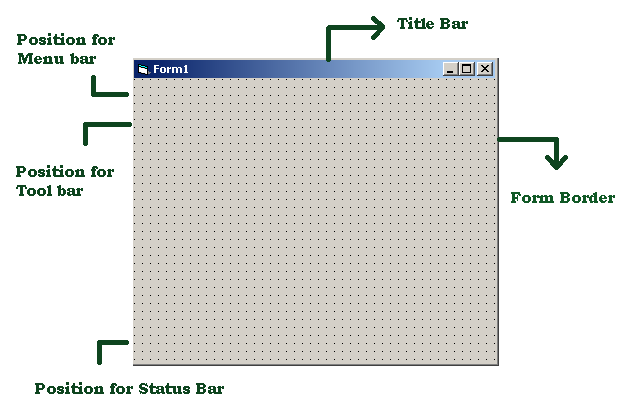
Menu bar – Under the title bar, is an optional menu bar, that contains various user menu. Each menu can take you to different places such as open other forms or do some windows related task such as copy, paste.
Main area – The main area is called the client area is something you as a VB programmer need to take care of. In this part, you will add or remove controls as per the need of the project.
Border – Each of the VB 6 form has a border. You can change the properties of this border using property box or the code editor, whichever is convenient.
Now that you are comfortable with forms, let’s talk about another type of form.
MDI Form Basics
In a VB 6 project, there can be multiple forms and it is very difficult to manage loose forms. Therefore, VB 6 offers MDI form.
The MDI (Multiple Document Interface) form is a type of container form that displays all other forms in one place. Each of these other forms are called MDI child forms.
The MDI child forms are standard forms that are changed into a MDI child by changing their MDI child property to true.
VB 6 Handling Financial Data
Apart from performing mathematical calculations using builtin math functions, the Visual Basic 6 has functions that can handle financial data. You can always write your own functions, however, VB 6 provides builtin functions.
A list of financial functions are given below.
| Financial Functions | Description |
| DDB, SLN, SYD | Compute depriciation |
| FV | Compute the future value |
| Rate | Rate of Interest |
| IRR, MIRR | Compute the Internal rate of return |
| NPer | Compute the number of periods |
| IPmt, Pmt, PPmt | Compute the payments |
| NPV, PV | Compute Present value and Net Present Value |
Note: click on each function to see an example.
VB 6 Date And Time Functions
Date and time are very important to programming languages. It helps show the date and time, run a timer, show current time or date, even show the difference between two different dates or times.
In this article, we will list few VB 6 date and time related function that you can use with examples. Each of the function leads to an example program. You can practice them and learn them thoroughly.
Date And Time Function List
| Function | Description |
| Date, Now, Time | Current date or time |
| DateAdd, DatePart, DateDiff | Date computations |
| DateSerial, DateValue | Return a date |
| Date, Time | Set date or time |
| Timer | Set a timer |
| Time Serial, TimeValue | Return a time |
VB 6 – Int() Function
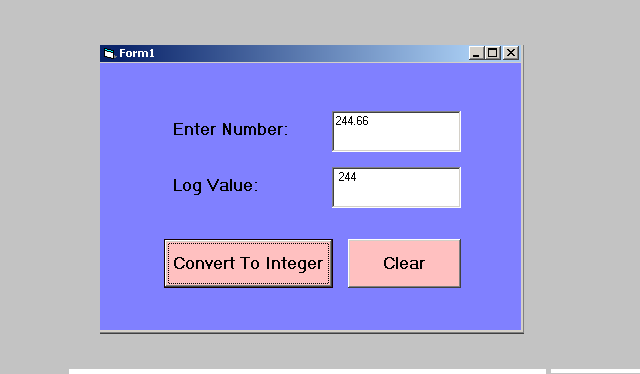
In this article, you will learn about a Int() function.The int() function will change any double or real number into integer and drop the real part.
For example,
234.56 becomes 234Example Program: Int() Function
Private Sub Command1_Click()

Dim Num As Double, Result As Double

Num = Val(Text1.Text)

Result = Int(Num)

Text2.Text = Str(Result)


End Sub

Private Sub Command2_Click()

  Text1.Text = ""
  Text2.Text = ""

End Sub
Output: Int() Function
VB 6 – Log() Function
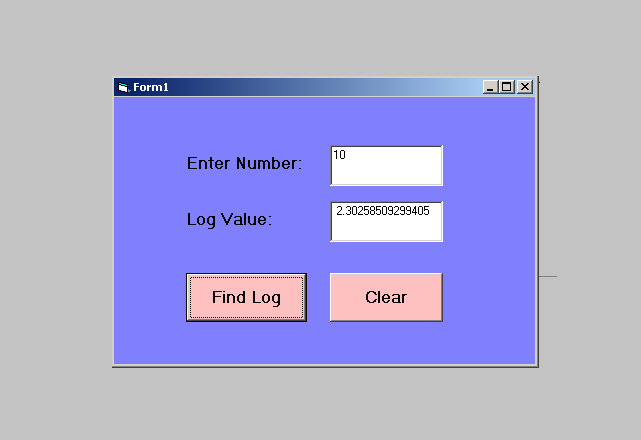
In this article, you will learn about Log() function. The Log function takes the Logex of a number x. To know the correct log value of a number you must refer to a log table.
For example, logex = loge10 = 2.302585
Example Program: Log() Function
Private Sub Command1_Click()
Dim Num As Double, Result As Double
Num = Val(Text1.Text)
Result = Log(Num)
Text2.Text = Str(Result)
End Sub
Private Sub Command2_Click()
  Text1.Text = ""
  Text2.Text = ""
End Sub
Output: Log() Function
VB 6 – Rnd() Function
The VB6 random number function is Rnd(). It generates a random number. In the following program we will use this function to generate a random number.
The Rnd() function generates a number between 0 to 1 which is a double value. However, you may increase the value of random number by multiplying it with some integer value.
For example.
result = Rnd() * 20 // will generate number less than 20Program Code: Rnd() Function
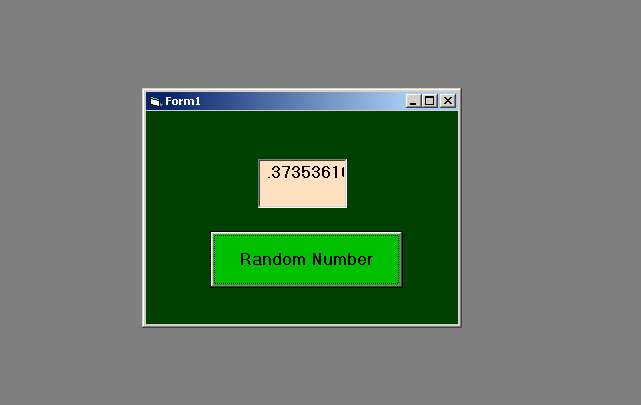
Private Sub Command1_Click()
Dim result As Double
result = Rnd()
Text1.Text = Str(result)
End Sub
Output: Rnd() Function