HTML DOM API and Selector API
In this article, you will be learning about the DOM API and the selector API.
Consider the following image of Mozilla developer console.
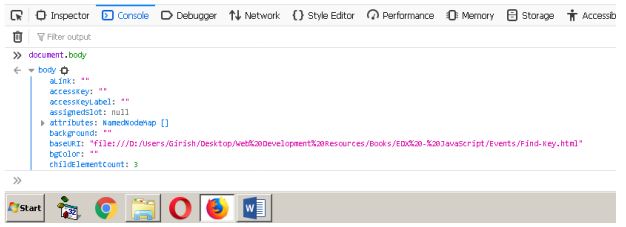
Every element in the DOM (document object model) has a number of APIs. The JavaScript will use those APIs to change the behavior or appearance of an HTML element.
HTML 5 offers some selector API to use CSS selectors to get to the HTML 5 elements.
document.querySelector(); // return the first DOM element that match the selector
document.querySelectorAll(); // returns all the DOM elements matching the selector.
Older DOM APIs
document.getElementById(identifier)
document.getElementsByTagName(tagName)
document.getElementsByClassName(className)
What can do with DOM APIs?
- Change the style of HTML elements using .style attribute
- Change the text content using .innerHTML attribute
- Read or change the text using .textContent attributes
We can also create new element using
Create new HTML element using
document.createElement(“new element name”);
Add the newly created element to another element in the DOM, using<span style="color:#ee1710" class="tadv-color"> append(), appendChild(), insertBefore() or the<br> innerHTML property</span>
Removing Element from DOM
Use .removeChild() property
//Example:
ul.removeChild(li);
//even innerHTML can remove elements
ul.innerHTML =JavaScript Mouse Events
In this article, you will learn about the mouse events and its associative properties and how JavaScript handles mouse events.
Here is the table of events related to mouse.
| Mouse events | Description |
| click | Press a button element |
| dblclick | Double click a button element |
| mousedown | Press the mouse button |
| mouseup | Release the mouse button |
| mousemove | Mouse pointer moved from one location to another |
| mouseleave | When mouse pointer move away from HTML element |
| mouseenter | When mouse pointer move onto an html element |
Mouse Event Properties
| Mouse Event Properties | Description |
| button | Return which button was pressed |
| client X and clientY | Coordinates relative to the view port ( the visible part of the document) |
| pageX and clientY | Coordinates relative to the actual document page. |
| screenX and screenY | Coordinates relative to the screen |
| altKey, ctrlKey, shiftkey | Return boolean true or false when alt, shift or ctrl key is pressed. |
clientX and clientY
<body>
<p>clientX:<span id="cx">X</span></p>
<p>clientY:<span id="cy">Y</span></p>
<script>

     var s = document.getElementById("cx");
     var d = document.getElementById("cy");

     window.addEventListener('mousemove',processMove);
     window.addEventListener('mousemove',processMove);
     function processMove(evt){
          s.innerHTML = evt.clientX;
          d.innerHTML = evt.clientY;
     }
</script>
</body>
pageX and pageY
var s = document.getElementById("cx");
var d = document.getElementById("cy");
window.addEventListener('mousemove',processMove);
window.addEventListener('mousemove',processMove);
function processMove(evt){
     s.innerHTML = evt.pageX;
     d.innerHTML = evt.pageY;
AltKey and ShiftKey
<body>
<p>AltKey :<span id="altt"></span></p>
<p>ShiftKey :<span id="shiftt"></span></p>
<script>
     window.onkeydown = pressSpecial;
     var d = document.getElementById("altt");
     var s = document.getElementById("shiftt");

     function pressSpecial(evt)
     {
          d.innerHTML = evt.altKey;
          s.innerHTML = evt.shiftKey;
     }
</script>
</body>
In the example above, whenever user press the ctrl, shift key, it is displayed in the HTML
JavaScript Keyboard Events
In this article, you will learn about various JavaScript keyboard events.
There are events from keyboard also,
Those events are
- Keydown
- Keyup
- Keypress
The key is the character in the language and keycode is the code for the character.
For example.<span style="color:#e71111" class="tadv-color">Event.key = Shift</span> means it is referring to Shift key.<span style="color:#e9250b" class="tadv-color">Event.keyCode = 16 </span>referring to code of key(the shift).
The legacy keyboard property are
- keyCode
- shiftKey
- ctrlKey
- altKey
Keypress event is not deprecated.
Keyboard Layout
There are many keyboards in different languages. QWERTY is the most popular.
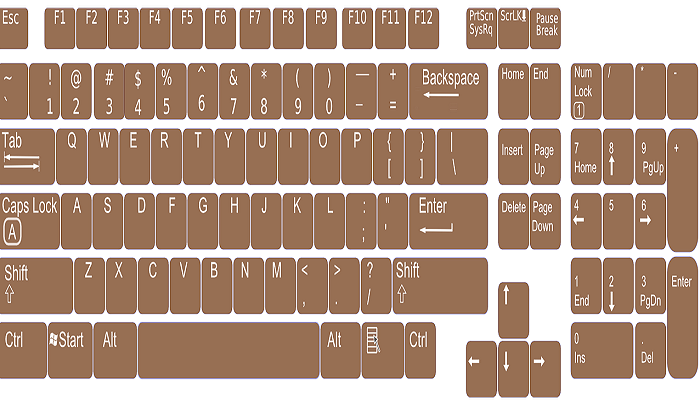
QWERTZ is used in Germany.
DVORAK is an alternative to QWERTY.
Keyboards have same layout and they can be rearranged or adjusted. This is called the Mechanical Layout.The regional layouts have
- Functional layout – software(driver) that maps hardware keys to characters.
- Visual layout – physical characters printed on the keyboard keys.
Keyboard events are keyup, keydown and keypress. The keypress event is character events. The keyboard events have legacy properties
- keyCode
- charCode
- which
The new api solves lot of problem with the keyboard.
Keyboard.key = gives the character for key or descriptive key such as backspace.
Keyboard.code = gives the physical code of the key.
Both are independent of each other. There is no existing keyboard with all the keys.
JavaScript Page Events
In this article, we will look at page events and how JavaScript handle those events.
Load Event
JavaScript can check the page level events such as load. Once the DOM tree is ready, we can call the HTML elements and manipulate them.
For example:
<body onload = "init()">
<p>Page Status:<span id="status">NOT LOADED</span></p>
<script>
     var d = document.querySelector("#status");
     function init() {
          d.style.color = "red";
          d.innerHTML = "LOADED";
     }
</script>
</body>
The above example checks for page load to happened and then output = LOADED.
Page Resize Event
<body>
<p>pageWidth:<span id="pwidth">Width</span></p>
<p>pageHeight:<span id="pheight">Height</span></p>
<script>
     window.onload = resize;
     window.onresize = resize;
     var d = document.getElementById("pwidth");
     var s = document.getElementById("pheight");
     function resize(){
          d.innerHTML = window.innerWidth;
          s.innerHTML = window.innerHeight;
     }
</script>
</body>
In the example above, the load page size is given in terms of width and height of the page respectively.
When the page is resized the value of page size also changes.
Scroll Event
<body>
<p>pageHeight:<span id="pheight">Height</span></p>
<script>
     var s = document.getElementById("pheight");
     s.addEventListener('scroll',scrollPage);
     function scrollPage(evt){
     s.innerHTML = window.innerHeight;
}
</script>
</body>
In the next article, you will see some keyword events and how to handle them.
JavaScript Events
Events are clicks, key press, or mouse moves. Timing and order of event cannot be predicted. Browser puts it in a queue of events, looks for event listeners and then the correct type of event is called.
You can add event listener in different ways.
Method #1
addEventListener('click',processClick);
function processClick(evt){
     alert("There was a click");
}
Method #2
addEventListener(‘click’, function processClick(evt){
     alert(“There was a click”);
});
Method #3
//anonymous function
addEventListener('click',function (){
     alert("This is a anonymous function");
});
Method #4
//windows object
window.onclick = processClick;
function processClick(evt){
    alert("Windows click");
}
Method #5
//Directly on the HTML element
<body>
     <button onclick="processClick()">Click Me</button>
     <script>
          function processClick(){
              console.log(“Clicked”);
          }
     </script>
</body>
Event Object
The event object is passed through the function if necessary. Every event like mouse, and keyboard has its own event properties.
However, there are events that are common to all events
| Event Property | Description |
| event.type | return name of the event |
| event.target | return HTML on which event took place |
| event.stopPropagation | stop the bubbling up of the event chain |
| event.preventDefault | stop the default behavior of that results from the event. You can specify a new custom response. |
Property: evt.type
<button id=”myButton”>Press Me</button>
<script>
     var b = document.querySelector(“myButton”);
     b.addEventListener(‘click’, processClick);
     function processClick(evt){
          alert(evt.type);
     }
</script>
Property : evt.target
<button id=”myButton”>Press Me</button>
<script>
     var b = document.querySelector(“myButton”);
     b.addEventListener(‘click’, processClick);
     function processClick(evt){
          alert(evt.target);
     }
</script>
//Output = Object HTML Button Element
Property : evt.preventDefault
<body>
     <button id="myButton">Click Me</button>
     <script>
          var b = document.querySelector("#myButton");
          b.addEventListener('click', processClick);
          function processClick(evt){
                evt.preventDefault;
          }
     </script>
</body>
Output = The usual button click will not respond
In the next article, we will see different types of events for mouse, keyboard, and page.
VB 6 With Statement
The With statement is not a loop, but can be as useful as a loop. In this article, we will discuss about the With statement.
The syntax for the width statement is given below.
With object
[Statements]
End With
Example: With Statement
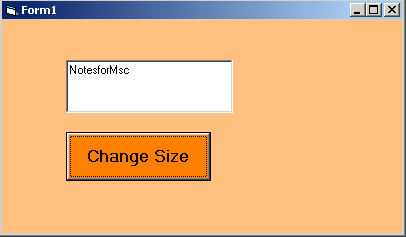
In the following example, we will use With statement to set some properties of a Textbox control.
Private Sub Command1_Click()
With Text1
  .Width = 2500
  .Height = 800
  .Text = "NotesforMsc"
End With
End Sub
In the above example, we can see that the properties of a textbox is changed using With statement when a user clicks the Command1 button.
Not only textbox control, we can change many other properties of Visual Basic 6 control objects.
Output: With Statement
The output of the above program is given below.
VB 6 Do Loop
Loops are very important when you want to repeat some code block. In previous example, we saw how while loop works. In this article, you will learn about Do loop.
There are two types of Do loop in VB 6 that you are going to see. Syntax for each type is given below.
Do [While | Until <condition>]
   [Statements]
   [Exit Do]
   [Statements]
Loop
In the example above the Do loop will check for condition before executing the code block. The second type is quite opposite of the above.
Do
   [Statements]
   [Exit Do]
   [Statements]
Loop [While | Until <condition>]
The loop is tested only after the code block is executed. This guarantees that the loop will executed at least once. That is the major difference between two types.
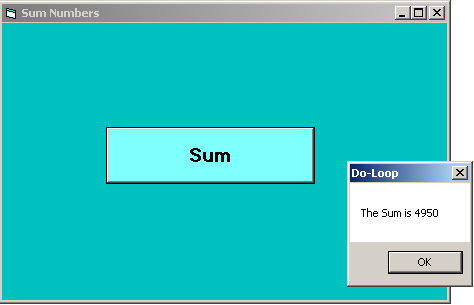
Example Program: Do Loop
In the given example, we will create a variable called Sum and add a number to it repeatedly until the loop is terminated.
Private Sub Command1_Click()
Dim sum As Integer, i As Integer
sum = 0
i = 0
Do Until i = 100
sum = sum + i
i = i + 1
Loop
MsgBox ("The Sum is" & " " & sum)
End Sub
Output – Do Loop
VB 6 While Loop
Like many programming languages out there, VB 6 also has loop control statements. In this article, you will learn about While loop which helps in repeating a block of code until loop is terminated.
Syntax: While Loop
The general structure of while loop is given below.
While condition
   [expression or statements]
Wend
The condition is very important in while loop because that is what decides when the loop will be terminated.
Consider the example below.
Dim index As Integer
index = -1;
While index < 10
   MsgBox (index + 2)
Wend
In the example above, we have put a condition for while loop that the loop should continue until index variable is equal to or greater than 10.
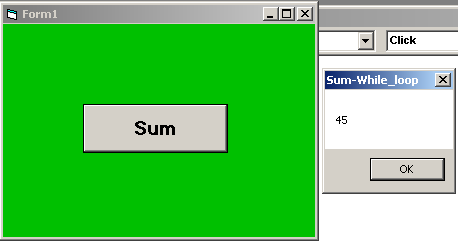
Example Program:
Dim Sum As Integer, i As Integer
i = 0;

While i < 10
   Sum = Sum + i
   i = i + i
Wend
MsgBox ("The Value of Sum is " + Sum)
Output – While Loop
The program loop through and add the value of i to Sum which is incremented by 1 at each iteration.
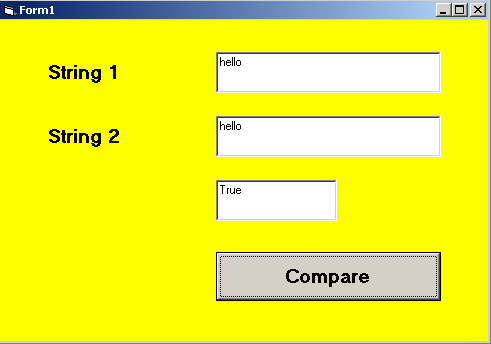
VB 6 – StrComp()
The strComp() function is a string handling function that compares two given string and returns an integer value. If the strings are same, a 0 is returned and if they are different then -1 is returned.
Example Program Code: StrComp()
Private Sub Command1_Click()
Dim result As Integer


result = StrComp(Text1.Text, Text2.Text)

If result = 0 Then

Text3.Text = "True"
Else

Text3.Text = "False"
End If

End Sub
Output: StrComp()
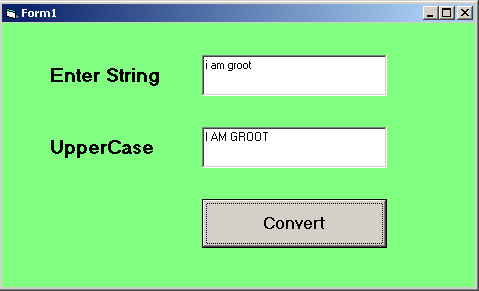
VB 6 – StrConv()
In this example, you will learn about the string handling funciton called StrConv(). That converts the string into following types
- vbKatakana
- vbHiragana
- vbUpperCase
- vbLowerCase
- vbUnicode
- vbWide
- vbNarrow
- vbProperCase
- vbFromUnicode
Example Code:
Private Sub Command1_Click()

Dim str As String

str = Text1.Text
Text2.Text = StrConv(str, vbUpperCase)

End Sub
Output: StrConv()